Do your gluten-free bread-baking adventures often leave you puzzled? Is your gluten-free bread not rising as you hoped it would?
The most common reason why gluten-free bread won’t rise is the absence of gluten, which provides structure and elasticity in traditional bread. Without it, gluten-free dough can struggle to trap air and expand.
But fear not! We’ve got seven simple fixes that can help your gluten-free bread rise to perfection. From choosing the right flour blend to adjusting your baking techniques, we’ll guide you through the secrets of achieving that fluffy, gluten-free loaf you’ve been craving. Keep reading to uncover the tips and tricks that will transform your gluten-free bread baking game.
Lack of Gluten
Gluten, that magical protein found in wheat, barley, and rye, is the lifeblood of traditional bread. It’s what gives bread its stretchy, elastic texture and helps it rise to glorious heights. But in the gluten-free world, it’s a different story. If your gluten-free bread isn’t rising, it’s likely because there’s no gluten to work its magic.
Without gluten, your bread dough lacks the structure and elasticity needed to trap air bubbles during fermentation. This means your bread won’t rise properly, resulting in a dense and unappealing loaf. So what can you do to fix this issue? Well, let’s dive into some simple solutions.
First, choose the right flour blend. Look for gluten-free flours and starches like rice flour, potato starch, and tapioca starch. These can mimic some of the properties of gluten and help your dough hold its shape. Experiment with different blends until you find the one that works best for your taste and dietary needs.
Next, consider adding xanthan gum or psyllium husk powder to your recipe. These ingredients act as binders, improving the texture and rise of your gluten-free bread. Just be mindful of the quantity, as too much can make your bread overly gummy.
Insufficient Yeast Activity
Yeast is the tiny, hardworking organism responsible for making bread rise. If your gluten-free bread isn’t reaching for the sky, it might be because your yeast isn’t pulling its weight. Insufficient yeast activity can leave your bread flat and uninspiring.
One common reason for this issue is the use of expired or inactive yeast. Always check the expiration date on your yeast packet and store it in a cool, dry place. If your yeast is past its prime, it won’t do the job effectively.
Another culprit could be water temperature. Yeast is sensitive, and if the water is too hot or too cold when you activate it, it can kill the yeast or make it sluggish. Aim for lukewarm water, around 110°F (43°C), to wake up those yeast cells and get them bubbling with excitement.
Lastly, consider giving your yeast a little boost by adding a pinch of sugar or honey to the water. Yeast feeds on sugar, and this quick snack can help kickstart its activity. Just don’t overdo it, as too much sugar can hinder yeast growth.
Overproofing
Okay, so you’ve tackled the lack of gluten and made sure your yeast is up to the task. But your gluten-free bread still isn’t cooperating? Overproofing might be the issue.
Overproofing happens when your dough is left to rise for too long. In regular bread baking, this extra time allows the gluten to develop and stretch, creating those fluffy loaves. But with gluten-free dough, it’s a different story. Overproofing can lead to a dough that’s overly hydrated, lacking structure, and unable to rise properly.
To combat this, keep a close eye on your dough during the rising process. Gluten-free dough often doesn’t require as much rise time as its gluten-containing counterpart. Follow the recipe’s recommended rise time, but don’t hesitate to test the dough’s readiness by gently poking it. If it springs back slowly, it’s ready to bake. If it doesn’t spring back at all, you may have overproofed it.
Liquid-to-Flour Ratio
Getting the right balance between liquid and flour in your gluten-free bread can be a bit of a puzzle. Too much liquid, and your dough becomes a gloopy mess; too little, and it’s dry and crumbly. Finding that sweet spot is essential for a well-risen loaf.
Start by following your recipe’s recommended ratios, but be prepared to adjust as needed. Gluten-free flours absorb liquid differently, so you may need to add a bit more or less liquid to achieve the right consistency. The goal is to have a dough that’s sticky but still manageable.
You can also experiment with different types of liquids. Some bakers find success with milk, while others prefer water or a mix of both. Each liquid has its unique effect on the dough, so don’t hesitate to play around and find what works best for you.
By mastering the art of liquid-to-flour ratios and keeping overproofing at bay, you’re well on your way to conquering the challenges of gluten-free bread baking. But we’re not done yet! Read on for more handy tips to ensure your gluten-free bread rises to perfection.
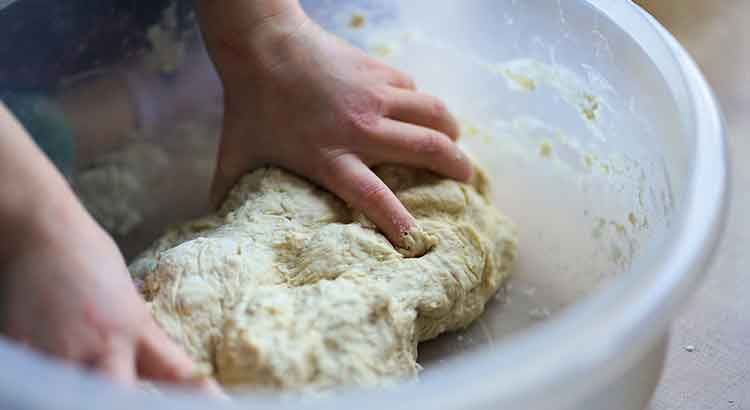
Mixing Technique
When it comes to gluten-free bread, the way you mix your dough can make or break your bread’s rise. The key here is to avoid overmixing, which can lead to a dense and flat loaf.
Unlike traditional bread, gluten-free dough doesn’t need the vigorous kneading that strengthens gluten. Instead, aim for gentle and thorough mixing. Start by combining your dry ingredients, and then slowly add the wet ingredients while mixing on low speed. Use a stand mixer or a sturdy wooden spoon – your choice – but don’t overdo it.
A handy tip is to let your mixed dough rest for a few minutes before shaping it. This short rest allows the flours to fully absorb the liquids, making the dough easier to handle. Then, shape your dough and transfer it to the pan for the final rise and bake.
Use of Eggs
Eggs can be your secret weapon when it comes to achieving a fluffy and well-risen gluten-free bread. Their unique properties add structure, moisture, and leavening power to your dough.
Consider adding an extra egg or two to your recipe to enhance the rise and texture of your bread. Eggs act as binders, helping to hold your dough together, and their proteins contribute to structure.
If you’re baking without eggs due to dietary restrictions, you can still achieve a good rise by using egg replacers like flaxseed meal mixed with water, applesauce, or mashed bananas. These alternatives provide moisture and binding properties similar to eggs.
Baking Powder or Baking Soda
In the realm of gluten-free baking, choosing the right leavening agent is crucial for achieving a great rise in your bread. You’ll typically have two main options: baking powder and baking soda.
Baking Powder: This is a leavening agent that contains both an acid and a base. When combined with liquid and exposed to heat, it produces carbon dioxide gas, which creates those sought-after bubbles and helps your bread rise. Gluten-free recipes often call for a bit more baking powder than regular ones to compensate for the lack of gluten’s structure-building properties. Just be cautious not to overdo it, as excessive baking powder can result in a bitter taste.
Baking Soda: Baking soda, or sodium bicarbonate, is another leavening agent that needs an acid to activate it. In gluten-free bread recipes, you’ll often see it paired with an acidic ingredient like vinegar or yogurt. When these two combine, they produce carbon dioxide gas, creating bubbles and causing your bread to rise. Keep in mind that baking soda can have a slightly different taste, so use it sparingly to avoid an overpowering flavor.
Experiment with both baking powder and baking soda to find the right balance for your gluten-free bread. Some recipes may even call for a combination of both for optimal results. Remember that the key is not only choosing the right leavening agent but also ensuring that your other ingredients and techniques are in harmony to support that glorious rise in your bread.
Final Thoughts
Congratulations! You’ve now delved into the world of gluten-free bread baking and uncovered some essential tips to troubleshoot and conquer the common challenges that may have been holding your loaves back. Before you embark on your next baking adventure, let’s wrap up with some final thoughts to ensure your gluten-free bread rises to perfection every time.
Remember that practice makes perfect. Don’t be discouraged if your first few attempts don’t yield the results you desire. Gluten-free baking can be a learning curve, and each batch brings you one step closer to mastering it. Keep notes of what works and what doesn’t in your recipes, so you can fine-tune your techniques over time.
Flexibility is your friend in the gluten-free world. Feel free to experiment with different flour blends, liquid-to-flour ratios, and leavening agents to find what suits your taste and dietary needs best. There’s no one-size-fits-all solution, so embrace the journey of discovery as you create bread that’s uniquely yours.
Lastly, share your newfound gluten-free bread baking wisdom with others. Whether you’re baking for friends, family, or yourself, the joy of a freshly baked loaf is something to be savored and shared. So gather your ingredients, preheat that oven, and let the aroma of freshly baked bread fill your kitchen. With these tips in mind, you’re well on your way to becoming a gluten-free bread-baking enthusiast who can rise to any occasion. Happy baking!
FAQ
Q1: Can I use gluten-free flour blends from the store, or do I have to make my own?
A1: You can absolutely use store-bought gluten-free flour blends for convenience. Many brands offer excellent options that work well for various gluten-free baking needs. However, if you’re up for experimenting and customizing your blend, making your own can be a rewarding endeavor. Just be sure to follow a trusted recipe for creating your mix, as it can require a balance of different flours and starches.
Q2: How do I know when my gluten-free bread is fully baked?
A2: Baking times can vary depending on your recipe, oven, and loaf size. A good rule of thumb is to look for a golden-brown crust and a hollow sound when you tap the bottom of the loaf. If you have a kitchen thermometer, the internal temperature should reach around 190-200°F (88-93°C) for most gluten-free bread. However, always refer to your specific recipe for precise guidance.
Q3: Can I make gluten-free bread without a bread machine?
A3: Absolutely! You don’t need a bread machine to make delicious gluten-free bread. Many gluten-free bread recipes are designed for conventional ovens. Simply follow the instructions for mixing, rising, and baking as specified in your chosen recipe. The key is to pay close attention to the details and techniques, as gluten-free dough may require some special handling.
Q4: How can I add flavor to my gluten-free bread?
A4: Adding flavor to your gluten-free bread is a creative process. You can experiment with various ingredients like herbs, spices, seeds, and dried fruits. Incorporate ingredients like garlic, rosemary, or cinnamon into your dough for a unique twist. Additionally, using flavorful liquids such as vegetable broth, apple cider, or even brewed coffee can enhance the taste of your bread. Remember that a pinch of salt can also go a long way in boosting flavor.
Q5: Can I freeze gluten-free bread?
A5: Yes, you can freeze gluten-free bread to extend its shelf life. Make sure to slice your bread before freezing so you can easily grab individual portions. Wrap the slices or the whole loaf in plastic wrap or aluminum foil and place them in an airtight container or freezer bag. When you’re ready to enjoy it, simply thaw the bread at room temperature or pop it in the toaster for a quick refresh.
Q6: What can I do with leftover gluten-free bread that has gone stale?
A6: Stale gluten-free bread can still be put to good use! You can turn it into breadcrumbs by pulsing it in a food processor. These homemade breadcrumbs are perfect for coating chicken, fish, or making meatballs. Alternatively, you can cube the bread, toss it with olive oil and seasonings, and bake it to make gluten-free croutons for salads or soups. Don’t let that leftover bread go to waste; get creative in the kitchen!
Q7: Are there any specific tips for making gluten-free bread in high-altitude locations?
A7: If you’re baking at high altitudes, you may need to make some adjustments to your gluten-free bread recipe. The lower air pressure can affect rising and baking times. To counteract this, you may need to reduce the yeast slightly, increase the liquid, and adjust the baking temperature and time. It’s a good idea to consult high-altitude baking guides or recipes specific to your elevation for best results.
With these frequently asked questions answered, you’re armed with the knowledge to overcome the hurdles of gluten-free bread baking. Keep experimenting, honing your skills, and delighting your taste buds with homemade gluten-free bread that rises to perfection. Happy baking!