Ever had your French toast stick to the pan, making your breakfast plans a bit less exciting? We’ve all been there with our kitchen quirks. Cooking up a batch of golden-brown French toast should be simple and delightful, not a sticky mess. But worry not, we’ve got the scoop on why this might be happening and how to fix it.
The most common reason why your French toast is sticking to the pan is inadequate greasing. A lack of butter or oil on the pan’s surface can cause your eggy delights to cling on for dear life. Ensure your pan is generously coated with your preferred cooking fat to prevent any unwanted adhesion and help your French toast flip and glide smoothly.
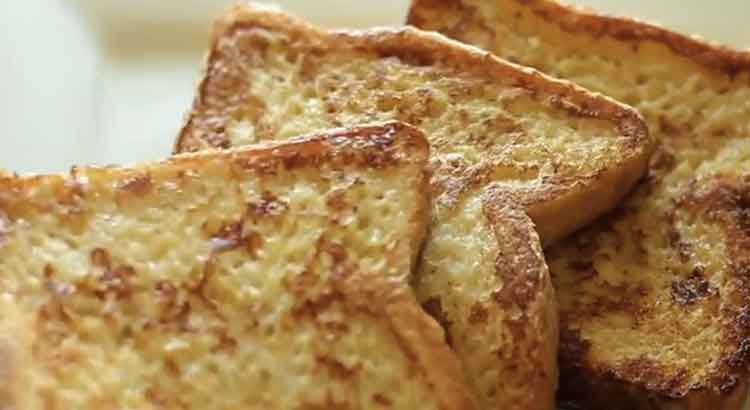
Curious about how to make your breakfasts effortlessly perfect? Join us as we delve into the secrets of a non-stick French toast adventure. From the right cooking temperatures to the kind of bread that works like magic, we’ve got the ultimate guide to rescue your morning meal. Say goodbye to sticky situations and hello to flawlessly golden French toast.
Insufficient Greasing
Picture this: you’re all set for a delightful breakfast, ready to flip those slices of bread into golden French toast perfection. But wait, disaster strikes! Your lovely French toast decides to stick to the pan like a stubborn koala to a eucalyptus tree. What went wrong? The most common reason behind this breakfast blunder is insufficient greasing of the pan.
You see, your pan is like a finicky friend – it needs a bit of butter or oil to feel comfortable and cooperative. When you skip on the greasing step, your French toast has no choice but to cling to the pan’s surface. It’s like trying to dance without any music – things just don’t flow as they should. So, next time you embark on your French toast adventure, make sure to give your pan a good rubdown with butter or oil. This simple act of kindness will make your French toast slide and glide effortlessly, turning your breakfast blues into a morning symphony of sizzling satisfaction.
Low-Quality Pan
Now, let’s talk about another potential pancake pitfall: the low-quality pan. You might not think much about your cooking vessel, but trust me, it matters more than you’d expect. The type of pan you use can significantly impact whether your French toast bids adieu to the pan or decides to stay put.
Imagine using a pan that’s seen better days, with a scratched and worn-out non-stick surface. It’s like expecting a tired horse to win a race – not going to happen! A low-quality pan can lead to uneven heating and poor non-stick performance, making your French toast stick and cling like it’s auditioning for a wallflower role. Investing in a decent non-stick pan, or giving your trusty pan a timely upgrade, can make a world of difference. Your French toast will thank you by gracefully sliding onto your plate, ready to be dressed in your favorite toppings.
High Cooking Temperature
Alright, let’s crank up the heat on this French toast investigation. Using a high cooking temperature can quickly turn your breakfast dreams into a sticky nightmare. When you’re in a rush and think “faster is better,” you might set the heat way too high. But here’s the twist: high heat can cause your French toast to seize up and grip the pan like a startled kitten clinging to a tree.
Think of it like a waltz – you can’t rush through the steps and expect it to be graceful. Similarly, you can’t rush the cooking process and expect your French toast to effortlessly glide off the pan. Instead, opt for a medium-low heat that allows the bread to soak up the custardy goodness without instantly bonding to the pan’s surface. This patient approach will reward you with beautifully golden and unstuck French toast that’s ready to take center stage on your plate.
Not Letting the Pan Heat Up
Ahoy, cooking explorers! Our next pitfall might seem trivial, but it’s a secret that seasoned chefs know well: not letting the pan heat up properly before adding your bread can lead to sticky situations. It’s like trying to swim in a pool before it’s filled with water – things won’t go as smoothly as expected.
When you impatiently toss your bread onto a cold or lukewarm pan, it doesn’t get that satisfying sizzle. Instead, it starts absorbing the cooking fat, creating a direct path for sticking. Give your pan a chance to preheat over medium heat before introducing your bread slices. This way, when your bread meets the pan, it’s greeted with a gentle sizzle that sets the stage for a non-stick performance. Your French toast will appreciate the warm welcome and reward you with easy release and delicious satisfaction.
Not Shaking Off Excess Egg Mixture
Hey there, cooking comrades! Let’s dive into the nitty-gritty of French toast mastery. One sneaky culprit behind sticky French toast is not shaking off the excess egg mixture. Picture this: you dip your bread slices into the eggy concoction, and instead of giving them a little shake to bid farewell to the excess, you let them drip their way onto the pan.
Now, imagine if you walked with wet shoes on a freshly mopped floor – not a pretty sight, right? Similarly, allowing your eggy bread to drip onto the pan can lead to a messy situation. The excess mixture cooks up unevenly and forms a clingy layer that doesn’t want to let go. The solution? Give your bread slices a gentle shake before they hit the pan. This way, they’ll be coated with just the right amount of egg goodness, ensuring a harmonious cooking process and a non-stick outcome.
Using Too Much Liquid
Ahoy, culinary companions! Let’s talk about a common blunder that might be sticking around in your French toast routine: using too much liquid in your egg mixture. It’s like trying to juggle a dozen eggs without cracking a single one – a bit challenging, to say the least.
When you add an excessive amount of milk or other liquids to your egg mixture, you’re essentially turning your French toast into a swimming lesson. The excess liquid takes longer to cook and can lead to soggy slices that stubbornly attach themselves to the pan’s surface. Instead, aim for a well-balanced mixture that coats your bread without drowning it. This way, your French toast can cook evenly and achieve that coveted golden-brown exterior, ready to be released from the pan without a fuss.
Crowding the Pan
Hey, kitchen adventurers! Let’s unravel more mysteries behind the art of French toast mastery. Crowding the pan with too many bread slices can lead to a sticky situation. Imagine a crowded dance floor – you’ve got less room to move around gracefully. The same goes for your pan!
When you squeeze in too many slices, they start competing for space, and that’s when the sticking game begins. They trap steam, create moisture, and end up becoming a jumbled mess. Give each slice its personal space on the pan, allowing them to cook and crisp up individually. This will prevent them from huddling together and forming a sticky alliance that’s tough to break. Remember, a little breathing room goes a long way in ensuring non-stick success.
Not Using a Spatula
Ahoy, fellow cooks! Let’s dive into another page of the French toast chronicles. One sneaky mistake that can lead to a clingy catastrophe is not using a spatula effectively. Imagine trying to build a sandcastle without a shovel – it’s bound to crumble!
When you flip your French toast with a gentle touch and the right tool, it’s like conducting a graceful ballet. But if you’re not using a spatula or you’re being too aggressive, you risk tearing the delicate surface and leaving a sticky mess behind. Invest in a sturdy, flat-edged spatula, and use it with finesse. Gently slide it under the toast, making sure it’s fully released before you flip. This way, your French toast will dance its way onto the plate instead of sticking stubbornly to the pan.
Not Letting It Cook Properly
Hey there, cooking comrades! We’re diving deeper into the world of French toast mastery. One of the sneakiest culprits of sticky French toast is not letting it cook properly. It’s like trying to take a cake out of the oven before it’s done – you end up with a gooey mess.
When you rush the cooking process, your French toast doesn’t get the chance to develop that beautiful golden-brown exterior. This means it’s not fully ready to release from the pan. Cooking your French toast over medium heat and giving it a bit of patience is key. Wait until you see that gorgeous color before attempting to flip. This way, you ensure that the outer layer is set and non-stick, making the flipping process a breeze.
Imagine this: a perfectly cooked French toast gently detaching from the pan, gracefully landing on your plate, ready to be adorned with your favorite toppings. It’s a breakfast dream come true! So, give your French toast the time it deserves to cook to perfection. Your patience will be rewarded with a non-stick masterpiece that’s as satisfying to make as it is to devour.
Final Thoughts
And there you have it, kitchen champions! Our adventure through the land of French toast triumphs and pitfalls comes to a close. We’ve uncovered the secrets to banishing sticky situations and achieving the ultimate non-stick breakfast delight. It’s been quite the journey, filled with spatula wisdom and cooking revelations.
Remember, achieving perfect French toast isn’t about being a seasoned chef or a culinary wizard. It’s about understanding the simple nuances that can make a world of difference. From proper greasing to mindful cooking temperatures, each step contributes to the grand symphony of non-stick success.
So, next time you’re in the kitchen, armed with slices of bread and a craving for golden deliciousness, keep these lessons close to heart. Let your pan preheat, give your bread slices space, and be patient as they transform into the perfect French toast. With a sprinkle of patience and a dash of knowledge, you’re well on your way to conquering breakfast glory.
Here’s to mornings filled with flawlessly non-stick French toast that slides onto your plate like a dream. May your breakfasts be delicious, your spatula skills be on point, and your kitchen adventures be filled with culinary victories. Happy cooking, and bon appétit!
FAQ
Q: Can I use any type of bread for French toast? Absolutely! While thicker bread like brioche or challah is a popular choice, you can use whatever you have on hand. Slices of regular sandwich bread work just as well. The key is to choose bread that’s a bit stale; it soaks up the egg mixture without becoming overly soggy.
Q: Is it essential to add spices and flavorings to the egg mixture? Not essential, but definitely delightful! Adding a pinch of cinnamon, a splash of vanilla extract, or a sprinkle of nutmeg can elevate your French toast’s flavor profile. However, it’s entirely up to you and your taste preferences. Experiment with different combinations and find your perfect mix.
Q: How do I know when the French toast is ready to flip? Great question! Keep an eye on the bottom side of the bread. When it turns a beautiful golden-brown color, it’s time to flip. This usually takes about 2-3 minutes. Be patient, and resist the urge to flip too soon. A well-cooked first side ensures a non-stick release.
Q: Can I make French toast ahead of time? Absolutely! If you’re planning for a busy morning, you can prepare French toast ahead of time. After cooking, let the slices cool completely on a wire rack. Then, store them in an airtight container in the fridge. When you’re ready to enjoy, simply reheat in a toaster or a warm oven until they’re heated through.
Q: What toppings go well with French toast? The options are endless! Classic choices include maple syrup, butter, and a dusting of powdered sugar. You can also get creative with fresh berries, sliced bananas, chopped nuts, whipped cream, or even a dollop of yogurt. Experiment with different combinations to find your favorite.
Q: Can I freeze leftover French toast? Absolutely! To freeze, place cooked and cooled French toast slices on a baking sheet and freeze until firm. Then, transfer them to a freezer-safe bag, separating each slice with parchment paper. When you’re ready to enjoy, simply reheat in a toaster or oven straight from the freezer.
Q: Can I make French toast without eggs? Definitely! If you’re looking for an egg-free alternative, you can use mashed bananas or a mixture of plant-based milk and flour to coat the bread. This vegan-friendly version can be just as delicious and satisfying.
Q: Why does my French toast sometimes turn out soggy? Sogginess can occur if you soak the bread slices in the egg mixture for too long. A quick dip is all you need – around 20-30 seconds per side. Also, make sure your pan is adequately preheated, and avoid crowding the pan, which can trap steam and create excess moisture.
Q: Can I use day-old French toast to make a delicious breakfast casserole? Absolutely! Day-old French toast is perfect for making a breakfast casserole. Simply cut the slices into cubes, layer them in a baking dish, and pour a mixture of eggs, milk, and your favorite toppings over them. Let it sit in the fridge overnight, then bake it in the morning for a delightful and easy breakfast treat.
Q: Any final tips for foolproof French toast? Of course! Patience is key. Allow your pan to preheat properly, use a gentle touch when flipping, and resist overcrowding. And most importantly, have fun! French toast is a versatile canvas for your culinary creativity. Enjoy the process and savor every delicious bite.
And there you have it, a compilation of answers to your burning French toast questions. With these insights in your apron pocket, you’re armed and ready to conquer the world of non-stick breakfast delights. Happy cooking!