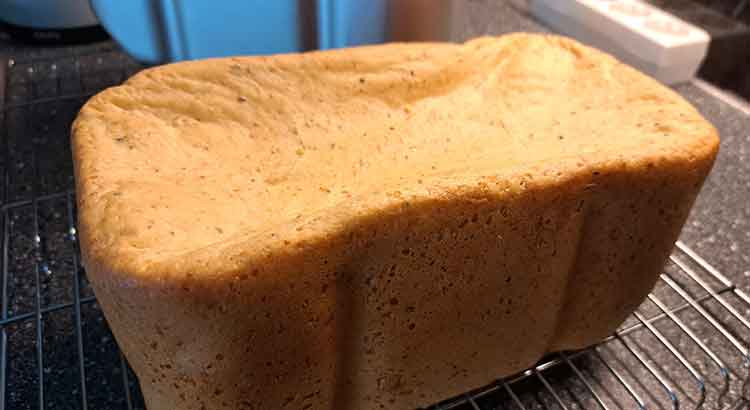
Are your gluten-free bread baking adventures ending with a disappointing sink in the middle?
The most common reason why a gluten-free bread will sink is the lack of structure provided by gluten. Gluten-free flours don’t have the same elasticity as wheat flour, making it challenging to trap the gases produced during baking, resulting in a deflated loaf.
But fear not! In this article, we’ll delve into seven simple fixes that will help you achieve gluten-free bread that rises with pride. From ingredient adjustments to specialized techniques, we’ll explore the secrets to creating gluten-free bread that’s light, fluffy, and sure to satisfy your cravings. Say goodbye to sunken loaves and hello to gluten-free bread success!
Lack of Structure
When it comes to gluten-free bread, the lack of structure is a common issue that leads to that disappointing sink in the middle. You see, regular wheat flour contains a protein called gluten, which provides elasticity and helps trap the gases produced during baking. Gluten-free flours, on the other hand, lack this magical protein. Without it, your bread can’t hold its shape as well, and that’s why it tends to collapse.
The solution? You’ll need to bolster your gluten-free dough with other binding agents. Xanthan gum or psyllium husk powder can work wonders. These additives mimic some of the properties of gluten, helping your bread maintain its structure and rise properly. Be sure to follow a trusted recipe that incorporates these binders to avoid the dreaded sink.
Too Much Liquid
Another common reason for your gluten-free bread taking a dive in the oven is excessive liquid. It’s easy to overdo it when you’re trying to achieve a moist and tender crumb. But here’s the thing – too much liquid can lead to a dough that’s overly sticky and lacks the necessary structure to hold up during baking.
To avoid this pitfall, measure your liquid ingredients precisely. Use a kitchen scale if you have one to ensure accuracy. If you’re adapting a regular bread recipe to be gluten-free, remember that gluten-free flours often require less liquid than their wheat counterparts. Gradually add your liquids and stop when the dough reaches the right consistency. It should be soft and slightly sticky but not overly wet. Finding the perfect balance can take some trial and error, but it’s a key step in preventing your gluten-free bread from sinking.
Yeast Activity
Let’s talk about yeast, the tiny but crucial ingredient in your bread-making adventure. Yeast is responsible for those lovely air bubbles that give your bread its light and airy texture. However, if you don’t handle yeast properly, it can lead to a sunken loaf.
The most common yeast-related issue is using expired yeast. Check the expiration date on your yeast packet; if it’s past its prime, your bread won’t rise as it should. Also, remember that yeast is a living organism that needs the right environment to thrive. Ensure your liquid temperature is between 110°F and 115°F (43°C-46°C). Too hot, and you’ll kill the yeast; too cold, and it won’t activate properly. Give your yeast a head start by dissolving it in warm liquid with a pinch of sugar before adding it to your dough.
Overproofing
Overproofing is a sneaky culprit that can lead to a bread collapse. Proofing is the process of allowing your dough to rise before baking. When you overproof, the yeast becomes exhausted, and the dough structure weakens, making it more likely to sink.
To avoid overproofing, follow your recipe’s recommended rise times carefully. Keep in mind that gluten-free doughs often require shorter proofing periods than regular wheat doughs. If you’re uncertain, it’s better to underproof slightly than to let it go too long. You can also perform the “poke test” – gently press your finger into the dough; if it springs back slowly, it’s ready; if it springs back quickly, it needs more time. With proper proofing, you’ll ensure your gluten-free bread rises beautifully and stays intact.
Mixing Technique
How you mix your gluten-free bread dough can greatly impact its final texture. If you’re too aggressive or don’t mix thoroughly enough, you might end up with a sunken loaf.
First, be gentle. Gluten-free flours are more delicate than wheat flour, and overmixing can cause the dough to become tough and less likely to rise properly. Use a gentle folding or stirring motion to combine your ingredients.
Second, make sure your ingredients are well incorporated. This includes your binders like xanthan gum or psyllium husk powder. Mix until everything is evenly distributed, but don’t overdo it.
Egg Addition
Eggs are often added to gluten-free bread recipes for moisture and structure. However, if you use too many or too few eggs, it can lead to problems.
If you use too many eggs, your bread may turn out overly heavy and dense, with a tendency to sink in the middle. On the other hand, using too few eggs can result in a dry and crumbly texture.
Follow your recipe’s egg recommendations carefully, and consider the size of the eggs you’re using. If your recipe doesn’t specify egg size, large eggs are a safe bet. Adjusting the egg quantity just right will help you achieve a gluten-free bread that’s moist, well-structured, and free from the dreaded sink.
Baking Powder or Baking Soda
Choosing the right leavening agent can make or break your gluten-free bread. Baking powder and baking soda are the usual suspects in this category, and understanding when to use them is vital.
Baking powder is a double-acting leavening agent. It creates bubbles of carbon dioxide twice—first when it’s mixed with a liquid, and then again when exposed to heat during baking. This is great for a gentle rise and soft texture, which is what you want for most gluten-free bread. Be sure your baking powder is fresh, as expired baking powder won’t work effectively.
On the other hand, baking soda requires an acidic ingredient, like yogurt or vinegar, to react and create carbon dioxide bubbles. If your recipe includes an acid, it can be an excellent choice. But using baking soda without the necessary acid can lead to a flat and sunken loaf.
Check your recipe to see which leavening agent it calls for, and follow the instructions closely. Using the right one and ensuring it’s active will help your gluten-free bread rise to perfection, keeping that sink at bay.
Final Thoughts
In your quest for perfect gluten-free bread that doesn’t sink in the middle, remember that a combination of factors can affect your results. It’s not just one culprit to blame, but rather a delicate balance of ingredients and techniques that can make all the difference.
Experimentation and patience are key. Don’t be discouraged by a few failed attempts. Each time you bake, you’re learning more about the nuances of gluten-free bread making. Keep a journal to track your successes and failures, noting any adjustments you make along the way.
And remember, there’s no one-size-fits-all solution. Different gluten-free flours, binders, and leavening agents can yield different results. So, don’t be afraid to try new recipes and tweak them to suit your taste and dietary needs. With practice and a bit of know-how, you’ll be on your way to creating gluten-free bread that’s delicious, well-risen, and sink-free. Happy baking!
FAQ
Q: Can I use the same recipe for gluten-free bread as regular bread?
A: While you can adapt regular bread recipes to be gluten-free, it’s not as simple as substituting wheat flour with a gluten-free alternative. Gluten-free flours and grains behave differently, and you’ll likely need to make adjustments to achieve the desired texture and rise. It’s often best to start with a trusted gluten-free bread recipe and follow it closely.
Q: What are some common gluten-free flour options for bread?
A: There are several gluten-free flours you can use, such as rice flour, sorghum flour, tapioca flour, and chickpea flour. Some gluten-free flour blends designed specifically for breadmaking are also available. Experiment with different combinations to find the flavor and texture you prefer. Keep in mind that using a mix of flours can often yield better results than relying on a single type.
Q: How can I tell if my gluten-free bread is done baking?
A: Gluten-free bread may take a slightly shorter time to bake than traditional wheat bread. To check for doneness, use a food thermometer; the internal temperature should reach around 205°F (96°C). Additionally, give your bread a gentle tap on the bottom – it should sound hollow. If your bread is browning too quickly on top, cover it with aluminum foil to prevent burning while the center finishes baking.
Q: Are there any alternatives to xanthan gum or psyllium husk powder as binders?
A: Yes, if you’re looking for alternatives to xanthan gum or psyllium husk powder, consider chia seeds or flaxseeds. To use them as binders, mix one tablespoon of chia or flaxseeds with three tablespoons of water, allow the mixture to sit for a few minutes until it forms a gel-like consistency, and then add it to your bread dough. Keep in mind that the texture may vary slightly compared to using xanthan gum or psyllium husk powder.
Q: Can I freeze gluten-free bread to make it last longer?
A: Absolutely! Freezing gluten-free bread is a great way to extend its shelf life. Slice the bread before freezing and place parchment paper between the slices to prevent sticking. Then, wrap the slices in an airtight bag or container and store them in the freezer. When you’re ready to enjoy a slice, simply toast it straight from the freezer for a fresh taste.
Q: Are there any specific tips for making gluten-free sourdough bread?
A: Gluten-free sourdough bread requires a bit of extra attention. Use a gluten-free sourdough starter and allow it to ferment for a longer period to develop the desired tangy flavor. Additionally, consider using a combination of gluten-free flours and add a bit of apple cider vinegar to enhance the sourdough taste. It may take some trial and error to perfect your gluten-free sourdough, but the result can be incredibly rewarding.
Q: Can I use a bread machine to make gluten-free bread?
A: Yes, many bread machines have gluten-free settings specifically designed for gluten-free bread recipes. However, it’s crucial to follow a gluten-free bread recipe that’s compatible with your bread machine to ensure the best results. Pay attention to the mixing and rising times, as they may differ from regular bread recipes.