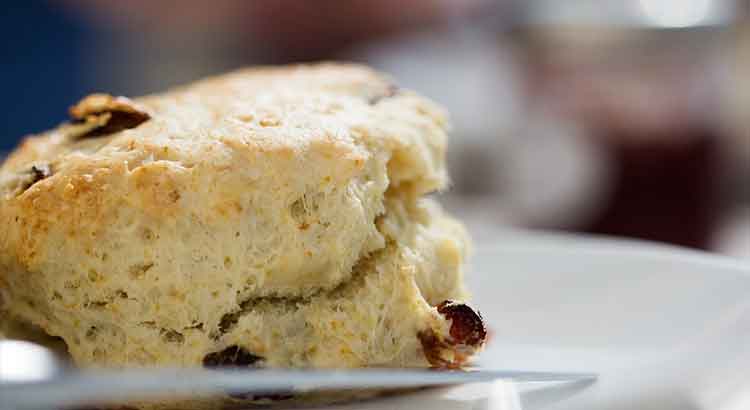
Do you ever find yourself biting into a freshly baked scone, only to have it crumble into a mess before your very eyes? Is your tea-time treat leaving you with more crumbs than satisfaction? If so, you’re not alone. Scones have a knack for being both delightful and frustrating in equal measure.
The most common reason why scones crumble is their dryness. Overmixing the dough or using too little liquid can lead to a lack of moisture, resulting in crumbly scones. But fear not, there are simple fixes to ensure your scones turn out tender and delicious every time.
If you’re tired of your scones falling apart and want to enjoy these buttery delights without the mess, read on. In this article, we’ll unravel the mysteries of scone-making, uncovering seven common problems and their easy solutions. You’ll soon be baking scones that are irresistibly moist, tender, and crumble-free, perfect for any occasion.
Overmixing the Dough
We’ve all been there, eager to whip up a batch of scones that rival those from your favorite bakery. But sometimes, in our quest for perfection, we tend to overmix the dough. It’s a common mistake and a leading cause of crumbly scones.
Overmixing scone dough is like trying to teach an old dog new tricks – it just doesn’t work. When you overwork the dough, you activate the gluten in the flour. This results in a tougher, less tender scone that crumbles at the slightest touch.
The Fix: To avoid this pitfall, mix your scone dough just until the ingredients come together. It’s perfectly fine if there are a few lumps or dry spots. Overmixing is the enemy here, so resist the urge to keep stirring. Your scones will thank you by turning out tender and delicious.
Using Too Much Flour
Scones are a simple pleasure, but they require the right balance of ingredients to achieve that perfect crumb. Using too much flour can quickly turn your scone dreams into a crumbly nightmare.
When you measure out too much flour, you’re essentially overcrowding the party in your scone dough. Excess flour leads to a dry, crumbly texture that no one wants to bite into.
The Fix: To ensure your scones come out tender and moist, use a kitchen scale to measure your flour accurately. If you don’t have a scale, fluff up the flour in the bag or container and spoon it into your measuring cup, then level it off. This method will give you just the right amount of flour for scone success.
Overbaking
Overbaking scones is a common blunder that can turn your golden-brown dreams into a crumbly nightmare. So, let’s dive right into it.
Leaving your scones in the oven for too long can suck the moisture right out of them. This results in scones that are dry and crumble at the slightest touch.
The Fix: Keep a close eye on your scones as they bake. Once they turn a lovely shade of golden brown, take them out. Remember, scones continue to cook a bit even after they’re out of the oven due to residual heat. So, don’t let fear of undercooking lead to overbaking.
Using Cold Ingredients
Scones love a cozy environment, and using cold ingredients straight from the fridge can be a buzzkill. Let’s unravel this chilly issue.
Cold butter and other ingredients can hinder the scone’s ability to rise and become tender. It’s like asking your scones to perform ballet in a freezer.
The Fix: Plan ahead and let your ingredients come to room temperature. Leave the butter out for about 30 minutes before starting. This way, it’ll blend more evenly with the dry ingredients, resulting in a fluffier, less crumbly scone.
Not Enough Fat
When it comes to scones, fat is your friend. But using too little of it can quickly turn your scones into dry, crumbly pucks. Here’s the scoop.
Fat is what gives scones their tender, moist texture. It coats the flour particles and prevents them from forming excessive gluten, which makes for crumbly scones. If you skimp on the butter or other fats, you’ll end up with a less-than-luscious result.
The Fix: Don’t be shy with the butter, cream, or buttermilk in your scone recipe. These fats are essential for creating scones that are melt-in-your-mouth delicious. Follow your recipe’s fat measurements closely, and you’ll be on your way to scone success.
Overbrowning the Tops
Sure, golden-brown scone tops look inviting, but overdoing it in the oven can spell disaster for your scones. Let’s dive into this crispy situation.
While a bit of browning is desirable, taking it to the extreme can lead to dry, crumbly scones. The intense heat can zap the moisture, leaving you with a less-than-ideal treat.
The Fix: Keep a close eye on your scones as they bake. Once they reach that lovely golden hue, it’s time to take them out. If you’re worried about overbrowning but want that classic look, you can brush the tops lightly with milk or an egg wash before baking. This will give them that desirable color without sacrificing moisture.
Using Too Much Sugar
Sugar adds sweetness and tenderness to scones, but going overboard can lead to a crumbling disaster. Let’s explore the sweet side of scone-making.
Excessive sugar can throw off the scone’s delicate balance. It not only sweetens but also contributes to moisture retention. Too much sugar, however, can lead to overly moist scones that crumble when you try to pick them up.
The Fix: Follow your scone recipe closely when measuring sugar. If you want a bit more sweetness, consider using a sprinkle of sugar on the tops of your scones just before baking. This will give them a lovely, slightly crunchy sweetness without compromising their structure.
Remember, scones are all about that perfect balance of ingredients, and sugar is just one part of the equation. Keep it in check, and you’ll have scones that are both tender and flavorful.
Final Thoughts
In the world of baking, scones hold a special place. They’re the perfect accompaniment to a cup of tea, a delightful addition to brunch, or a comforting treat all on their own. But as we’ve discovered, scones can be a bit finicky, with crumbliness being a common issue. Now that we’ve explored the seven common problems and their fixes, it’s time for some final thoughts on achieving scone perfection.
First and foremost, don’t be discouraged by a crumbly batch or two. Baking is an art that requires practice, and scones are no exception. Even experienced bakers face challenges from time to time. Embrace the learning process, and with each batch, you’ll hone your skills and get closer to the ideal scone.
Secondly, scone baking is all about precision. Measuring your ingredients accurately, from flour to fat to sugar, can make all the difference. Following your recipe closely and resisting the urge to make impromptu ingredient substitutions will help you achieve those tender, crumb-free scones you desire.
Lastly, remember that the joy of scones lies not only in their taste but also in the process of making them. It’s an opportunity to experiment, to explore new flavors, and to share delicious moments with loved ones. So, whether you’re a novice or a seasoned baker, don’t forget to savor the journey of crafting the perfect scone. With patience and a little bit of know-how, you’ll master the art of scone-making and create delightful, crumble-free treats that will leave everyone asking for seconds. Happy baking!
FAQ
Q: Can I use margarine instead of butter in my scones? A: Yes, you can substitute margarine for butter in scone recipes. However, keep in mind that margarine typically has a higher water content than butter, so your scones may turn out slightly different in texture. It’s best to use a margarine specifically labeled for baking, as these varieties are formulated to mimic the properties of butter in baked goods.
Q: Why did my scones turn out flat and not rise properly? A: Flat scones can be the result of several factors. Overmixing the dough, using outdated or insufficient leavening agents (like baking powder), or not handling the dough gently enough can all lead to scones that don’t rise properly. Make sure to follow the recipe’s instructions carefully and avoid overworking the dough for fluffy, well-risen scones.
Q: Can I freeze scone dough for later use? A: Yes, you can freeze scone dough for future baking. To do this, shape the dough into scones, place them on a baking sheet, and freeze until solid. Then, transfer the frozen scones to a freezer-safe bag or container and store them for up to three months. When you’re ready to bake, you can place the frozen scones on a baking sheet and bake them, adding a few extra minutes to the baking time.
Q: Can I make savory scones instead of sweet ones? A: Absolutely! Savory scones can be a delightful addition to meals. You can add ingredients like shredded cheese, herbs, diced vegetables, or cooked bacon to your scone dough for a savory twist. Just be sure to adjust the sugar content accordingly if your recipe includes it. Savory scones are perfect for serving with soups, salads, or as a side dish.
Q: Can I use whole wheat flour instead of all-purpose flour in scones? A: Yes, you can use whole wheat flour in scone recipes, but be prepared for a slightly different texture and flavor. Whole wheat flour tends to make scones denser and nuttier in taste. If you’re new to using whole wheat flour in baking, you might want to start by substituting just a portion of the all-purpose flour in your recipe, gradually increasing the proportion as you become accustomed to the flavor and texture.
Q: How can I make my scones more flavorful? A: There are various ways to enhance the flavor of your scones. You can add ingredients like vanilla extract, citrus zest, spices (like cinnamon or nutmeg), or extracts (such as almond or maple) to the dough for extra flavor. Additionally, incorporating mix-ins like dried fruit, chocolate chips, or nuts can also elevate the taste of your scones. Experiment with different flavor combinations to discover your personal favorites.
Q: My scones always come out too dry. What am I doing wrong? A: Dry scones can be a result of several factors. Using too much flour, overbaking, or not incorporating enough fat into the dough can lead to dryness. To remedy this, ensure that you measure your flour accurately, bake until just golden brown, and follow the recipe’s recommended fat content. Adding a bit more liquid, such as cream or buttermilk, to the dough can also help combat dryness.
Q: Can I make gluten-free scones? A: Yes, you can make gluten-free scones by using gluten-free flour blends or alternative flours like almond flour, coconut flour, or oat flour. Be sure to choose a gluten-free baking powder and other ingredients that are certified gluten-free if you have a gluten intolerance or sensitivity. Keep in mind that gluten-free scone dough may have a different texture, so be patient and adjust as needed to achieve the desired consistency.
Q: How do I store leftover scones to keep them fresh? A: To keep your scones fresh, store them in an airtight container at room temperature for up to two days. If you want to extend their freshness, you can freeze them. Wrap individual scones tightly in plastic wrap and place them in an airtight container or freezer bag. When you’re ready to enjoy them, simply thaw at room temperature or warm them in the oven.
Q: Can I make mini scones instead of regular-sized ones? A: Absolutely! Making mini scones is a fun variation. Simply divide the dough into smaller portions and shape them into smaller rounds or triangles. Adjust the baking time accordingly, as mini scones will cook faster than their larger counterparts. Mini scones are perfect for serving at brunches, tea parties, or as bite-sized treats.
With these frequently asked questions answered, you’re well-equipped to tackle any scone-making challenge that comes your way. So, roll up your sleeves, gather your ingredients, and let the scone adventures continue in your kitchen! Happy baking!