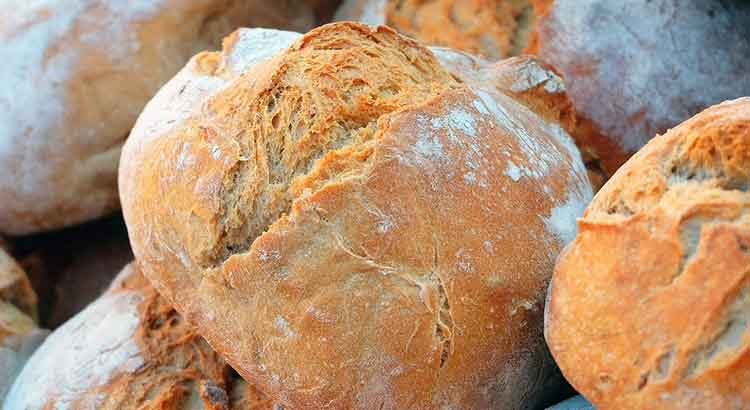
Do you ever find yourself eagerly waiting for your freshly baked bread, only to be disappointed when it comes out of the oven still pale and not beautifully browned?
The most common reason why your bread doesn’t brown is inadequate heat. Your oven might not be reaching the right temperature, or you could be using a wrong rack position. Fear not, we’ve got seven common reasons and their fixes to help you achieve that perfect golden brown crust.
From the science of baking to practical tips and troubleshooting, we’ll guide you through the journey of mastering the art of browning your bread. Get ready to discover the secrets that will transform your loaf into a mouthwatering masterpiece, leaving you with that satisfying crunch and irresistible aroma. Say goodbye to pale loaves, and let’s dive into the world of perfectly browned bread!
Insufficient Oven Temperature
If you’ve ever pulled your bread out of the oven and found it disappointingly pale, the culprit might be insufficient oven temperature. Achieving that perfect golden-brown crust requires the right amount of heat. Here’s what you can do:
1. Preheat Properly: Make sure to preheat your oven thoroughly. Don’t rush this step; it’s crucial for even baking and browning. Allow your oven to reach the desired temperature before placing your dough inside.
2. Use an Oven Thermometer: Oven temperatures can sometimes be inaccurate. To ensure you’re baking at the right temperature, invest in an oven thermometer. Place it inside your oven to get an accurate reading.
3. Adjust Rack Position: The bread’s position in the oven matters. For a nicely browned crust, consider moving your rack closer to the top heating element. Just be cautious not to get it too close, as it could lead to burning.
Lack of Steam
Another common reason your bread might not brown as expected is the lack of steam during the baking process. Steam plays a crucial role in creating a crisp and beautifully browned crust. Here’s how to fix it:
1. Use a Steam Tray: Place a shallow pan of hot water on the lower rack of your oven when you start preheating. The steam generated will help your bread develop that lovely crust.
2. Steam During Baking: Once your bread is in the oven, you can introduce more steam by spraying water onto the walls of the oven. Use a spray bottle to create bursts of steam every few minutes during the first part of the baking process.
3. Consider a Dutch Oven: Baking your bread in a preheated, covered Dutch oven for the initial part of the baking time can trap steam, creating an excellent environment for browning.
Underproofing
Sometimes, the key to achieving that beautiful brown crust on your bread lies in the proofing process. Underproofing can lead to a pale and lackluster result. Here’s how to tackle this issue:
1. Allow Ample Time: Be patient during the dough’s rising stages. Underproofing often happens when you rush through this step. Follow the recipe’s recommended proofing times, and if needed, give it a little extra time to ensure proper fermentation.
2. Check for the Finger Test: To determine if your dough is adequately proofed, gently press your finger into it. If the indentation remains, it’s ready. If it springs back immediately, it needs more time. Don’t rush this stage; it’s crucial for flavor and color development.
3. Watch the Dough: Keep an eye on your dough as it proofs. It should visibly increase in size and become slightly puffy. When it’s ready, you’re on your way to a nicely browned loaf.
Insufficient Sugar or Honey
Sugar and honey play a dual role in bread baking, contributing to both flavor and browning. If your bread isn’t browning as expected, it could be due to inadequate sweeteners. Here’s how to address this:
1. Check Your Recipe: Ensure that you’re using the correct amount of sugar or honey as specified in your recipe. Sweeteners not only add sweetness but also aid in caramelization, which is crucial for browning.
2. Experiment with Sweeteners: If your recipe allows for it, consider experimenting with different types of sweeteners. Honey, brown sugar, or even maple syrup can impart unique flavors and enhance browning.
3. Egg Wash or Milk Wash: Before baking, brushing your bread with an egg wash (a beaten egg with a bit of water) or milk can promote browning. This will give your bread a glossy and enticing finish.
Lack of Fat
The presence of fat in your bread dough can significantly affect its browning. If your bread isn’t achieving that beautiful golden hue, it might be due to a lack of fat. Here’s how to address this issue:
1. Add Fat to the Recipe: Review your bread recipe and check if it includes fats like butter, oil, or lard. If not, consider adding some to enhance the browning. Fats help with flavor and create a tender crumb, as well as aid in browning.
2. Experiment with Different Fats: Depending on your preference and dietary restrictions, you can experiment with different types of fats. Butter adds a rich flavor, while olive oil can lend a unique taste to your bread. Choose one that complements your recipe.
3. Brush with Butter or Oil: Before baking, try brushing the surface of your bread with melted butter or oil. This will not only add flavor but also promote browning during the baking process.
Overly Dense Dough
An overly dense dough can be a stumbling block to achieving that perfect brown crust. Dense dough doesn’t allow for even heat distribution, leading to uneven browning. Here’s how to tackle this problem:
1. Knead Properly: Ensure that you knead your dough adequately. Kneading helps develop gluten, which contributes to the bread’s structure. An under-kneaded dough can result in a dense loaf that struggles to brown.
2. Avoid Overmixing: On the other hand, overmixing can lead to an overly dense dough. Follow your recipe’s instructions regarding mixing times carefully to maintain the right dough texture.
3. Consider the Hydration Level: The hydration level of your dough matters. A dough that is too wet can be challenging to work with and may not brown well. Conversely, a dry dough can lead to a tough crust. Balance is key.
Inadequate Baking Time
If you’ve ever wondered why your bread didn’t brown properly, inadequate baking time could be the issue. Rushing through the baking process can leave you with a pale loaf. Here’s how to address this problem:
1. Follow Recipe Instructions: The recipe you’re using likely provides a recommended baking time. Follow it closely and resist the temptation to remove your bread prematurely. Baking times can vary depending on factors like oven type and size, so trust the recipe as your guide.
2. Invest in an Oven Thermometer: To ensure that your oven is heating to the correct temperature, use an oven thermometer. An oven that runs too cool can lead to underbaked bread, resulting in poor browning.
3. Perform the Tap Test: A simple way to check if your bread is done is by giving it a tap. If it sounds hollow, it’s likely fully baked. If not, return it to the oven for a few more minutes.
4. Adjust Oven Rack Position: The position of your bread in the oven can affect browning. Placing it closer to the top heating element can help achieve the desired crust color. Just be cautious not to burn the top.
Final Thoughts
In the world of bread baking, achieving that perfect golden-brown crust is a delightful pursuit. It’s a journey filled with trial and error, but the rewards are scrumptious. As we wrap up our exploration of common reasons why your bread may not brown as expected and their fixes, let’s reflect on what we’ve learned.
Firstly, the key to a beautifully browned loaf lies in the details. From oven temperature to proofing times, each step plays a crucial role in determining the outcome. Being patient and attentive to these factors can make all the difference between a pale, lackluster bread and one that’s visually and gastronomically appealing.
Secondly, don’t be afraid to experiment. Bread baking is as much an art as it is a science. Whether it’s trying different types of sweeteners, exploring various fats, or tweaking your kneading technique, experimentation can lead to wonderful discoveries. Embrace the creative aspect of bread making and make it your own.
Lastly, keep in mind that practice makes perfect. Baking bread is a skill that improves with time and experience. Don’t be discouraged by occasional setbacks; they are part of the learning process. With each loaf you bake, you’ll gain insights and refine your techniques, inching closer to that ideal browned crust.
So, as you embark on your bread-baking adventures or continue honing your skills, remember the seven common reasons we’ve discussed and the corresponding fixes. Armed with this knowledge, you’re well-equipped to tackle any challenges that may arise on your path to crafting that perfect golden-brown bread. Happy baking!
FAQ
Q1: Can I use a toaster oven to bake bread?
A: Yes, you can bake bread in a toaster oven! However, keep in mind that toaster ovens are smaller and may have uneven heating. To ensure even browning, consider using a smaller loaf or rotating it during baking. Use an oven thermometer to monitor the temperature accurately.
Q2: How do I know when my bread is perfectly proofed?
A: The best way to determine if your bread is adequately proofed is the finger test. Gently press your finger into the dough; if the indentation remains and slowly springs back, it’s ready. If it springs back immediately, it needs more time. Proper proofing is vital for both flavor and browning.
Q3: Why does my bread taste bitter sometimes?
A: Bitterness in bread can result from overbaking. When bread is left in the oven for too long, the sugars in it caramelize excessively and can turn bitter. Make sure to follow recommended baking times and monitor your bread closely during the final stages.
Q4: Can I substitute honey for sugar in my bread recipe?
A: Yes, you can substitute honey for sugar in your bread recipe. However, keep in mind that honey is sweeter than sugar, so you’ll need to use less. For every cup of sugar, you can typically use 3/4 to 1 cup of honey. Honey can also add a unique flavor and moisture to your bread, enhancing its overall quality.
Q5: How do I prevent my bread from getting too dark on top before it’s fully baked?
A: To prevent your bread from getting too dark on top, you can tent it with aluminum foil during the final stages of baking. This will shield the top from direct heat while allowing it to continue cooking. Make sure not to cover it too early to ensure proper browning.
Q6: Can I use a convection oven for baking bread?
A: Yes, you can use a convection oven for baking bread. Convection ovens have a fan that circulates hot air, resulting in more even heat distribution. To avoid over-browning, you may need to reduce the temperature or baking time slightly. Keep an eye on your bread as it bakes to make adjustments as needed.
Q7: How do I make my bread crust extra crispy?
A: To make your bread crust extra crispy, you can try a few techniques. Firstly, preheat your oven with a baking stone or steel to create a hot surface for your bread. Secondly, introduce steam into the oven at the beginning of the baking process. Lastly, ensure that you bake your bread long enough for the crust to fully develop.
Q8: What’s the ideal temperature for baking bread?
A: The ideal temperature for baking bread is typically between 375°F to 425°F (190°C to 220°C). However, this can vary depending on the type of bread and recipe you’re using. It’s essential to follow the temperature recommendations in your specific recipe for the best results.
Q9: How do I store freshly baked bread to maintain its crust?
A: To maintain the crust of freshly baked bread, store it in a paper bag or a cloth bread bag at room temperature. Avoid sealing it in a plastic bag, as this can lead to moisture buildup and a soft crust. If your bread starts to stale, you can reheat it in the oven to revive the crust’s crispness.
Q10: Can I freeze bread dough for later use?
A: Yes, you can freeze bread dough for later use. After the first rise and shaping, wrap the dough tightly in plastic wrap or an airtight container, and freeze it. When you’re ready to bake, allow the dough to thaw and complete its final rise before baking as usual.
These frequently asked questions cover some common concerns and dilemmas when it comes to baking bread. Armed with these answers, you’ll be better prepared to tackle any challenges that arise in your bread-baking endeavors and continue on your path to achieving that perfect golden-brown crust. Happy baking!