Do your delicate macarons lack that sought-after skin? Let’s delve into the mysteries of these sweet treats! Have you ever whisked egg whites to perfection, only to find your macarons smooth, not skinning?
The most common reason why macarons don’t form skin is inadequate drying time. Macarons need to rest before baking, allowing a skin to develop. Humidity or a rushed process can hinder this crucial step.
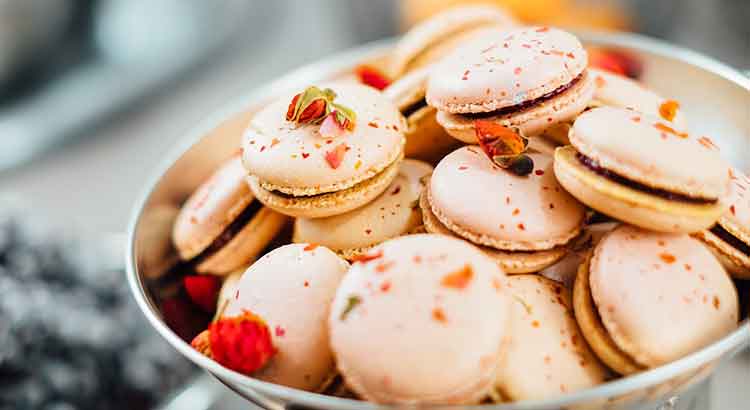
Get ready to uncover the magic of macarons! Discover 7 simple fixes that promise perfect, crisp shells. From mastering resting times to taming your kitchen’s humidity, we’ve got you covered. Soon, your macarons will flaunt their flawless skin, making every bite a delightful experience.
Undermixing
When it comes to creating those picture-perfect macarons, undermixing is a sneaky troublemaker. You know how sometimes you find a stubborn lump of dry ingredients hanging around? Yep, that’s the sign of undermixing. This happens when you’re a bit too cautious with your mixing efforts.
Macarons thrive on the delicate balance between the wet and dry ingredients. If you’re too gentle during the mixing process, the batter can remain uneven, and voilà – no skin for your macarons. You want the batter to flow like lava, smoothly and consistently. So, don’t be afraid to show a little muscle and fold that batter until it’s just right.
Humidity
Picture this: you’ve got your macarons perfectly piped onto the baking sheet, ready for their magical transformation in the oven. But wait, there’s a twist in the story – humidity strikes! You see, macarons are like moody artists; they don’t appreciate excessive moisture in the air.
Humidity can slow down the skin-forming process, leaving your macarons vulnerable to mishaps. If your kitchen is feeling a bit like a sauna, consider using a dehumidifier or even turning on the air conditioning to create a drier environment. When it’s just the right amount of dry, your macarons will thank you with the beautiful skin they deserve.
Inadequate Resting Time
So, you’re all set to make those macarons, and you can practically taste their sweet success. But hold on a second – have you given them the rest they need? Macarons demand a bit of patience. Without the right amount of resting time, they won’t have the chance to develop that crucial skin.
Think of it like this: macarons are like sleepyheads after a long day. They need some time to settle down and gather their strength before facing the heat. Allowing your piped macarons to rest before baking is key. This gives them the opportunity to create that protective layer that will turn into a beautiful skin, helping them rise just the way they should.
Drafts or Breezes
Let’s talk about the uninvited guests at your macaron-making party – drafts and breezes. These sneaky troublemakers can play havoc with your delicate macarons. Macarons are sensitive souls, and they don’t appreciate being exposed to sudden temperature changes caused by drafts.
Keep an eye out for open windows, fans, and any gusts of air that might be lurking around your kitchen. Even a small breeze can disrupt the skin-forming process. Make sure your macarons are shielded from any unexpected currents, so they can focus on becoming the picture of perfection.
Improper Piping Technique
Alright, let’s get real – piping macarons isn’t just a fancy swirl of the wrist. Your piping technique matters. If you’re not careful with how you pipe those cute little circles, you might end up with macarons that won’t develop that sought-after skin.
Here’s the scoop: unevenly piped batter can lead to macarons that don’t bake uniformly. And guess what? Uneven baking equals uneven skin. Make sure you’re using a piping bag and tip that create consistent shapes and sizes. Keep those hands steady and your piping consistent, and you’ll be well on your way to macaron success.
Dirty or Oily Equipment
Listen up, folks – clean equipment is the unsung hero of macaron success. Dirty or oily equipment can sabotage your macaron game. Grease, oil, or any residue left behind can interfere with the skin formation process, leaving you with flat, sad-looking macarons.
Before you dive into macaron making, give your equipment a thorough clean. This means your mixing bowls, piping tips, and even the surfaces where you’ll be piping your macarons. A clean slate is the way to go. Your macarons will thank you by rising beautifully and forming that delicate, dreamy skin.
Old Almond Flour
Hey there, fellow macaron explorer! Let’s dive into a mystery that might be the missing puzzle piece in your macaron journey – old almond flour. Believe it or not, the freshness of your almond flour can affect your macaron’s skin formation.
Think about it like this: just as you wouldn’t use stale ingredients in your cooking, old almond flour can lead to lackluster macarons. Fresh almond flour holds the key to a successful macaron skin. When almond flour gets old, it tends to clump up and lose moisture, which can mess up the batter consistency and skin development.
To ensure your macarons have the best chance at forming that lovely skin, make sure to use fresh and finely ground almond flour. Keep it stored in an airtight container away from moisture to maintain its quality. By choosing the right almond flour, you’re setting yourself up for macaron triumph.
Final Thoughts
And there you have it, dear macaron enthusiast! We’ve embarked on a journey to uncover the secrets behind those elusive macaron skins, and we’ve explored fixes for some of the most common issues. From undermixing batter to battling humidity, we’ve dived deep into the world of macarons to help you achieve that flawless, delicate skin.
Remember, macaron-making is all about balance and attention to detail. Each step in the process plays a significant role in the final result. Taking the time to understand these factors can make all the difference between macarons with a smooth, beautiful skin and those that fall flat in appearance.
As you continue on your macaron-making adventure, keep these insights in mind. Whether you’re perfecting your piping technique, keeping your equipment squeaky clean, or ensuring you’re using fresh almond flour, each tweak you make brings you closer to macaron success. Don’t be disheartened by any mishaps along the way; consider them lessons that will only sharpen your skills.
With these fixes at your fingertips, you’re well-equipped to conquer the world of macarons and create stunning treats that will leave everyone in awe. So, arm yourself with knowledge, practice your techniques, and savor the journey of crafting macarons with the dreamiest, most irresistible skin. Happy baking!
FAQ
Q: My macarons turned out hollow even though I followed all the steps. What’s going wrong?
A: Hollow macarons can be a bit frustrating, but fear not – we’re here to help! Hollow macarons often result from issues during the macaronage process. Overmixing or undermixing the batter can lead to trapped air, causing hollow pockets. Focus on achieving that “lava-like” consistency during mixing and tap the baking sheets after piping to release excess air bubbles.
Q: My macarons are browned on top but undercooked inside. What’s the fix?
A: Ah, the classic underbaking dilemma! While you might be eager to pull out your macarons, remember that a slightly longer bake can make all the difference. Lower the oven temperature a tad and extend the baking time. Test with a gentle tap – if the macaron doesn’t wobble and feels firm, it’s good to go. This will ensure a lovely, evenly cooked interior.
Q: My macarons are sticking to the baking paper. How can I prevent this?
A: Sticky situations with baking paper can be avoided with a few tricks. First, make sure your macarons are completely cooled before attempting to remove them. If they’re still sticking, place a damp cloth under the baking paper for a minute – this can help create steam, making the macarons easier to lift. And of course, using a silicone baking mat can be a game-changer in preventing stickiness altogether.
Q: Can I save macarons that are too dry or too moist?
A: Absolutely, don’t throw in the towel just yet! For dry macarons, consider adding a touch of filling to help soften them. And for overly moist macarons, leave them out in a dry environment for a little longer to let them firm up. Sometimes, a bit of patience and adjustment can salvage your macaron creations.
Q: How do I prevent my macarons from spreading too much during baking?
A: It’s all about maintaining the right consistency. If your macarons are spreading excessively, they might be too runny. Be cautious during the macaronage process and make sure you’ve achieved that “flow like lava” texture. Additionally, double-check your oven temperature – if it’s too low, macarons can spread before they start to set.
Q: My macarons have irregular shapes. How can I make them uniform?
A: Uniformity is the name of the game! To achieve consistent shapes, start by drawing circles on the underside of your parchment paper to use as piping guides. This helps you keep the size in check. Also, remember to pipe directly downward, rather than at an angle, to ensure even distribution of batter. With a bit of practice, your macarons will become picture-perfect.
Q: Can I freeze macarons for later?
A: Absolutely, freezing can be a lifesaver! Once your macarons have cooled completely, store them in an airtight container and pop them in the freezer. When you’re ready to enjoy them, take them out and let them thaw in the container to prevent condensation. Your frozen macarons will taste just as scrumptious as freshly made ones.
Q: How can I add flavor variations to my macarons?
A: Get ready to explore a world of flavors! You can add extracts, essences, or even finely ground freeze-dried fruits to your macaron batter to infuse different tastes. Just remember, a little goes a long way. Play around with small quantities and taste as you go to find your perfect flavor balance.
We hope these FAQs have helped shine a light on some of your macaron mysteries. Remember, each baking adventure is a chance to learn and improve. Don’t be afraid to experiment, make adjustments, and enjoy the delightful process of creating these delicate treats. Happy baking!