Do your cakes sometimes turn out less than perfect, leaving you wondering which KitchenAid attachment to use for that flawless, moist, and fluffy texture? Worry not, dear bakers! In this beginner’s guide, we’ll unlock the secrets of the ideal KitchenAid attachment for cake baking, paving the way for delectable treats that will impress everyone at the table.
The answer is the “Flat Beater” attachment! This versatile paddle-shaped tool is your cake-baking best friend. It effortlessly blends cake batters, making them smooth and evenly mixed for consistent results. No more dense or lumpy cakes – the “Flat Beater” is here to save the day!
But wait, there’s more! In this article, we’ll go beyond the “Flat Beater” and delve into other valuable KitchenAid attachments for cake baking. From whipping up airy meringues with the “Wire Whip” to kneading dough for coffee cakes with the “Dough Hook,” we’ll explore the full range of possibilities. Get ready to elevate your cake-baking game and impress your loved ones with scrumptious creations. Let’s get started!
The “Flat Beater” Attachment
When it comes to baking cakes with your KitchenAid mixer, one of the essential attachments to consider is the “Flat Beater.” This versatile tool is a game-changer for beginners in the world of baking. It’s a must-have accessory that will simplify your cake-making process and ensure your cakes turn out soft, fluffy, and delicious every time.
What is the “Flat Beater” Attachment?
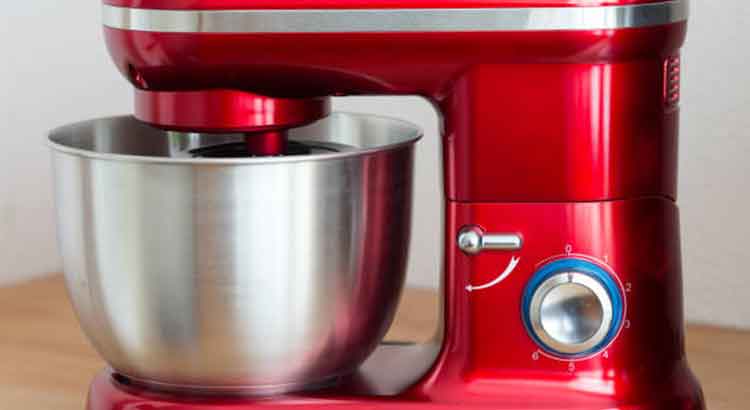
The “Flat Beater” is a paddle-shaped attachment that comes with your KitchenAid mixer. It is typically made of durable metal and is designed to mix, beat, and cream ingredients with ease. The flat, wide surface of the beater makes it perfect for blending cake batters, cookie doughs, and other similar mixtures.
Use this link to check the deals KitchenAid has right now.
Why Use the “Flat Beater” for Cakes?
- Even Mixing: The flat beater’s design allows it to reach all areas of the mixing bowl, ensuring that your ingredients are evenly combined. This is crucial for achieving a consistent texture in your cake batter.
- Prevents Over-Mixing: Over-mixing can lead to tough and dense cakes. The “Flat Beater” attachment’s gentle mixing action helps avoid overworking the batter, resulting in tender cakes.
- Versatility: While it excels at cake batters, the flat beater can also handle other tasks, such as making frosting and mixing brownie or bar cookie dough.
- Time-Saving: The “Flat Beater” is efficient and saves you time in the kitchen. You won’t need to spend long minutes manually mixing ingredients – the attachment does the work for you.
- Ease of Cleaning: Cleaning the “Flat Beater” is a breeze. Unlike more intricate attachments, this paddle-style tool is straightforward to wash and maintain.
Tips for Using the “Flat Beater” Attachment
- Room Temperature Ingredients: Before mixing, ensure that your butter, eggs, and other ingredients are at room temperature. This will help the “Flat Beater” blend them more effectively.
- Scrape the Bowl: Occasionally, stop the mixer and use a spatula to scrape the sides and bottom of the mixing bowl. This ensures that all the ingredients are well incorporated.
- Start Slow: Begin mixing at a low speed to prevent ingredients from splashing out of the bowl.
- Watch the Clock: Avoid over-mixing by following your recipe’s recommended mixing times.
- Prevent Curdling: For recipes with acidic ingredients like buttermilk or yogurt, briefly mix them separately before adding them to the batter to avoid curdling.
Additional Tips and Tricks
1. The “Wire Whip” Attachment
The “Wire Whip” attachment is another valuable tool for cake baking. It features a wire whisk design that incorporates air into your batter, resulting in lighter and fluffier cakes. Use the “Wire Whip” when your recipe calls for beating egg whites, making meringues, or creating airy sponge cakes.
2. The “Dough Hook” Attachment
While the “Dough Hook” is not typically used for cake batters, it is worth mentioning for those who enjoy experimenting with various baking projects. This attachment is ideal for kneading dough, making it perfect for cake recipes that require a yeast-based or heavy dough, such as coffee cakes or certain fruitcakes.
3. Adjusting Speed and Mixing Time
Every cake recipe is unique, and some may require specific mixing speeds and times. It’s essential to follow your recipe’s instructions carefully. As a general rule, start mixing at a low speed and gradually increase it as the ingredients combine. Be cautious not to overmix, as it can lead to a dense cake.
4. Adding Ingredients Gradually
When adding dry ingredients to your cake batter, such as flour or cocoa powder, add them gradually. Pouring them all in at once may create lumps and uneven mixing. Instead, add a little at a time and mix well before adding more.
5. Incorporating Wet and Dry Ingredients Alternately
For certain cake recipes, especially those involving buttermilk or milk, it’s best to alternate adding wet and dry ingredients to the batter. This technique helps maintain a smooth and well-mixed consistency.
6. Checking Doneness
To determine if your cake is fully baked, insert a toothpick or cake tester into the center. If it comes out clean or with a few moist crumbs, the cake is ready. Avoid opening the oven door too often during baking, as this can cause fluctuations in temperature and affect the cake’s rise.
7. Cooling and Storage
Once your cake is baked, let it cool in the pan for a few minutes before transferring it to a wire rack to cool completely. Always allow the cake to cool thoroughly before frosting or storing. For storage, place the cake in an airtight container or cover it with plastic wrap to prevent it from drying out.
8. Experiment with Flavors and Fillings
Don’t be afraid to get creative with your cake recipes! Experiment with different flavors, such as adding citrus zest, extracts, or spices. You can also try incorporating various fillings like fruit preserves, chocolate ganache, or whipped cream between cake layers for added taste and texture.
9. Practice Makes Perfect
Baking cakes is a skill that improves with practice. Don’t be disheartened if your first few attempts don’t turn out exactly as you hoped. Keep trying, learn from your mistakes, and celebrate your successes. Each baking experience will bring you closer to becoming a confident cake-baking expert.
10. Share the Joy of Cake Baking
Baking cakes can be a delightful and rewarding experience. Share your delicious creations with family and friends to spread the joy of homemade treats. Their smiles and compliments will motivate you to continue honing your cake-baking skills.
Final Thoughts
Exploring the world of cake baking with KitchenAid attachments opens up a world of possibilities for beginners and seasoned bakers alike. The “Flat Beater” attachment proves to be an indispensable tool for creating smooth and consistent cake batters, making the cake-making process a breeze. Its versatility and time-saving capabilities make it a must-have in any baker’s kitchen.
While the “Flat Beater” takes center stage for most cake recipes, the “Wire Whip” and “Dough Hook” attachments offer exciting opportunities for experimenting with different baking projects. From light and airy meringues to kneading dough for unique coffee cakes, these attachments expand the horizons of your cake-baking endeavors.
With a few essential tips and tricks, you can elevate your cake-baking skills to new heights. From adjusting mixing speeds and times to incorporating ingredients gradually and alternating wet and dry components, mastering these techniques will result in perfectly baked cakes every time. Remember to check for doneness, cool cakes thoroughly, and store them properly to preserve their deliciousness.
In the end, baking cakes is not just about following a recipe; it’s about the joy of creating something special for yourself and your loved ones. Embrace the learning process, celebrate your successes, and don’t be afraid to experiment with flavors and fillings. Whether you’re baking for a celebration, a special occasion, or simply for the pure pleasure of it, the journey of cake baking with KitchenAid attachments is a delightful and rewarding one. So, roll up your sleeves, gather your ingredients, and let the magic of cake baking unfold in your kitchen. Happy baking!
FAQ
1. Can I use the “Flat Beater” for other recipes besides cakes?
Absolutely! The “Flat Beater” is a versatile attachment that can handle various tasks beyond cake baking. It’s perfect for making cookie dough, brownies, frosting, and even mashed potatoes. Its wide paddle design ensures thorough mixing, making it a valuable tool for a wide range of recipes.
2. How do I clean and maintain my KitchenAid attachments?
Cleaning and maintaining your KitchenAid attachments is simple. For attachments like the “Flat Beater” and “Wire Whip,” hand wash them with warm, soapy water after each use. Avoid using abrasive materials that could damage the surface. For the “Dough Hook,” it’s best to hand wash as well, but pay extra attention to any trapped dough in the crevices. Allow the attachments to dry completely before storing them in a dry and safe place.
3. Can I adjust the mixing speed of my KitchenAid mixer?
Yes, you can! Most KitchenAid mixers come with multiple speed settings. You can adjust the mixing speed using the speed control lever, which allows you to go from low to high or vice versa. Experiment with different speeds to find the best setting for each recipe.
4. My cake batter has lumps; what should I do?
Lumps in your cake batter can be frustrating, but there’s an easy fix. Stop the mixer and use a spatula to gently fold and mix the batter until the lumps disappear. If the batter remains lumpy, consider sifting the dry ingredients before adding them to the mixing bowl. Sifting helps break up clumps and ensures a smoother batter.
5. Can I use the “Flat Beater” for gluten-free cake recipes?
Yes, you can use the “Flat Beater” for gluten-free cake recipes. However, when working with gluten-free flours, be cautious not to overmix the batter, as it can result in a gummy texture. Mix the batter just until the ingredients are combined to achieve the best results.
6. Can I make vegan cakes with KitchenAid attachments?
Absolutely! KitchenAid attachments can be used for making delicious vegan cakes. Substitute dairy ingredients with plant-based alternatives like almond milk, soy milk, or coconut milk. Swap eggs with ingredients like applesauce, mashed bananas, or flaxseed meal mixed with water. The “Flat Beater” will blend these vegan ingredients seamlessly, resulting in delectable vegan cakes.
7. How do I know if my cake is done baking?
To check if your cake is fully baked, insert a toothpick or cake tester into the center. If it comes out clean or with a few moist crumbs, the cake is ready. Additionally, the cake should pull away slightly from the sides of the pan, and the top should spring back when gently pressed. If it appears undercooked, continue baking for a few more minutes and retest.
8. Can I use the KitchenAid mixer for making cheesecakes?
Yes, the KitchenAid mixer is excellent for making cheesecakes. When mixing the cream cheese filling, use the “Flat Beater” or “Wire Whip” attachment at a low speed to avoid incorporating too much air. This helps prevent cracking during baking. Remember to follow your cheesecake recipe closely and enjoy your creamy and decadent creation.