Do you ever find yourself eyeing that jar of sourdough starter in your kitchen, wondering if it’s ready for baking? Is your curiosity piqued about when and how to use a mature sourdough starter to achieve that perfect loaf?
Mature sourdough starter is the key to achieving that tangy, flavorful bread you crave. It’s a well-aged mixture of flour and water that’s teeming with natural yeast and beneficial bacteria. This lively concoction is what gives sourdough its distinctive taste and texture.
From mastering the art of feeding and maintaining your starter to discovering the secrets behind its unique flavor, we’re about to unravel all the mysteries that surround this magical ingredient. So, if you’re ready to elevate your sourdough game, read on to embark on a flavorful journey that will leave your taste buds begging for more!
How to Use Mature Sourdough Starter
Feeding Your Starter
To make the most of a mature sourdough starter, regular feeding is crucial. This maintains its vitality and ensures your bread rises just right. Begin by discarding a portion of your starter, leaving only a small amount. Then, add equal parts flour and water, mixing until smooth. Let it sit at room temperature until it bubbles and expands, usually in about 4-6 hours. Once it’s lively and active, it’s ready to work its magic in your dough.
Balancing Hydration Levels
Adjusting the hydration level of your starter can significantly impact your final bread. A stiffer starter (with less water) yields a chewier crumb, while a more hydrated one gives a softer texture. Experiment to find your preference. For a stiffer starter, use less water when feeding, and for a looser consistency, add a bit more water. Remember, it’s about finding that sweet spot that suits your taste.
Incorporating It into Recipes
When it comes to using a mature sourdough starter in recipes, it’s not just for bread. It can be a secret weapon in pancakes, waffles, and even pizza dough. Simply replace a portion of the flour and liquid in your recipe with your active starter. This imparts a unique flavor profile and extra lift to your baked goods. It may take some trial and error, but the results are well worth it.
Adjusting for Different Flours
Every type of flour has its own personality, and your mature sourdough starter can adapt to them all. Whether you’re using whole wheat, rye, or spelt, remember to give your starter some time to acclimate. Start with a few feedings using the new flour before incorporating it into recipes. This ensures your starter is in sync with the flour’s characteristics, guaranteeing the best possible outcome.
Maintaining Consistency
Consistency is key in the world of sourdough baking. To achieve reliable results, establish a feeding schedule that aligns with your baking routine. Whether it’s daily, weekly, or even bi-weekly, find a rhythm that suits you. Keep track of your starter’s behavior after feeding – the rise and fall pattern will guide you. With time, you’ll develop a keen intuition for when it’s at its peak performance.
Storing Your Mature Starter
Life happens, and you might not always be in the mood for a sourdough baking session. In such cases, your mature starter can hibernate in the fridge. Simply feed it, let it sit at room temperature for a few hours, and then transfer it to the fridge. This slows down its activity, allowing it to be stored for up to a couple of weeks. When you’re ready to bake again, give it a few feedings to wake it up and bring it back to life.
When to Use Mature Sourdough Starter
Baking with a Ripe Starter
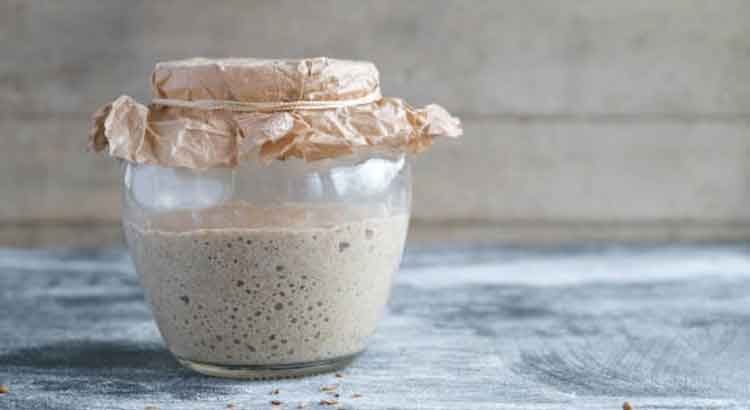
Using a mature sourdough starter at its peak is essential for achieving the best results. This is when it’s most active and ready to leaven your dough effectively. Look for signs like a doubled volume, a bubbly surface, and a tangy aroma. It should be at its liveliest about 4-6 hours after a feeding. This is when you’ll get that wonderful rise and flavor in your baked goods.
Planning Ahead for Flavorful Bread
If you’re aiming for a deeply flavorful loaf, plan ahead. Before starting your recipe, give your mature starter a boost by feeding it a few hours earlier. This allows it to develop even more flavor, enhancing the taste of your final product. The extra time also lets the natural yeast and bacteria work their magic, resulting in a more complex and satisfying sourdough.
Experimenting with Different Recipes
Mature sourdough starter isn’t just for classic bread. It can add a unique twist to a variety of recipes. Try incorporating it into pancakes, muffins, or even pizza crust for an extra layer of flavor. Remember to adjust the amount of starter based on your desired outcome. The more starter you use, the more pronounced the sourdough flavor will be in the final dish.
Reviving a Dormant Starter
If your mature sourdough starter has been resting in the fridge for a while, it might need a little TLC before use. Begin by discarding a portion to reduce any excess acidity. Then, give it a few feedings at room temperature to wake it up. It might take a day or two of regular feeding to restore its vigor, but soon it’ll be back to its lively self, ready to create wonderful baked goods.
Trusting Your Senses
When it comes to using a mature sourdough starter, trust your instincts and your senses. Pay attention to its appearance, smell, and the way it behaves. A well-fed and active starter will have a vibrant, bubbly surface, a slightly tangy aroma, and will double in volume after a feeding. Trusting your observations will lead you to the perfect moment to incorporate it into your recipes.
Additional Tips
Temperature Matters
Maintaining the right temperature for your sourdough starter is crucial. Warmer environments speed up fermentation, while cooler ones slow it down. Find a cozy spot in your kitchen, away from drafts and direct sunlight. If your kitchen tends to be chilly, consider using a proofing box or placing your starter near a slightly warm oven to keep it happy and active.
Be Patient
Patience is the secret ingredient to successful sourdough baking. Don’t rush the process. Allow your starter ample time to develop and rise. Likewise, give your dough the time it needs to ferment and develop those complex flavors. It’s worth the wait for that perfect, tangy, and airy crumb in your bread.
Stay Consistent with Feedings
Consistency is key when it comes to feeding your sourdough starter. Establish a routine that works for you and stick to it. Whether it’s daily, weekly, or bi-weekly, find a schedule that aligns with your lifestyle. This regular feeding routine ensures a healthy and active starter, ready to leaven your dough effectively.
Embrace Mistakes
Baking with sourdough is a learning process, and mistakes are bound to happen. Don’t be discouraged by a less-than-perfect loaf. Instead, see it as an opportunity to learn and improve. Each loaf is a step towards mastering the art of sourdough baking. Embrace the journey, and don’t be afraid to experiment and try new techniques.
Experiment with Flavors
Once you’ve mastered the basics, don’t be afraid to get creative with flavors. Add seeds, nuts, dried fruits, or even herbs to your dough for a unique twist. These additions not only enhance the taste but also add texture and visual appeal to your bread. Experimentation is where you’ll discover your signature sourdough style.
Trust Your Instincts
While recipes are helpful guidelines, trust your instincts and adapt as needed. Pay attention to the feel of the dough, the rise of your starter, and the aroma of your bread. You know your ingredients and environment best. Trusting your instincts will lead you to the perfect outcome, even if it means making small adjustments along the way.
Final Thoughts
In the world of sourdough baking, patience is not just a virtue, but a necessity. It’s a journey that demands time, observation, and a willingness to learn from both successes and missteps. Embracing the ebb and flow of sourdough starter activity, along with the subtle changes in dough texture, leads to the most rewarding outcomes. Remember, there’s no one-size-fits-all approach; each baker’s path is uniquely their own.
Consistency in feeding and attentiveness to temperature play pivotal roles in nurturing a thriving sourdough starter. Finding a routine that aligns with your lifestyle ensures a robust and active starter, ready to impart that distinctive tang to your creations. As you become attuned to the nuances of your starter’s behavior, you’ll develop a symbiotic relationship, working together to craft loaves that are truly a reflection of your dedication and care.
Lastly, don’t be afraid to let your creativity run wild. While mastering the basics is essential, the true joy of sourdough lies in its versatility. Whether it’s experimenting with different flours, flavors, or incorporating unique ingredients, let your imagination guide you. Each loaf is a canvas waiting to be painted with your personal touch. So, roll up your sleeves, preheat that oven, and let the delightful aroma of freshly baked sourdough fill your kitchen. Happy baking!
FAQ
Can I Use All-Purpose Flour for My Starter?
Absolutely! All-purpose flour is a great choice for creating a thriving sourdough starter. Its balanced protein content provides the right environment for the natural yeast and bacteria to flourish. As you continue to feed your starter with all-purpose flour, it will develop into a robust and active foundation for your sourdough creations.
What Should I Do if My Starter Smells Off?
If your sourdough starter takes on an unpleasant or unusual odor, don’t fret. This can happen from time to time, especially if it’s been neglected or hasn’t been fed in a while. Begin by discarding a portion of the starter, then give it a few regular feedings. This usually helps the starter regain its healthy, slightly tangy aroma. If the smell persists, it might be time to consider adjusting your feeding routine.
Why Is My Bread Not Rising?
A common challenge in sourdough baking is achieving a good rise. There could be a few culprits at play. Firstly, ensure your starter is at its peak activity before incorporating it into your dough. Secondly, the ambient temperature in your kitchen plays a crucial role; a warmer environment encourages a better rise. Lastly, be patient. Sourdough is a slow process, and sometimes it requires a bit more time to develop that perfect lift.
Can I Speed Up the Fermentation Process?
While sourdough is known for its slow fermentation, there are ways to give it a nudge. A warmer environment, like near a slightly warm oven or in a proofing box, can expedite the process. Additionally, using a smaller portion of well-fed starter with a higher hydration level can also accelerate fermentation. Keep in mind, though, that rushing the process too much can affect the flavor and texture of your final product.
What If My Starter Develops a Grayish Layer?
A grayish layer on your starter is typically harmless and often a sign that your starter is hungry. This can happen if it’s been a while since the last feeding. Simply discard the top layer and proceed with your regular feeding routine. It’s a good practice to maintain regular feedings to keep your starter healthy and active.
Can I Use Whole Wheat Flour for My Starter?
Absolutely! Whole wheat flour is a fantastic choice for a sourdough starter. It provides additional nutrients and a different flavor profile compared to all-purpose flour. If you decide to transition to whole wheat, it’s recommended to do so gradually to allow your starter to adjust. Start by incorporating a small portion of whole wheat flour with your regular feedings, and gradually increase the ratio over time.
What Should I Do if My Starter Has a Pink or Orange Hue?
If you notice a pink or orange hue in your starter, it’s a sign that unwanted bacteria may have taken hold. This is rare but can happen, especially if your utensils or container aren’t properly cleaned. The best course of action is to discard the affected portion, thoroughly clean your container, and begin feeding your starter regularly again. This usually rectifies the issue.
How Do I Know When My Starter Is Ready for Baking?
Your starter is ready for baking when it’s at its peak activity, about 4-6 hours after a feeding. Look for a doubled volume, a bubbly surface, and a pleasantly tangy aroma. It should be lively and eager to leaven your dough. This is the prime moment to incorporate it into your recipe for the best rise and flavor in your final baked goods.