Are your macarons not turning out as pretty as you’d like? No worries, we’ve got you covered! In this friendly baking adventure, we’ll explore the world of undermixed macaron batter and unveil five easy-peasy fixes to save the day.
From mastering the “Figure 8” test to the wonders of partially beaten egg whites, we’ll guide you through simple techniques to transform your lumpy batter into a smooth, dreamy delight. Get ready to elevate your macaron-making game with our tried-and-true solutions.
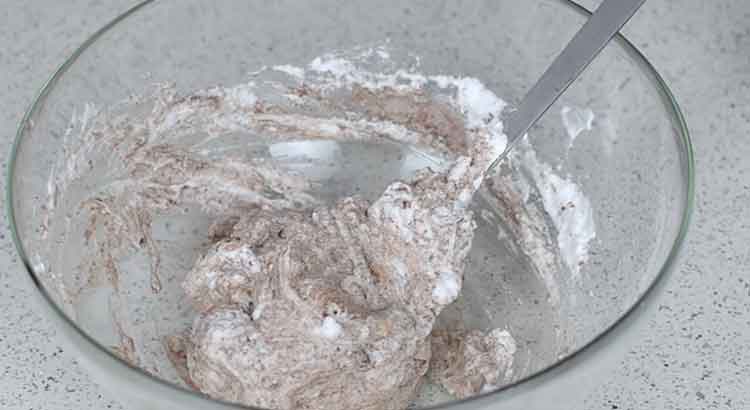
Continue Folding Carefully
One common issue that macaron enthusiasts may encounter is undermixed batter. If your macaron batter appears thick, lumpy, or does not flow smoothly, don’t panic! There are simple ways to fix it and still create those delightful, delicate treats. Let’s dive right into it!
To begin, continue folding your macaron batter carefully. The folding process is essential for incorporating the dry ingredients with the meringue, creating the desired smooth and shiny batter. Use a silicone spatula and make sure to scrape the sides and bottom of the bowl as you fold. Be gentle yet thorough, aiming for a homogeneous mixture.
As you fold, pay close attention to the consistency of the batter. It should flow off the spatula in a thick ribbon and gradually smooth out into the rest of the batter. Avoid overmixing, as it can lead to deflation and result in flat macarons. Take your time and be patient, ensuring that the dry ingredients are fully integrated with the meringue.
Use the “Figure 8” Test
Let’s talk about the trusty “Figure 8” test and how it can save your undermixed macaron batter. As I mentioned earlier, this technique helps you determine the right consistency for your batter. It’s a simple but effective method that requires just a keen eye and a steady hand.
When you draw a figure 8 through your batter with the spatula, pay attention to how it behaves. If the pattern quickly disappears back into the batter, it’s a clear sign that your macaron batter needs a bit more love. Keep folding gently until the figure 8 pattern takes a few seconds to blend back in. This way, you know the dry ingredients are incorporating well with the meringue, giving you a smoother batter.
Now, I must admit, when I first tried the “Figure 8” test, I was a bit nervous about undermixing or overmixing my batter. But with a bit of practice, I got the hang of it! Just remember to take your time and trust your instincts. It’s better to be patient and achieve that perfect consistency than to rush and end up with flat macarons.
Add Partially Beaten Egg Whites
Oh, how I love this little trick! Adding partially beaten egg whites is like giving your undermixed batter a second chance at greatness. When you’re dealing with a thick and stubborn batter, don’t worry—those partially beaten egg whites will come to the rescue!
Simply whisk a small amount of egg whites separately until they form a foamy consistency. Then, gently fold them into your undermixed batter. Those extra egg whites help lighten the mixture and incorporate more air, giving your macarons the lift they need.
I remember the first time I tried this technique; it felt like a little macaron miracle! The batter transformed before my eyes into a smoother, more workable texture. Just be careful not to overdo it—too many egg whites can turn your macarons into little puffy clouds, and while that sounds cute, it’s not what we’re aiming for.
Rescue the Batter with a Food Processor
Let’s talk about another nifty trick to save your undermixed macaron batter: the trusty food processor. If you find yourself with a stubborn batter that just won’t cooperate, fear not – this kitchen appliance can come to the rescue!
Now, I have to admit, the first time I tried using a food processor to fix my macaron batter, I was a bit hesitant. I thought it might ruin the delicate mixture I worked so hard to create. But boy, was I pleasantly surprised!
To get started, transfer your undermixed batter into the food processor bowl. Remember, this is a last resort, so if you think your batter can still be saved with the previous techniques, give those a shot first. Pulse the batter in short bursts, being careful not to overdo it. The goal here is to gently mix the batter to achieve a smoother consistency.
You see, the food processor’s blades help break down those stubborn lumps and incorporate the ingredients more evenly. It’s like a mini-macaron makeover in your kitchen!
However, a word of caution: don’t get carried away with the pulsing! Overmixing at this stage can spell disaster for your macarons. Keep a close eye on the batter and stop pulsing as soon as it reaches the desired smoothness.
I must say, using the food processor as a last resort has saved me from macaron mishaps on more than one occasion. It’s a handy tool to have in your baking arsenal, but remember, it’s not a substitute for proper mixing techniques.
Final Thoughts
Now, let’s wrap up our baking adventure with some final thoughts and friendly advice to keep you inspired in your macaron-making endeavors.
Remember, practice is the key to success in the world of macarons. Don’t be discouraged if your first few attempts don’t turn out exactly as you envisioned. Baking these delicate treats takes time and patience. Embrace the learning process, and with each batch, you’ll gain valuable insights that will make you a macaron pro in no time.
Share your macaron journey with fellow bakers and enthusiasts. There’s a vast community of sweet treat lovers out there who would love to hear about your experiences and, of course, see pictures of your gorgeous creations. It’s not just about the end result; it’s about the joy of baking and connecting with others who share your passion.
Lastly, don’t be afraid to get creative! While mastering the classic macaron is fantastic, feel free to experiment with flavors, colors, and fillings. You might discover your own signature macaron that becomes a hit among your friends and family. Be adventurous, and remember, there are no limits to your macaron imagination!
As we conclude this baking escapade, I want to extend my heartfelt gratitude to each and every one of you. Thank you for embarking on this journey with me, for sharing your baking tales, and for being part of this wonderful community. I wish you all the best in your future baking endeavors, and may your macarons always be sweet, colorful, and simply delightful. Happy baking!
FAQ
Hey there, baking buddies! As we wrap up our macaron-making adventure, I thought it’d be great to address some frequently asked questions to help you become true macaron masters. Let’s dive right in!
Q: Why are my macarons hollow? A: Ah, the dreaded hollow macarons! Don’t worry; you’re not alone in this struggle. Hollow macarons occur when too much air gets trapped inside the batter, causing them to puff up and create an empty space inside. To avoid this, make sure to tap your baking sheets firmly on the counter after piping to release any trapped air bubbles. Additionally, keep an eye on your oven temperature and baking time. Overbaking can contribute to hollowness, so adjust your baking time accordingly.
Q: How do I prevent cracked macarons? A: Cracked macarons can be disappointing, but fear not – we’ve got your back! Cracks usually occur when the macarons dry too quickly or if the batter is too dry. To prevent cracks, try letting the piped macarons sit at room temperature for a little longer before baking, so they form a smooth skin on top. You can test this by lightly touching the surface; it should be dry to the touch. If your macarons still crack, don’t worry; they’ll still taste amazing!
Q: My macarons turned out too chewy. What can I do? A: If your macarons are chewier than you’d like, it could be due to underbaking. Ensure you follow the recommended baking time and temperature. It’s better to slightly overbake than underbake. If you’ve tried that and they’re still chewy, you might want to check your measurements. Accurate measurements of ingredients are crucial for the perfect macaron texture.
Q: Can I freeze macarons? A: Absolutely! Macarons freeze surprisingly well, which is excellent news for those who love to plan ahead or have leftovers. Once your macarons have cooled completely, place them in an airtight container or freezer-safe bag. Make sure to separate the layers with parchment paper to avoid sticking. When you’re ready to enjoy them, simply thaw them in the refrigerator for a few hours or at room temperature for about 15 minutes. They’ll taste just as delightful as the day you baked them!
Q: Can I color my macarons naturally? A: Yes, you can! If you prefer natural coloring options, you can use ingredients like matcha powder, cocoa powder, or fruit and vegetable powders to add color to your macarons. Keep in mind that natural colors might not be as vibrant as artificial food coloring, but they can still give your macarons a lovely hue and a subtle flavor twist.
Q: How do I store filled macarons? A: Storing filled macarons can be a bit tricky because of their delicate texture. To keep them fresh, place the filled macarons in an airtight container and refrigerate them. However, be mindful that the filling can soften the macarons over time. If you plan to store them for an extended period, it’s best to freeze the unfilled shells and fill them just before serving.
There you have it – some answers to the most common macaron-related queries. Remember, practice and persistence are the keys to macaron success. Don’t be afraid to experiment, have fun, and enjoy the process. Happy baking!