Do you love baking fresh, homemade bread but wonder if gluten-free bread is a different ballgame? Is your kitchen filled with questions like, “Should You Knead Gluten-Free Bread?” Well, fear not! We’ve got the answers you need to bake gluten-free bread that’s both delicious and hassle-free.
Gluten-free bread doesn’t need to be kneaded. Instead, we have a game-changing method that guarantees soft, perfectly textured loaves without the extra effort.
So, what’s the secret behind gluten-free bread that rises to the occasion? Join us on a gluten-free baking adventure as we explore the tips, tricks, and techniques that will leave your taste buds singing. From flours to flavors, we’ve got you covered. Get ready to embark on a gluten-free bread-making journey like no other, and let’s create some mouthwatering magic in the kitchen!
Step-by-Step Beginners Guide
Choosing the Right Flour
Start with a reliable gluten-free flour blend. Look for one with a mix of flours like rice, tapioca, and potato starch. These blends mimic the texture of regular wheat flour, ensuring your bread turns out just right.
Adding the Magic Binders
Xanthan gum and psyllium husk powder act as the glue that holds your bread together. They provide the elasticity that gluten would, ensuring your dough rises properly and maintains its structure.
Balancing Wet and Dry Ingredients
Achieving the right moisture balance is crucial. Too much liquid can result in a sticky mess, while too little can lead to a dry, crumbly loaf. Adjust slowly, adding a little liquid at a time until your dough reaches the perfect consistency.
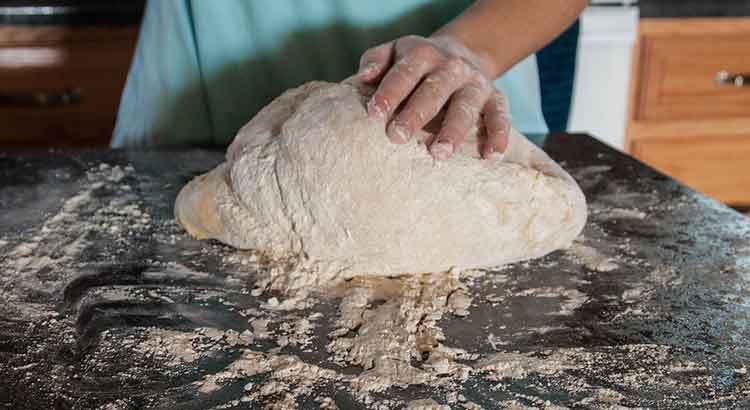
Skip the Kneading, Embrace Patience
Unlike traditional bread, gluten-free dough doesn’t benefit from kneading. Instead, give it time to rise and develop flavors. A longer rise allows the yeast to work its magic, creating a light and airy texture.
Mastering the Art of Proofing
Cover your dough with a damp cloth and let it proof in a warm, draft-free spot. This step is crucial for the final texture. Keep a watchful eye to ensure it rises just enough, without overdoing it.
The Bake: Steady and Gentle
Preheat your oven and place a pan of water on the bottom rack. This creates steam, giving your bread a crisp crust. Gently transfer your risen dough to a preheated Dutch oven or baking dish. Cover, then bake. Uncover for the last few minutes to achieve that perfect golden finish.
Cool Down for Success
Resist the temptation to slice into your fresh loaf right away. Let it cool on a wire rack to allow the internal moisture to redistribute. This step ensures a soft, even crumb that’s a delight to bite into.
Troubleshooting Tips: Common Hiccups and Solutions
Dealing with a Dense Loaf
If your bread turns out too heavy, it’s likely a moisture issue. Adjust the liquid content next time, and make sure your dough has risen sufficiently.
Tackling Crumbly Texture
An overly crumbly texture may mean you’ve gone too heavy-handed with the flour. Be cautious when adding dry ingredients and consider adjusting the blend for your next batch.
Avoiding a Gummy Interior
Overproofing can lead to a gummy interior. Keep a close eye on the proofing process, and adjust the time accordingly.
Perfecting the Crust
For a crust that’s just right, play with the baking time. A little longer can give you a hearty, rustic crust, while a shorter bake will yield a softer finish.
Additional Tips
Experimenting with Flavors
Don’t be afraid to get creative with your gluten-free bread. Add herbs, seeds, or even a touch of honey for a unique twist. These small additions can transform your loaf from ordinary to extraordinary.
Embrace the Power of Rest
After mixing your ingredients, let the dough rest for about 20 minutes before proofing. This short rest allows the flours to fully absorb the liquids, resulting in a smoother, more workable dough.
Invest in Quality Bakeware
A good-quality Dutch oven or baking stone can make a world of difference in your gluten-free bread baking. These tools distribute heat evenly, ensuring a beautifully golden crust and a well-cooked interior.
Keep an Eye on Temperature
Consistency in oven temperature is key. Invest in an oven thermometer to ensure accuracy. A few degrees too high or low can greatly affect the outcome of your bread.
Don’t Rush the Cooling Process
Resist the urge to cut into your freshly baked loaf immediately. Allowing it to cool completely not only improves texture but also enhances flavor.
Store with Care
Gluten-free bread tends to stale faster than its wheat-based counterpart. To keep it fresh, store it in an airtight container or resealable bag. You can also slice and freeze individual portions for longer shelf life.
Practice Makes Perfect
Don’t be discouraged if your first few attempts aren’t perfect. Baking gluten-free bread is a skill that improves with practice. Keep experimenting and adjusting until you find the perfect formula that suits your taste.
Final Thoughts
In the world of gluten-free baking, mastering the art of bread-making is a true achievement. It requires a blend of precision and creativity, and a willingness to adapt and learn along the way. Remember, each loaf you bake is a step closer to perfection, and even the so-called “imperfections” hold a certain charm. Embrace the process with an open heart and a patient spirit.
As you embark on this gluten-free bread-making journey, keep in mind that there is no one-size-fits-all approach. Every kitchen, oven, and palate is unique. What works wonders for one baker may require a tweak or two for another. Trust your instincts, and don’t be afraid to make adjustments based on your own experiences.
Ultimately, the joy of gluten-free baking lies not only in the end result but in the creative process itself. It’s a chance to experiment, discover new flavors, and find the perfect combination of ingredients that suits your individual taste. So, don’t be disheartened by any initial bumps in the road. With practice, patience, and a sprinkle of determination, you’ll soon be savoring slices of gluten-free bread that rival the best in any bakery. Happy baking, and may your kitchen be filled with the warm aroma of fresh, homemade loaves for years to come.
FAQ
Can I substitute different gluten-free flours in my bread recipe?
Absolutely! Experimenting with different flour combinations can lead to delightful variations in texture and flavor. However, it’s essential to keep in mind that each flour has its own unique properties. For example, almond flour tends to be denser, while coconut flour is highly absorbent. Start with established gluten-free flour blends and gradually introduce substitutions to find what works best for you.
What can I use instead of xanthan gum or psyllium husk powder?
If you’re looking for alternatives, consider guar gum or chia seeds. Both can provide the necessary binding and elasticity to your dough. Keep in mind that the quantity needed may vary, so a bit of experimentation might be in order. Remember, the goal is to find what best suits your preferences and dietary needs.
Why did my bread turn out too crumbly or dry?
A crumbly or dry texture can result from a few factors. One common culprit is overmixing the dough or using too much flour. Additionally, inadequate moisture content or a shortened proofing time can lead to a drier end product. Be sure to follow the recipe closely, and adjust the moisture levels as needed to achieve the desired texture.
Can I make gluten-free bread without a dedicated gluten-free kitchen?
Absolutely! While a separate kitchen can be helpful for those with severe gluten allergies, it’s not a requirement for successful gluten-free baking. Thoroughly clean your utensils, surfaces, and equipment to minimize any potential cross-contamination. Additionally, using separate ingredients and flour blends can further reduce the risk of gluten exposure.
How can I add extra flavor to my gluten-free bread?
Herbs, seeds, spices, and even dried fruits can be wonderful additions to your gluten-free bread. Consider adding rosemary and thyme for a savory twist, or cinnamon and raisins for a touch of sweetness. Remember to adjust quantities to your taste preference, and don’t be afraid to get creative with flavor combinations.
Is there a way to speed up the rising process for gluten-free bread?
While gluten-free dough typically requires a longer rise time, there are ways to expedite the process. Using a warm environment, like a turned-off oven with a bowl of hot water, can help. Just be cautious not to rush it too much, as allowing the dough to rise slowly often yields a better texture and flavor.
Can I make gluten-free bread without yeast?
Certainly! There are yeast-free recipes available that rely on baking powder or baking soda for leavening. Keep in mind that the texture and flavor profile may differ from yeast-based bread, but it can still be delicious and satisfying.
Remember, every baker encounters challenges along the way. Don’t be discouraged by the occasional misstep. With a bit of persistence and a willingness to learn from your experiences, you’ll be well on your way to creating delectable gluten-free bread that suits your taste perfectly. Happy baking!