Silicone baking pans have gained popularity in recent years for their non-stick properties and versatility. But when it comes to greasing them, things can get a bit confusing. Should you grease or not grease? Well, fear not, as we’re here to help demystify this topic for you.
In general, silicone molds don’t need to be greased, but adding a thin layer of grease can provide extra insurance against sticking for recipes with sticky fillings or ingredients. And in some situations it can even enhance the taste.
In this beginner’s guide, we’ll explore the reasons why greasing may or may not be necessary, and provide you with some tips to ensure baking success with your silicone pans. So, let’s roll up our sleeves and get ready to bake up a storm together!
Do You Have to Grease Silicone Baking Cups?
When it comes to silicone baking pans, the good news is that they are inherently non-stick. This means that in most cases, you won’t have to grease them before using. Silicone has a naturally smooth and slick surface, which prevents most baked goods from sticking to the cups during the baking process. This is one of the reasons why silicone baking pans have gained popularity among home bakers. So, if you’re using silicone baking pans for muffins, cupcakes, or other baked treats, you can usually skip the greasing step altogether.
However, there might be some instances where you may want to grease your silicone baking pans. For certain recipes or ingredients that are known to be more prone to sticking, greasing the pan can be beneficial. For example, if you’re making a sticky caramel-filled cupcake or a cheese-filled muffin, adding a thin layer of grease can help prevent any potential sticking. Additionally, greasing the pan can provide some extra insurance, especially if you’re unsure about the quality or condition of your silicone baking cups.
With What You Should Grease the Silicone Pans?
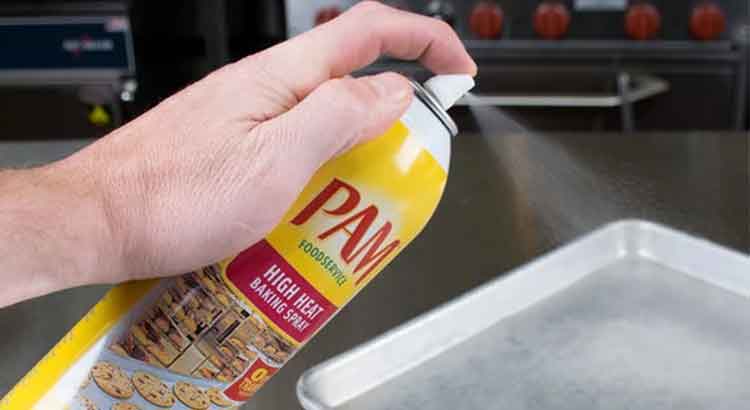
When it comes to greasing silicone baking pans, it’s essential to choose the right type of grease to ensure the best results. Avoid using cooking sprays that contain aerosol propellants. These sprays can create a sticky residue on the silicone surface, which can be difficult to remove and might affect the performance of your pan. Instead, opt for a light coating of oil or butter to grease the silicone pans.
Vegetable oil and canola oil are good options for greasing silicone pans. They have a high smoke point and can withstand the heat of the oven without burning. Additionally, they provide a neutral flavor, allowing the true taste of your baked goods to shine through. You can apply the oil using a pastry brush or a paper towel, ensuring that you cover the entire surface of the pan evenly.
Another alternative is using melted butter to grease your silicone baking pans. Butter adds a rich flavor to your baked goods and can enhance the overall taste. Before applying the melted butter, make sure it has cooled slightly to avoid damaging the silicone material. You can use a pastry brush or a paper towel to spread a thin layer of butter onto the pan. Remember not to use too much grease, as excess grease can cause your baked goods to become oily and heavy.
How to Grease Silicone Baking Pans
Greasing silicone baking pans is a straightforward process. Start by choosing the type of grease you want to use, such as vegetable oil, canola oil, or melted butter. Remember to avoid using cooking sprays with aerosol propellants, as they can leave a sticky residue on the silicone surface.
Next, take a pastry brush or a paper towel and dip it into the chosen grease. Ensure you have a thin and even layer of grease on the brush or towel. Then, gently brush or wipe the entire interior surface of the silicone baking pan, making sure to cover all corners and crevices.
Once you have applied the grease, you can proceed with filling the pan with your batter or dough. Follow the instructions of your recipe and bake the goods as directed. After baking, allow the pan to cool before removing the baked goods. The greased surface should help the baked goods release easily from the silicone pan without any sticking.
Silicone Baking Pans vs Paper Cups
Silicone baking pans and paper cups are both popular options for baking, but they have some differences worth considering. Silicone baking pans are reusable and durable, making them a cost-effective choice in the long run. They are also versatile, as they can be used for various baked goods like cakes, muffins, and bread. On the other hand, paper cups are disposable and convenient for quick clean-up, making them a popular choice for occasions when ease and convenience are prioritized.
When it comes to baking results, silicone pans offer even heat distribution, resulting in consistent and evenly baked goods. They also have a non-stick surface, reducing the need for greasing in most cases. Paper cups, while convenient, may require greasing to prevent sticking and can result in slightly uneven baking due to variations in paper thickness.
It’s important to note that personal preference and the specific recipe will also play a role in choosing between silicone baking pans and paper cups. Some bakers prefer the traditional look and feel of paper cups, while others appreciate the durability and easy release of silicone pans. Consider your baking needs, desired convenience, and desired baking results to make the best choice for your specific situation.
Note: It’s always a good idea to consult the manufacturer’s instructions and guidelines when using silicone baking pans to ensure proper usage and maintenance.
Best Practices While Using Silicone Molds
When using silicone molds, it’s important to follow some best practices to ensure successful baking results. Firstly, always place your silicone mold on a sturdy baking sheet before filling it with batter or dough. This provides stability and makes it easier to transfer the mold in and out of the oven.
Additionally, make sure to fill the silicone mold only up to the recommended level indicated by the manufacturer. Overfilling the mold can cause the batter to overflow and result in uneven baking or messy spills in the oven. Follow the recipe guidelines and leave some room for the batter to expand during the baking process.
Another key practice is to allow the baked goods to cool in the silicone mold for a few minutes before attempting to remove them. This helps the baked goods set and firm up slightly, making them easier to release from the mold. Gently press on the bottom of the mold or flex its sides to loosen the baked goods, and then carefully lift them out. Avoid using sharp utensils or knives that can damage the silicone surface.
Additional Tips and Tricks
- Always wash your silicone molds thoroughly before first use and after each subsequent use. Use warm soapy water and a soft sponge to clean them, and make sure to remove any leftover residue or crumbs.
- Avoid using abrasive cleaning tools or harsh chemicals that can damage the silicone material. Opt for gentle cleaning methods to preserve the longevity of your silicone molds.
- Store your silicone molds in a cool and dry place, away from direct sunlight. Avoid stacking them on top of each other to prevent any deformation or sticking between the molds.
- To prevent any potential transfer of flavors or odors, it’s a good practice to designate specific silicone molds for different types of baked goods. For example, have separate molds for sweet and savory items.
- If you’re baking delicate or intricate designs, consider lightly greasing the silicone mold even if it’s typically non-stick. This extra precaution can help ensure that the finer details release cleanly.
- Silicone molds can also be used for non-baking purposes, such as molding chocolate, making homemade soaps, or crafting decorative items. Just make sure to keep separate molds for food and non-food uses.
- When using silicone molds for frozen desserts or ice cubes, you can flex the mold slightly or run it under warm water to help release the frozen items more easily.
- If your silicone mold has a lid or cover, it can be useful for storing leftovers or for transporting baked goods without the need for an additional container.
- Consider using a silicone baking mat or parchment paper underneath your silicone mold for added stability and to catch any potential drips or spills during the baking process.
- Don’t place silicone molds directly on the stovetop or under the broiler. While silicone is heat-resistant, extreme temperatures can damage or warp the material.
- Silicone molds can be used in both conventional ovens and microwave ovens, making them versatile for different baking and cooking needs.
- Lastly, have fun experimenting with different recipes and shapes using your silicone molds. They provide endless possibilities for creative and unique baked goods.
Final Thoughts
Greasing silicone baking pans and cups is generally not required thanks to their natural non-stick properties. However, in certain cases, a light coating of oil or butter can prevent potential sticking, especially with recipes that contain sticky fillings or ingredients. Just remember to avoid cooking sprays with aerosol propellants, as they can leave unwanted residue.
When it comes to choosing between silicone baking pans and paper cups, consider your preferences and baking needs. Silicone pans offer durability, even heat distribution, and easy release, making them a cost-effective long-term investment. On the other hand, paper cups provide convenience and easy clean-up for quick baking sessions. Ultimately, the choice is yours based on your personal preferences and specific recipes.
To ensure success with silicone molds, follow best practices such as placing them on a baking sheet, filling them to the recommended level, and allowing baked goods to cool before removing. Additionally, keep your molds clean, store them properly, and consider using separate molds for different types of baked goods. And don’t forget to have fun and explore the many creative possibilities that silicone molds offer!
So, whether you decide to grease or not grease your silicone pans, or choose silicone molds over paper cups, remember that baking is a delightful journey of experimentation and enjoyment. Embrace the versatility and convenience that silicone baking tools provide, and let your creativity flourish in the kitchen. Happy baking!