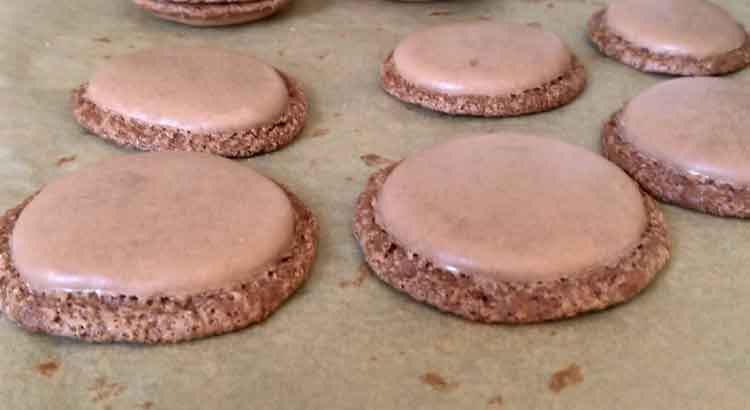
Are your macarons turning out disappointingly flat? Don’t worry; we’ve got the answers you need! In this article, we’ll uncover seven common reasons why your macarons might not be reaching those delightful heights you desire. Plus, we’ll share some simple fixes that will have you baking picture-perfect macarons in no time!
The simplest way to fix flat macarons is to ensure your egg whites are whipped to perfection. Beat them until stiff peaks form to incorporate enough air into the batter.
But wait, there’s more! In this article, we’ll not only address under-whipped egg whites but also dive into how piping, oven temperature, and more. So get ready to bake your way to macaron mastery!
Under-Whipped Egg Whites
When making macarons, egg whites are an essential ingredient. They create the delicate and airy texture we all love. However, if you don’t whip the egg whites enough, your macarons won’t rise properly. Whipping the egg whites incorporates air into them, and this trapped air expands when baking, giving your macarons their characteristic height.
To avoid flat macarons due to under-whipped egg whites, ensure you beat the egg whites to the right consistency. They should form stiff peaks, holding their shape when the whisk is lifted. If they are too runny or not well-whipped, your macarons won’t rise as expected. Take your time with this step, and you’ll be on your way to beautifully domed macarons!
Overmixed Batter
Another factor that can lead to flat macarons is overmixing the batter. Macaron batter should have a smooth, thick, and lava-like consistency when piped onto the baking sheet. However, if you overmix the batter, it becomes too thin, and the macarons won’t hold their shape during baking.
When combining the almond flour and powdered sugar with the whipped egg whites, it’s essential to fold the ingredients gently. Overmixing will deflate the air you worked so hard to incorporate during the whipping process, resulting in lackluster macarons.
To prevent this issue, fold the dry ingredients into the egg whites just until they are fully combined. You want to achieve the right balance between incorporating the dry ingredients and keeping the batter’s structure intact. Remember, a few extra folds can make a big difference!
Improper Piping Technique
Let’s dive into another reason why your macarons might be turning out flat: improper piping technique. Piping the macaron batter onto the baking sheet is a crucial step in achieving those picture-perfect, puffy macarons.
If you pipe the batter too close to the baking sheet or at an angle, it can cause the macarons to spread too much while baking. As a result, you’ll end up with flat and irregularly shaped macarons that don’t look as visually appealing as you’d hoped.
To avoid this mishap, use a piping bag fitted with a round tip, and hold it perpendicular to the baking sheet. Squeeze the batter gently and pipe evenly sized circles, leaving a bit of space between each one. This will allow the macarons to spread slightly without merging into each other.
Incorrect Oven Temperature
Let’s talk about another factor that affects your macaron success: oven temperature. Baking macarons at the wrong temperature can lead to disastrous results, including flat macarons.
If your oven is too hot, the macarons might develop a crust too quickly, trapping air inside. As the macarons continue to bake, the air expands and tries to escape, causing the macarons to crack or become unevenly shaped. On the other hand, if the oven temperature is too low, the macarons won’t rise and might remain flat.
To ensure the perfect temperature, invest in an oven thermometer to accurately gauge the heat. Preheat your oven to the specified temperature and allow it to stabilize before baking the macarons. This way, you’ll have more control over the baking process and can achieve those delightful, fluffy macarons you’ve been dreaming of.
Improper Resting Time
Let’s address another crucial aspect of macaron-making: resting time. After piping the macarons onto the baking sheet, you might be tempted to pop them right into the oven, but hold on! Allowing the macarons to rest for a bit before baking is essential for achieving that sought-after rise.
During the resting time, a thin, glossy layer forms on the surface of the macarons. This layer is known as the “skin.” It might sound strange, but trust me, it’s essential! The skin helps create a barrier that prevents the macarons from spreading too much during baking.
If you skip this resting step or don’t let the macarons rest long enough, they might not develop that protective skin, leading to flat and underwhelming results. On the other hand, if you let them rest for too long, the macarons could become overly dry, affecting their texture and rise.
The ideal resting time can vary based on factors like humidity and batter consistency, but a general rule is to let the macarons sit for about 30 minutes before baking. You’ll know they are ready when you can gently touch the tops without the batter sticking to your finger.
Humid Weather
Macarons are sensitive little treats, and they don’t particularly enjoy humid weather. High humidity levels in the air can add moisture to the macaron batter, making it more challenging for them to form that precious skin we talked about earlier. As a result, the macarons might spread too much, leading to flatness instead of those delightful peaks.
If you’re attempting to make macarons on a humid day, consider using a dehumidifier in your kitchen or waiting for a less humid day to try your hand at these delicate delights. Alternatively, you can try adjusting the amount of liquid in the batter to account for the extra moisture in the air.
Remember, don’t let a humid climate dampen your macaron-making spirit! With a little bit of planning and some adjustments, you can conquer any weather and bake stunning macarons that will impress everyone.
Incorrect Macaronage Technique
Macaronage is the process of folding the dry ingredients into the whipped egg whites to create the perfect macaron batter consistency.
If you undermix the batter during macaronage, it will be too thick and won’t spread well during baking, resulting in flat macarons. On the other hand, if you overmix the batter, it becomes too runny, and your macarons won’t hold their shape.
So, what’s the secret to achieving the right macaronage technique? It’s all about finding the sweet spot. You want the batter to flow like lava, smoothly and effortlessly when piped, but not too thin that it spreads uncontrollably.
Start by adding a portion of the dry ingredients to the whipped egg whites and fold gently. Repeat this process until the dry ingredients are fully incorporated. Test the batter’s consistency by lifting a small amount with the spatula—if it falls back into the bowl like thick ribbons and blends with the rest of the batter after about 20 seconds, you’ve nailed it!
Practice makes perfect with macaronage. Don’t get disheartened if you don’t get it right the first time. With each attempt, you’ll gain a better understanding of how the batter should look and feel.
Final Thoughts
We’ve covered a lot in our macaron journey, and now it’s time to wrap things up with some final thoughts. Making macarons can be a bit challenging, but don’t let that discourage you. With a little practice and some helpful tips, you’ll be creating macarons that will amaze your friends and family in no time!
Remember, when it comes to macarons, patience is the key. Take your time with each step, from whipping the egg whites to perfecting the macaronage technique. Rome wasn’t built in a day, and neither are perfect macarons! Don’t be afraid to try again if your first batch doesn’t turn out as expected. Every attempt is a learning experience, and each time, you’ll get a little closer to macaron perfection.
As you continue on your macaron-making adventure, don’t forget to have fun! Baking should be enjoyable and rewarding. Get creative with flavors and colors, experiment with different fillings, and make your macarons uniquely yours. And remember, even if they don’t turn out picture-perfect every time, they’ll still taste fantastic, and that’s what matters most.
Lastly, don’t be too hard on yourself. Baking can be tricky, and not every batch will be a total success. But that’s okay! The joy of baking lies not only in the final result but in the process itself. So, keep your chin up, and don’t give up. Soon enough, you’ll be impressing everyone with your gorgeous, delectable macarons!
Well, my friend, it’s been quite a journey through the world of macarons. I hope you’ve enjoyed our little baking adventure and that you feel more confident in your macaron-making skills. Remember, practice makes perfect, and there’s always room for improvement. So, keep practicing, keep experimenting, and keep spreading the sweetness of macarons to all those around you. Happy baking!
FAQ
As you delve deeper into the world of macarons, you might have some burning questions. Don’t worry; I’ve got you covered with answers to some frequently asked questions about making these delightful treats!
Q: Why do my macarons have hollow shells? A: Ah, the dreaded hollow shells! Hollow macarons occur when the interior of the shells doesn’t properly develop during baking. This could be due to a few reasons. One common cause is overmixing the batter, which leads to excess air trapped inside the macarons. Another factor might be baking at too high a temperature, causing the shells to rise too quickly and then collapse, leaving hollow spaces. To fix this, ensure you fold the batter just enough during macaronage and bake them at the right temperature to achieve those perfectly filled macarons.
Q: Can I use regular food coloring for macarons? A: Absolutely! Adding a pop of color to your macarons is a fun way to make them visually appealing. Regular liquid or gel-based food coloring works well. However, be cautious with the amount you use. A little goes a long way, and adding too much liquid can affect the macaron batter’s consistency, leading to flat macarons. To be safe, use gel-based colors or powder-based colors specially formulated for macarons.
Q: How do I store macarons? A: Storing macarons properly will help maintain their freshness and deliciousness. Once filled, keep your macarons in an airtight container in the refrigerator. They can stay fresh for up to 5-7 days. If you need them to last longer, you can freeze them for up to a month. Just make sure to place parchment paper between the layers to avoid sticking. Before serving, let the frozen macarons thaw in the refrigerator for a few hours.
Q: My macarons are too sticky and won’t come off the baking sheet. What should I do? A: Sticky macarons can be a challenge, but fear not! If your macarons are sticking to the baking sheet, they might not have baked long enough. Stickiness can also result from baking them in a humid environment. To fix this, try extending the baking time and make sure the macarons are fully set before removing them from the oven. If the humidity is a problem, use a dehumidifier or wait for a less humid day to bake your macarons.
Q: Can I freeze the macaron batter for later use? A: Freezing the macaron batter is not recommended, as it can negatively affect the batter’s consistency and lead to flat macarons. It’s best to prepare the batter and use it immediately. However, you can freeze the already baked and filled macarons, as mentioned earlier, to extend their shelf life.
I hope these answers help you on your macaron-making journey! Keep practicing, experimenting, and enjoying the process. Baking macarons can be both challenging and rewarding, and with time and dedication, you’ll become a macaron master in no time. Happy baking!