Are you tired of your gluten-free bread turning out dense and heavy? We’ve all been there! But fear not, because in this blog post, we’ll explore the reasons behind this common problem and provide you with practical solutions to fix it. So, let’s dive right in and discover how to make your gluten-free bread light and fluffy!
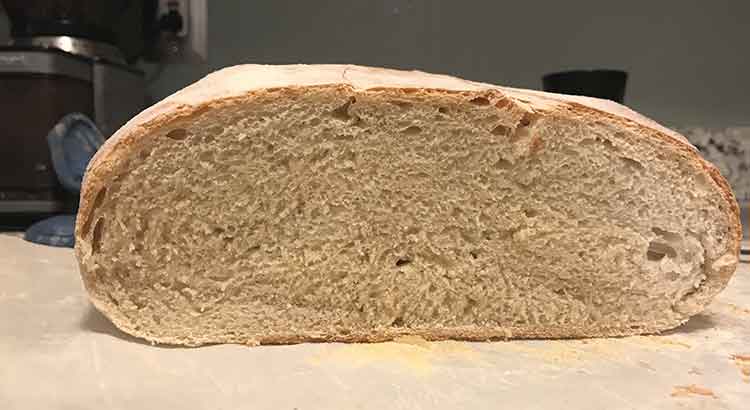
The main reason why gluten-free bread can be dense lies in the absence of gluten, the protein responsible for the structure and elasticity in traditional bread. Gluten-free flours lack the ability to trap air bubbles during the rising process, resulting in a denser texture.
In this article, we’ll address seven key reasons behind dense gluten-free bread and provide you with simple tips and techniques to fix each one. From issues with structure and binding agents to moisture levels, yeast problems, and mixing techniques, we’ll cover it all. By understanding these factors and implementing the suggested fixes, you’ll be on your way to enjoying delicious, bakery-worthy gluten-free bread with a light and airy texture. So, let’s get started and revolutionize your gluten-free bread baking experience!
Lack of Structure
Gluten, a protein found in wheat and other grains, is responsible for giving bread its structure and elasticity. When you remove gluten from the equation, achieving the same level of structure becomes a challenge. Gluten-free flours, such as rice flour, almond flour, or tapioca flour, lack the ability to trap air bubbles during the rising process, resulting in a denser texture.
To overcome this issue, consider incorporating ingredients that can improve the structure of your gluten-free bread. Xanthan gum and guar gum are commonly used binding agents that can help mimic the stretchy properties of gluten. Adding them to your recipe, usually in small quantities, can make a significant difference in the final texture of your bread.
Insufficient Binding Agents
Binding agents are crucial in gluten-free baking as they help hold the ingredients together. Apart from gums like xanthan gum and guar gum, you can also experiment with other natural binding agents. Chia seeds and ground flaxseeds, when combined with water, form a gel-like substance that can provide some structure to your bread. This gel helps retain moisture and acts as a binder.
To incorporate chia or flaxseeds into your bread recipe, mix them with warm water and allow them to sit for a few minutes until they develop a gel-like consistency. Then add this mixture to your dough. It’s important to note that the ratio of seeds to water may vary, so refer to your recipe or adjust accordingly.
Remember, binding agents are essential, but using too much can lead to a gummy or overly moist texture. It’s all about finding the right balance to achieve the desired results.
Too Much Moisture
One common culprit behind dense gluten-free bread is excessive moisture. Gluten-free flours tend to absorb more liquid than their wheat counterparts, which can lead to a heavy and wet texture. If your bread is turning out dense and gummy, here are a few things you can do to address the moisture issue.
First, make sure you’re using the correct ratio of liquid to flour in your recipe. Gluten-free flours may require more liquid to achieve the right consistency. However, it’s important not to go overboard. Start by following the recipe closely, and if your bread is still coming out too moist, gradually reduce the amount of liquid until you find the perfect balance.
Additionally, consider using ingredients that can help absorb excess moisture. Adding a tablespoon or two of psyllium husk powder or cornstarch to your dry ingredients can help bind the excess moisture and improve the structure of your bread. These ingredients act as thickeners and help create a lighter texture.
Lastly, pay attention to the dough’s consistency during the mixing process. Gluten-free bread dough should be slightly sticky but still hold its shape. If it’s too wet, add a bit more flour until it reaches the desired consistency. Avoid the temptation to add too much flour, as it can make the bread dry and crumbly.
Yeast Issues
Yeast plays a crucial role in bread-making, and problems with yeast activation or fermentation can result in dense gluten-free bread. Here are a few yeast-related issues to consider when troubleshooting your dense loaves.
Firstly, check the expiration date on your yeast. Expired yeast may not be as effective in leavening the bread, leading to a dense texture. Always use fresh yeast to ensure optimal results.
Secondly, activate the yeast properly. Yeast needs warm water and a bit of sugar to activate and produce carbon dioxide, which creates air bubbles and causes the bread to rise. Make sure the water is at the right temperature (around 110°F/43°C) and add a pinch of sugar to feed the yeast. Let it sit for a few minutes until it becomes frothy and bubbly. If your yeast doesn’t froth, it may be inactive, and you should start with a new batch.
Lastly, consider giving your bread dough enough time to rise. Gluten-free bread dough often requires longer rising times compared to traditional wheat bread. Allow the dough to double in size during the first rise, and give it adequate time to rise again after shaping it into a loaf. This allows the yeast to work its magic and helps create a lighter, less dense bread.
Inadequate Leavening Agents
Leavening agents, such as baking powder and baking soda, are responsible for creating the air pockets that give bread its light and fluffy texture. However, using inadequate or expired leavening agents can result in dense gluten-free bread. Here’s what you need to know about leavening agents and how to ensure they work their magic in your gluten-free baking.
Firstly, check the expiration dates on your baking powder and baking soda. Over time, these leavening agents lose their potency, making them less effective in creating the desired rise. If your bread consistently turns out dense, it may be time to replace your leavening agents with fresh ones.
Secondly, pay attention to the ratios of baking powder and baking soda in your recipes. Gluten-free flours often require additional leavening agents to compensate for the lack of gluten. If your bread is consistently dense, try increasing the amount of baking powder or baking soda by 25% to 50% to provide more lift.
Lastly, consider incorporating acidic ingredients into your recipe. Acidic ingredients, such as lemon juice, apple cider vinegar, or yogurt, react with the leavening agents and create carbon dioxide, which contributes to the rising process. Adding a tablespoon of an acidic ingredient to your dough can help improve the overall lightness of the bread.
Overmixing or Undermixing
The mixing process in gluten-free bread making is delicate, and both overmixing and undermixing can lead to dense results. Here’s why proper mixing is crucial and how you can find the right balance.
Overmixing the dough can result in excessive air incorporation and the development of a gummy texture. When using gluten-free flours, it’s important to mix the ingredients until they are just combined. Avoid vigorous stirring or using high-speed mixers, as this can lead to overmixing. Once the ingredients are incorporated, stop mixing and proceed with shaping and baking the bread.
On the other hand, undermixing can result in uneven distribution of ingredients and poor structure. Make sure all the ingredients are thoroughly mixed, paying extra attention to incorporating the binding agents evenly. Use a spatula or wooden spoon to gently fold the ingredients together until they are well combined.
Finding the right balance between overmixing and undermixing may require some experimentation. Take note of the texture and consistency of your dough and adjust your mixing technique accordingly. With practice, you’ll develop a feel for when the dough is properly mixed, resulting in lighter, less dense gluten-free bread.
Insufficient Proofing Time
Proofing is the process of allowing the bread dough to rise before baking. It’s an essential step in gluten-free bread making, as it gives the yeast time to ferment and create carbon dioxide, which contributes to a light and airy texture. Insufficient proofing time can lead to dense gluten-free bread. Here’s why proofing is important and how to ensure you give your bread dough enough time to rise.
Firstly, be aware that gluten-free bread dough generally requires longer proofing times compared to traditional wheat bread. Due to the absence of gluten, which provides structure and elasticity, gluten-free dough takes longer to rise and develop those desirable air pockets. Patience is key when it comes to proofing gluten-free bread.
To ensure adequate proofing, follow the recipe’s instructions regarding the suggested proofing time. However, keep in mind that the ambient temperature of your kitchen can affect the proofing process. In colder temperatures, the yeast activity slows down, resulting in a slower rise. If your kitchen is on the cooler side, consider creating a warm environment by placing the dough in a slightly warmed oven or near a warm spot in your kitchen.
When proofing, allow the dough to double in size during the first rise. This may take longer than you expect, so resist the temptation to rush the process. After shaping the dough into a loaf, let it rise again until it reaches the desired volume before baking. This second rise is equally important in ensuring a light and fluffy final texture.
By giving your gluten-free bread dough sufficient proofing time, you’ll allow the yeast to work its magic, resulting in a more open and airy crumb structure. Don’t rush this crucial step, and be rewarded with a less dense and more enjoyable gluten-free bread.
Final Thoughts
Congratulations! You’ve made it to the final section of our blog post on why your gluten-free bread may be dense and how to fix it. We’ve covered several reasons and provided practical solutions to help you achieve lighter and fluffier gluten-free loaves. As we wrap up, here are some final thoughts to keep in mind on your gluten-free bread baking journey.
Remember, gluten-free baking can be a bit tricky, and achieving the perfect texture takes practice and experimentation. Don’t get discouraged if your first few attempts result in dense bread. Baking is a wonderful combination of science and art, and it often requires adjustments to suit your specific ingredients, kitchen environment, and personal preferences. Embrace the learning process, and with each bake, you’ll gain valuable insights that will help you improve your gluten-free bread game.
Additionally, don’t hesitate to seek inspiration and guidance from fellow gluten-free bakers. Online communities, forums, and recipe websites can be a treasure trove of knowledge and ideas. Share your experiences, ask questions, and learn from others who have been on a similar gluten-free bread journey. The baking community is generally supportive and eager to help, so don’t be afraid to reach out and connect with others who share your passion for delicious gluten-free bread.
Lastly, enjoy the process and have fun with your gluten-free bread experiments. Baking is a wonderful way to express your creativity and nourish yourself and your loved ones. Celebrate the small victories along the way, whether it’s a loaf with a slightly improved texture or a new flavor combination that brings you joy. Remember, even if your bread turns out a bit dense, it can still be delicious and enjoyed in various ways, from toasting it for a crispy bite to using it as a base for tasty sandwiches or croutons.
FAQ
As we conclude our blog post on why gluten-free bread can be dense and how to fix it, we wanted to address some frequently asked questions that often arise when it comes to baking gluten-free bread. Let’s dive right in!
1. Can I substitute gluten-free flour 1:1 for wheat flour in bread recipes?
Unfortunately, it’s not as simple as a 1:1 substitution. Gluten-free flours behave differently than wheat flour due to the absence of gluten. To achieve a successful gluten-free bread, you’ll need to use a combination of gluten-free flours and starches, along with other ingredients such as binding agents, to create a texture similar to wheat bread. Experimenting with different flour blends and following gluten-free bread recipes specifically formulated for gluten-free flours will give you better results.
2. Why does my gluten-free bread have a crumbly texture?
A crumbly texture in gluten-free bread can be attributed to several factors. One common reason is the lack of binding agents or not using them in the right proportion. Binding agents such as xanthan gum or chia seeds help hold the ingredients together and provide structure. Additionally, overbaking can lead to a crumbly texture, so it’s important to follow the recommended baking time and temperature in your recipe. Lastly, insufficient moisture in the dough can also contribute to a crumbly texture, so ensure you’re using the appropriate amount of liquids.
3. How can I add flavor to my gluten-free bread?
Gluten-free bread can sometimes be perceived as lacking in flavor compared to traditional wheat bread. However, there are numerous ways to add delicious flavors to your gluten-free loaves. You can incorporate ingredients like herbs, spices, seeds, or nuts into the dough to enhance the taste. Additionally, experimenting with different gluten-free flour blends, such as buckwheat, quinoa, or sorghum, can bring unique flavors to your bread. Don’t forget the power of toppings and fillings too! From savory options like cheese and herbs to sweet additions like cinnamon and dried fruits, the possibilities are endless.
4. Can I freeze gluten-free bread?
Absolutely! Freezing gluten-free bread can be a convenient way to have bread readily available when you need it. Make sure your bread is completely cooled before freezing. Slice it if desired, then wrap it tightly in plastic wrap or place it in a freezer-safe bag. To thaw, simply remove the desired number of slices and let them thaw at room temperature or toast them for a warm and crispy bite.
5. Are there any additional tips for successful gluten-free bread baking?
- Measure your ingredients accurately. Gluten-free baking is precise, so using a kitchen scale for flour and other dry ingredients can yield more consistent results.
- Don’t skip the resting time. Letting your bread dough rest for a short period before shaping can improve its structure and make it easier to handle.
- Experiment with different recipes and flour blends. Every gluten-free flour has its unique characteristics, so trying various combinations can help you discover your preferred texture and flavor.
- Have patience and be persistent. Gluten-free baking may require some trial and error, but with practice, you’ll become more comfortable and confident in achieving excellent results.
We hope these answers to frequently asked questions have provided you with further insights and guidance in your gluten-free bread baking endeavors. Remember, practice makes perfect, so keep experimenting, learning, and enjoying the process. Happy baking!