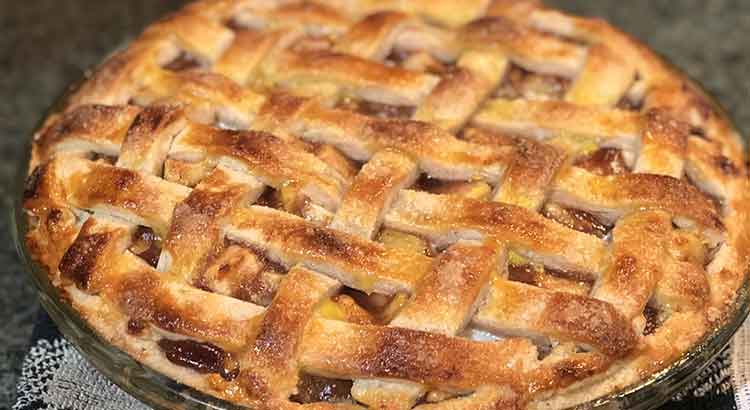
Do you love baking pies but often find yourself disappointed when the bottom crust doesn’t turn out as crispy as you’d like? Well, fret not! In this article, we’ll dive into the world of frozen pie crusts and explore seven common reasons why they may not cook properly on the bottom. So, let’s get ready to unravel the secrets to achieving that perfectly cooked pie crust!
The most common reason why your frozen pie crust is not cooked on the bottom is an incorrect oven rack position. By placing your pie on the lowest oven rack, closer to the heat source, you allow the bottom crust to crisp up and brown more quickly, preventing any dreaded sogginess. It’s a simple adjustment that can make a world of difference in the final result of your delicious pie.
But wait, there’s more! In this article, we’ll not only explore the impact of oven rack position but also dive into factors such as inadequate pie weight, the importance of blind baking and more. By understanding and addressing these factors, you’ll be well on your way to baking pies with delightfully cooked bottom crusts that will leave your taste buds craving more. So, let’s uncover the secrets and make your next pie a baking triumph!
Incorrect Oven Rack Position
One of the key reasons why your frozen pie crust may not be cooking properly on the bottom is due to an incorrect oven rack position. When the rack is placed too high in the oven, the bottom of the pie crust doesn’t receive enough direct heat, resulting in an undercooked or soggy crust.
To ensure your pie crust cooks evenly, it’s important to position the oven rack in the lower third of the oven. This allows the heat to circulate evenly and reach the bottom of the pie crust, promoting a golden and crispy texture.
If you find that your crust consistently comes out undercooked on the bottom, take a moment to check the placement of your oven rack. Adjusting it to a lower position can make a significant difference in the final result of your pie.
Inadequate Pie Weight
Another common reason for an undercooked bottom crust is inadequate pie weight. When baking a pie with a pre-made frozen crust, it’s essential to use pie weights or a weighted pie chain to prevent the crust from bubbling up and losing its shape during the baking process.
Pie weights are small ceramic or metal beads that can be placed on top of the crust before baking. They provide even pressure on the crust, preventing it from puffing up and ensuring it bakes evenly. If you don’t have pie weights, you can also use dried beans or rice as a makeshift alternative.
To properly use pie weights, line your frozen crust with parchment paper and fill it with the weights. Make sure to distribute them evenly across the entire crust. This will help keep the crust flat and in contact with the heat source, resulting in a thoroughly cooked bottom.
If you’ve been experiencing issues with your pie crust not cooking on the bottom, double-check that you’re using sufficient pie weights. They play a crucial role in achieving a perfectly baked pie crust.
No Blind Baking
Blind baking refers to the process of pre-baking the crust before adding the filling. It is a crucial step, especially when making pies with custard or fruit fillings that don’t require extended baking times. Failure to blind bake your frozen pie crust can lead to an undercooked bottom.
When you skip blind baking, the moisture from the filling seeps into the crust, making it soggy instead of crisp. To avoid this, blind baking is essential. It helps set the crust and create a barrier that prevents the filling from directly touching the dough.
To blind bake a frozen pie crust, start by preheating your oven according to the instructions on the package. Then, take the frozen crust and prick the bottom with a fork. This process, known as docking, allows steam to escape and prevents the crust from puffing up.
Next, line the crust with parchment paper or aluminum foil, making sure to cover the edges as well. Fill the lined crust with pie weights or dried beans to hold it in place during baking. Bake the crust in the preheated oven for the recommended time.
After blind baking, remove the weights and parchment paper, and let the crust cool slightly before adding the filling. This process ensures that the bottom crust is fully cooked and prevents it from becoming soggy when the filling is added.
Lack of Docking
Docking refers to the act of pricking the crust with a fork to create small holes. It serves two purposes: allowing steam to escape and preventing the crust from puffing up during baking. Neglecting to dock your frozen pie crust can result in an undercooked bottom.
When a pie crust bakes, steam forms between the layers of dough. Without docking, the steam gets trapped, causing the crust to rise and potentially leaving the bottom layer uncooked. By pricking the crust, you allow steam to escape and maintain a flat and evenly baked crust.
To dock your frozen pie crust, simply take a fork and gently poke it into the bottom and sides of the crust. Be sure to space the pricks evenly, covering the entire surface area. This process helps release steam and ensures a more consistent baking experience.
Docking is a quick and easy step that can make a significant difference in the texture and doneness of your pie crust. So, don’t forget to take a moment to dock your crust before baking. It’s a small but essential detail that contributes to a perfectly cooked bottom crust.
Improper Thawing
Thawing your frozen pie crust properly is crucial for achieving a fully cooked bottom. Improper thawing can result in uneven baking, with the bottom crust remaining undercooked. To ensure your pie crust cooks evenly, follow these steps for proper thawing:
- Read the package instructions: Different brands may have specific thawing instructions, so be sure to check the packaging for any recommended methods.
- Transfer to the refrigerator: The best way to thaw a frozen pie crust is to transfer it from the freezer to the refrigerator. Place the crust on a plate or a baking sheet to catch any condensation that may occur during the thawing process.
- Allow ample time: Thawing times can vary depending on the size and thickness of the crust. As a general guideline, allow the crust to thaw in the refrigerator overnight or for at least 4-6 hours.
- Avoid countertop thawing: While it may be tempting to speed up the process by thawing the crust on the countertop, this can lead to uneven thawing and potential bacterial growth. It’s best to stick with refrigerator thawing for food safety reasons.
By thawing your frozen pie crust properly, you give it a head start in the baking process and ensure that the bottom cooks through completely. Take the time to thaw the crust in the refrigerator, and you’ll be rewarded with a perfectly cooked bottom crust in your finished pie.
Thick Crust
A thick pie crust can be a delightful feature, but if it’s not cooked properly, the bottom can end up undercooked. Here are some factors to consider if you find yourself with a thick, undercooked crust:
- Adjust baking time and temperature: Thick crusts often require longer baking times to ensure even cooking. Increase the baking time slightly, keeping an eye on the crust’s color and texture. Lowering the oven temperature slightly can also help prevent excessive browning while allowing the bottom to cook thoroughly.
- Par-bake the crust: Par-baking, also known as pre-baking or pre-cooking, involves partially baking the crust before adding the filling. This technique can help ensure that the thick crust is fully cooked on the bottom. Follow the instructions for blind baking mentioned earlier, but reduce the blind baking time to achieve a partially cooked crust.
- Consider a thinner crust: If you consistently struggle with undercooked bottoms in thick crusts, you might want to experiment with a thinner crust. Using less dough or rolling it out more thinly can help promote better heat distribution and ensure that the bottom cooks through.
Insufficient Preheating
Insufficient preheating of the oven is a common culprit behind undercooked bottom crusts in frozen pies. Preheating is the process of allowing the oven to reach the desired temperature before placing the pie inside. Insufficient preheating can result in uneven heat distribution, leading to a partially cooked or soggy bottom crust.
To ensure your frozen pie crust cooks evenly, follow these steps for sufficient preheating:
- Read the recipe or package instructions: Different pies may require different oven temperatures. Refer to the recipe or package instructions for the recommended temperature.
- Allow ample preheating time: Preheating the oven takes time, so be patient. Depending on your oven, it may take around 15-20 minutes or longer to reach the desired temperature. Allow the oven to fully preheat before placing the pie inside.
- Use an oven thermometer: Oven thermostats can sometimes be inaccurate, leading to temperature variations. To ensure the oven is truly at the desired temperature, consider using an oven thermometer. This will help you achieve more precise and consistent results.
- Place the pie in the center of the oven: For even heat distribution, position the pie in the center of the oven. This allows the heat to surround the pie from all sides, including the bottom, promoting thorough cooking.
Final Thoughts
Achieving a fully cooked bottom crust in your frozen pie requires attention to detail and a few key considerations. By addressing the following factors, you can greatly improve your chances of baking a pie with a deliciously crispy and cooked bottom.
Firstly, ensure that your oven rack is positioned correctly. Placing it in the lower third of the oven allows for even heat distribution and ensures that the bottom crust receives adequate direct heat. This simple adjustment can make a significant difference in the final outcome of your pie.
Secondly, don’t forget the importance of proper pie weights and docking. Using pie weights or weighted chains helps prevent the crust from bubbling up during baking, while docking allows steam to escape and maintains a flat crust. These techniques work together to promote even baking and a thoroughly cooked bottom crust.
Additionally, pay attention to the thawing process for your frozen pie crust. Thawing it properly in the refrigerator ensures that it is evenly thawed before baking, avoiding any potential issues with an undercooked bottom crust.
Remember, baking a perfect pie crust takes practice and experimentation. Don’t be discouraged if you encounter a few mishaps along the way. With each attempt, you’ll gain valuable experience and insights to refine your techniques and achieve the desired results.
So, roll up your sleeves, preheat that oven, and embark on your pie-baking adventures. With the knowledge and tips shared in this article, you’re well on your way to mastering the art of a fully cooked bottom crust. Happy baking!
FAQ
1. Why is my frozen pie crust not cooking on the bottom?
There could be several reasons for this issue. One common reason is an incorrect oven rack position. Make sure the rack is placed in the lower third of the oven to ensure even heat distribution and proper cooking of the bottom crust. Another possibility is insufficient pie weight. Using pie weights or a weighted chain during baking helps prevent the crust from puffing up and ensures thorough cooking. Additionally, skipping blind baking, where the crust is pre-baked before adding the filling, can result in an undercooked bottom crust.
2. How can I prevent a soggy bottom crust in my frozen pie?
To prevent a soggy bottom crust, consider blind baking your frozen pie crust before adding the filling. This process involves pre-baking the crust without the filling to create a barrier and ensure a crisp bottom. Docking the crust by pricking it with a fork also helps release steam and prevent puffing, which can lead to sogginess. Proper thawing is important too. Thaw the frozen crust in the refrigerator to maintain its structure and avoid excess moisture.
3. Can I use alternative methods to thaw my frozen pie crust?
While thawing in the refrigerator is the recommended method, there are alternative options if you’re short on time. One method is placing the frozen crust on the countertop for a shorter period, although this can result in uneven thawing and potential bacterial growth. Another method is using a microwave on the defrost setting, but be cautious as it can partially cook the crust. Whichever method you choose, ensure the crust is fully thawed before baking to avoid an undercooked bottom.
4. What should I do if my pie crust is too thick and not fully cooked on the bottom?
If your pie crust is consistently thick and undercooked on the bottom, try adjusting the baking time and temperature. Increase the baking time slightly to allow for thorough cooking, while monitoring the crust’s color and texture to prevent excessive browning. You can also consider par-baking the crust, partially baking it before adding the filling. Additionally, experimenting with a thinner crust by using less dough or rolling it out more thinly can promote better heat distribution and ensure a fully cooked bottom.
5. How can I tell if my pie crust is fully cooked on the bottom?
A fully cooked bottom crust should be golden brown and crisp. To check if it’s done, carefully lift the edge of the pie crust with a spatula or fork and inspect the color and texture. If it appears pale and soggy, it needs more time to bake. Keep in mind that baking times may vary depending on the recipe and oven, so it’s important to rely on visual cues and personal judgment to determine if the bottom crust is fully cooked.
Hopefully, these frequently asked questions and their answers have shed some light on the common issues faced when baking a frozen pie crust. With these tips and techniques, you’ll be better equipped to overcome challenges and achieve a fully cooked, delightful pie with a perfectly crispy bottom crust. Happy baking!