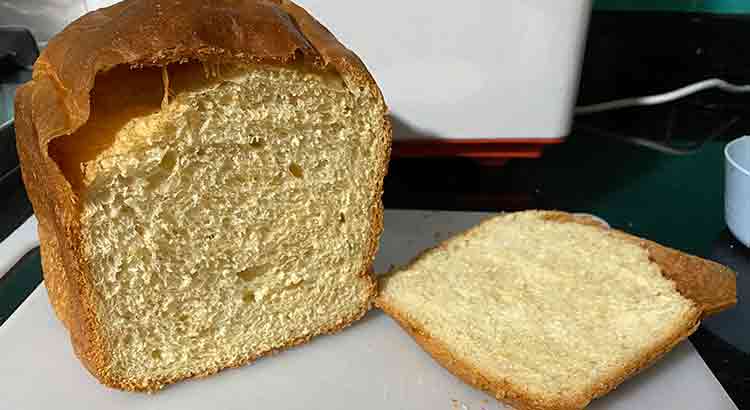
Have you ever eagerly awaited the moment when your breadmaker would churn out a heavenly loaf of homemade bread, only to be left disappointed by its dense and heavy texture? We feel you! It can be disheartening when your bread turns out less fluffy and more like a brick. But fear not, because we’re here to help you troubleshoot and fix this common issue.
One of the most common reasons why breadmaker bread turns out too dense is not using the correct flour types. Different flour types will make bread with different textures. If you use a different type of flour than the one in the recipe, your bread could turn out dense.
In this article, we’re going to explore nine possible reasons why your breadmaker bread might be turning out too dense, and of course, we’ll share some practical tips on how to fix it. From yeast choices to kneading techniques and ingredient measurements, we’ll dive into the nitty-gritty details that can make all the difference between a dense loaf and a light, airy masterpiece. So, let’s get started on this breadmaking adventure together and turn those heavy bricks into heavenly, fluffy loaves that will have you coming back for seconds!
1. Use Active Dry Yeast Instead of Instant Yeast
While both active dry yeast and instant yeast serve the same purpose of leavening bread dough, their properties differ slightly, and this can have a significant impact on the final result.
Active dry yeast requires proofing in warm water before being added to the dough, allowing it to activate and start the fermentation process. On the other hand, instant yeast can be added directly to the dry ingredients without proofing.
The key difference lies in the moisture content. Active dry yeast has a higher moisture content, and this additional moisture can lead to better yeast activation and a lighter, fluffier bread. So, if you find your bread consistently turning out dense, consider switching to active dry yeast and proofing it before incorporating it into your dough. It might just be the secret to achieving that airy, perfectly textured loaf you’ve been dreaming of.
2. Were the Kneading Paddles Engaged Correctly?
The kneading process is crucial when it comes to breadmaking. It helps develop the gluten in the dough, which gives the bread its structure and elasticity. However, if your bread is turning out dense, it’s worth checking whether the kneading paddles in your breadmaker are properly engaged.
Breadmakers typically come with removable paddles that are inserted into the baking pan. These paddles are responsible for kneading the dough during the mixing cycle. If the paddles are not engaged correctly or are not properly aligned with the dough, it can result in uneven kneading and ultimately lead to a dense loaf. So, before you start your breadmaker, double-check that the paddles are securely attached and positioned properly. Taking this simple step can make a world of difference in achieving a lighter, more airy texture in your homemade bread.
3. Using the Correct Flour Type
Choosing the right flour for your bread is another factor that can greatly impact its density. Different types of flour have varying protein contents, which affect gluten development and ultimately the texture of the bread. If you consistently end up with dense loaves, it might be worth evaluating the flour you’re using.
For breadmaking, it is generally recommended to use bread flour or all-purpose flour with a higher protein content. These flours have more gluten-forming proteins, allowing for better structure and a lighter texture in the final bread. On the other hand, using cake flour or low-protein flours can result in a denser loaf. So, the next time you’re at the grocery store, be sure to reach for a flour specifically designed for breadmaking. It can make a significant difference in the quality and texture of your homemade bread.
4. Using Too Much Flour
Using too much flour is a common mistake that can result in a disappointing bread texture. When we add excessive flour to the dough, it can lead to a lack of hydration, hindering the yeast’s activity and gluten development.
To avoid this issue, it’s important to measure your flour accurately. Using a kitchen scale is the most precise method, but if you don’t have one, make sure to use the fluff-and-scoop method. First, fluff up the flour in the bag or container to loosen it. Then, gently scoop the flour into a measuring cup, without packing it tightly, and level it off with a straight edge. This method helps prevent compacting the flour, ensuring you use the right amount for a properly hydrated dough. By using the correct flour measurement, you’ll give your bread the chance to rise and achieve the light and airy texture you desire.
5. Is the Size of the Recipe Within the Manufacturer’s Recommendation?
Breadmakers often come with recommended recipes and instructions from the manufacturer. These guidelines include the specific measurements and ingredients for optimal results. However, sometimes we might be tempted to modify the recipe by increasing or decreasing the quantities without considering the potential impact on the bread’s texture.
If your bread consistently turns out dense, it’s worth revisiting the manufacturer’s recommendations for the recipe size you’re using. Altering the quantities too drastically can throw off the balance of ingredients and result in a heavier loaf. Pay attention to the recommended flour, water, yeast, and other ingredients to ensure you’re within the suggested range. Following the manufacturer’s instructions closely can help you achieve the desired texture and consistency in your homemade bread.
6. Not Using Enough Yeast or Leavening Agent
Yeast is the magical ingredient that makes bread rise and gives it its light and fluffy texture. However, if you find your bread turning out dense, it’s possible that you’re not using enough yeast or leavening agent in your recipe. Insufficient yeast can lead to slower fermentation, resulting in a denser loaf.
To avoid this issue, make sure you measure your yeast accurately and follow the recipe guidelines. Using a kitchen scale is the most precise method, but if you’re using teaspoons or packets, be sure to level them off without packing. Additionally, pay attention to the expiration date on your yeast. Expired yeast may not be as potent and could affect the bread’s rising ability. By using the appropriate amount of yeast or leavening agent, you’ll give your dough the boost it needs to rise and achieve that light and airy texture you crave in your homemade bread.
7. Was the Water Hot?
When it comes to breadmaking, the temperature of the water plays a crucial role in activating the yeast and promoting fermentation. If the water is too hot, it can kill the yeast, resulting in a dense and heavy loaf. On the other hand, if the water is too cold, the yeast may not activate properly, leading to poor fermentation and a lack of rise in the dough.
To ensure the water temperature is just right, aim for warm water that feels slightly above body temperature when you touch it. A good range is usually between 100°F to 110°F (37°C to 43°C). If you don’t have a kitchen thermometer, you can test the water on your wrist—it should feel warm but not uncomfortably hot. By using water at the correct temperature, you’ll create an ideal environment for the yeast to thrive and help your bread achieve a lighter, more desirable texture.
8. Bad Hydration Level
The hydration level of your bread dough refers to the ratio of water to flour. It plays a significant role in determining the final texture and structure of the bread. If the hydration level is off, either too high or too low, it can result in a dense loaf.
If your bread consistently turns out dense, consider adjusting the hydration level of your dough. A higher hydration level, with more water relative to flour, can lead to a lighter and airier texture. However, it also requires a different approach to kneading and shaping the dough due to its stickier consistency.
Conversely, a lower hydration level, with less water, can result in a denser bread with a tighter crumb. Experiment with different hydration levels within the recommended range for your chosen recipe and find the sweet spot that yields the desired texture in your homemade bread.
9. Bad Measurements
Accurate measurements are essential in baking, including breadmaking. Using the wrong amounts of ingredients can throw off the balance of the dough and result in a dense and heavy loaf. Whether it’s flour, water, yeast, or other ingredients, precision matters.
To ensure you’re using the right measurements, it’s recommended to use a kitchen scale whenever possible. This ensures accuracy and consistency in your baking. If a scale is not available, be sure to use the appropriate measuring tools, such as measuring cups and spoons, and level off the ingredients. Avoid packing the flour or cramming the ingredients into the measuring cups, as it can lead to excess amounts. Taking the time to measure each ingredient properly will help you achieve better results and a lighter texture in your homemade bread.
That concludes our exploration of reasons behind dense bread and how to fix them. With these tips and adjustments, you’ll be well on your way to baking delicious, light, and airy loaves that will impress your family and friends. Happy breadmaking!
Final Thoughts
Breadmaking can be a delightful and rewarding experience, but it can also come with its fair share of challenges. If you’ve been struggling with dense bread, don’t be discouraged! With a few adjustments and some experimentation, you can achieve that light and fluffy loaf you’ve been dreaming of.
Remember to pay attention to the little details that can make a big difference. From using the right yeast and engaging the kneading paddles correctly to choosing the appropriate flour and measuring ingredients accurately, each step plays a role in the final outcome. Be patient with yourself and allow room for trial and error. It’s all part of the learning process.
So, roll up your sleeves, dust off that breadmaker, and give it another go! Take these tips to heart and embark on a breadmaking adventure. And don’t forget to enjoy the journey. There’s something truly magical about the smell of freshly baked bread and the satisfaction of slicing into a perfectly textured loaf. Happy baking, and may your future loaves be light, airy, and utterly delicious!