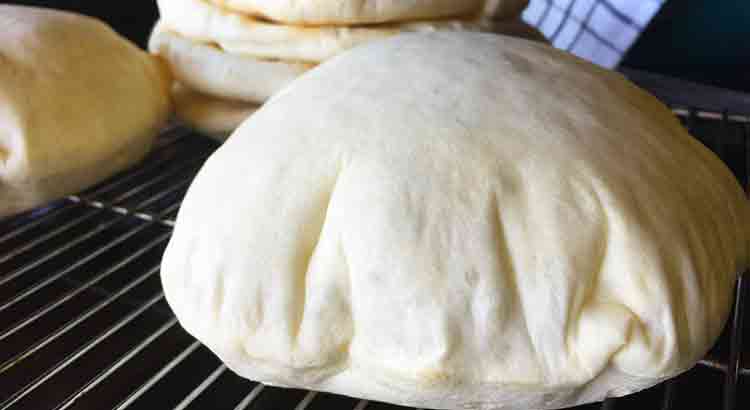
We all know that moment of anticipation when we eagerly open the oven, hoping to find beautifully inflated pitas, only to be met with disappointment. But fear not, my friends! There are several factors that can contribute to flat pitas, and understanding them is the first step towards making those pitas rise to the occasion.
One of the most common reasons why your pita bread is not puffin up is kneading the dough too much. When you overwork the dough, it looses its elasticity, making it unable to properly poof up while it’s being cooked.
From over-kneading the dough to not using enough yeast or not having a hot enough cooking surface, we’ll explore the five most common reasons why your pita bread isn’t puffing up. So, grab your apron, dust off your rolling pin, and let’s embark on a journey to puffy pita perfection!
Kneading the Dough Too Much
One common mistake that can lead to flat pitas is over-kneading the dough. While it’s important to develop gluten in the dough for proper texture, excessive kneading can actually make the bread dense and prevent it from puffing up. When you knead the dough too much, you’re effectively breaking down the gluten strands, making them less elastic and unable to trap air during baking.
To fix this issue, it’s best to knead your pita dough just until it reaches a smooth and slightly elastic consistency. Avoid the temptation to keep kneading for a longer time. By being gentle and stopping at the right point, you’ll give your pitas a better chance of puffing up nicely in the oven.
Not Enough Yeast
Another reason why your pita bread might not be puffing up is that you haven’t used enough yeast in your recipe. Yeast is responsible for the fermentation process, creating carbon dioxide gas that causes the dough to rise. If you don’t use enough yeast, the dough won’t have enough gas production to create the desired puffiness in the oven.
To remedy this problem, make sure to follow the recipe instructions accurately when measuring yeast. Use the recommended amount or consider using a little extra yeast if you’re uncertain. Additionally, ensure that your yeast is fresh and active by proofing it in warm water before adding it to the dough. This step will help activate the yeast and ensure proper fermentation.
Pan Not Hot Enough
Even if you’ve nailed the dough consistency and used the right amount of yeast, your pita bread might still fall flat if your cooking surface is not hot enough. Pitas need a burst of high heat to create the steam necessary for them to puff up in the oven. If the pan or oven temperature is too low, the bread won’t receive the instant heat it needs to expand rapidly.
To fix this issue, preheat your oven or stove top pan to a high temperature before baking the pitas. A hot cast-iron skillet or baking stone in the oven works particularly well. This initial blast of heat will give your pita bread the best chance of puffing up beautifully. Remember to handle the hot pan or stone with care and follow any safety instructions specific to your cooking equipment.
Using Too Much Flour
Another reason why your pita bread might not be puffing up like it should is if you’re using too much flour during the dough-making process. While flour is essential for binding the ingredients and giving structure to the bread, going overboard can weigh down the dough and hinder its ability to rise.
To avoid this pitfall, it’s crucial to measure your flour accurately. Spoon the flour into your measuring cup rather than scooping it directly from the bag, as this can lead to compacted flour and an excess amount. Gradually add the flour to the dough, paying attention to its consistency. The dough should be slightly sticky, but still manageable. If you notice it becoming too dry or stiff, add a little bit of water to bring it back to the right balance. Remember, a lighter dough means a better chance of achieving those puffy pitas!
Not Letting the Dough Rest
Another possible problem could be that you’re not allowing the dough to rest adequately. Resting or proofing the dough allows the yeast to work its magic, developing flavor and creating those lovely air pockets that give pita bread its characteristic puffiness.
After kneading the dough, it’s crucial to let it rest in a warm, draft-free spot for a sufficient amount of time. This typically ranges from 1 to 2 hours, depending on the recipe and ambient temperature. During this resting period, the yeast ferments the dough, producing carbon dioxide that will expand the bread when it bakes. Be patient and give the yeast the time it needs to work its wonders. Trust me, the results will be worth it!
Final Thoughts
And there you have it, we’ve explored five common reasons why your pita bread might not be puffing up as desired, and I’ve shared some handy tips on how to fix these issues. Remember, achieving that delightful puffiness in your pitas is all about finding the right balance in your dough, giving it the time it needs to rest and rise, and ensuring a hot cooking surface.
Baking pita bread can be a delightful and rewarding experience, even if it takes a bit of practice to get it just right. Don’t be disheartened if your first few attempts don’t turn out exactly as you envisioned. Baking is a journey of learning and improvement, and with each batch of pitas, you’ll gain valuable insights that will bring you closer to puffy perfection.
So, my fellow pita enthusiasts, I encourage you to keep experimenting, tweaking your technique, and enjoying the process. With a little patience, practice, and a touch of love, you’ll soon be savoring homemade pita bread that’s fluffy, flavorful, and absolutely irresistible. Happy baking, my friends, and may your pita bread always puff up to new heights of deliciousness!

