Pizza is one of the most beloved and versatile foods in the world. Whether you prefer a classic Margherita or a loaded meat lover’s pizza, the crust is the foundation that sets the stage for all the delicious toppings. One of the most important factors that affect the texture and flavor of the crust is the pizza dough proofing temperature.
The best temperature range for proofing pizza is dough is between 75°F to 85°F (24°C to 29°C) at a humidity of 75%. This temperature range encourages the yeast to ferment and produce carbon dioxide, which causes the dough to rise.
In this beginner’s guide, we will explore everything you need to know about pizza dough proofing temperature. We’ll cover the best temperature for proofing pizza dough, different types of proofing, humidity, how to test if your pizza dough has proofed, and more!
Best Temperature for Proofing Pizza Dough
The ideal temperature for proofing pizza dough is between 75°F to 85°F (24°C to 29°C). This temperature range encourages the yeast to ferment and produce carbon dioxide, which causes the dough to rise.
If the temperature is too low, the yeast will ferment too slowly, resulting in a dense and under proofed dough. If the temperature is too high, the yeast will ferment too quickly, causing the dough to overproof and lose its structure.
It’s important to note that the best temperature for proofing pizza dough may vary depending on the type of yeast you’re using, the desired rise time, and the hydration level of the dough. So, while there is an overall optimal range, the bet temperature might change depending on the situation, and the type of rise that you need.
Different Types of Proofing
The temperature at which you proof pizza dough can affect the type of rise you achieve. Two common types of rises are slow rise and fast rise.
Slow Proofing
A slow proofing is achieved by proofing the dough at a lower temperature for an extended period. This method allows the yeast to ferment more slowly, resulting in a more complex flavor and a more open crumb structure.
A slow proofing is ideal for dough made with sourdough or natural yeast, which requires more time to ferment than commercial yeast. You can achieve a slow rise by proofing the dough in a cool place or in the refrigerator.
As for how low the temperature can be, basically anything over a freezing temperature will work.
Most pizzerias, use this type of proofing, and let their doubt in the fridge overnight.
Fast Proofing
A fast proofing is achieved by proofing the dough at a higher temperature for a shorter period.
This method speeds up the fermentation process and is ideal for dough made with commercial yeast.
A fast proofing produces a less complex flavor and a denser crumb structure than a slow rise. You can achieve a fast rise by proofing the dough in a warm place or using a proofing box.
As for the temperature, you can co as high as you want, as long as the dough doesn’t start baking.
How to Test if Your Pizza Dough Has Proofed
There are two simple tests that you can use to see if your dough has proofed enough. Ant they are called the poke test and the float test.
The Poke Test
This is extremely simple, you just have to slightly poke your dough and see how it reacts.
- If the dough bounces back quickly, it still needs some more time to proof.
- If the dough slowly gets back to its original shape, then it proofed for long enough, and it’s time to use it to make some pizza.
- If the dough doesn’t get back to its original shape, it means that it spent too much time proof, which is not ideal, but you can still make some good pizza with it.
The Float Test
Fill a glass with water and take a small piece of your dough and gently put it in the glass. If the dough floats, it means that it has proofed for enough time, and you can start making your pizza. If the dough floats, it means that you either have to let it rise for a little longer or that it has risen for too long.
Bulk Proofing vs Single Dough Balls
When proofing pizza dough, you can choose to do so in two ways. You can either let it proof in bulk, or you can make multiple dough balls. So which one is the best?
Bulk is ideal for making larger quantities of pizza dough, as it allows for even roofing and consistent results.
Proofing in single dough balls is ideal for smaller quantities of dough, as it allows you to control the proofing of each portion individually and customize the proofing time based on the dough’s size.
But other than this, there is no major difference. Both methods are very effective, so you can choose whichever is more convenient for you.
Proofing vs Rising
Proofing, rising, fermenting, resting, all of them mean the same thing when making pizza.
Over the years, bakers have used those different terms, to refer to the different rises that a dough has to go through. But even then they were not always used consistently.
Pizza has to rise, or proof only once, so no matter what term you use, it’s still the same process.
And even for more complex recipes, where the dough has to be proofed multiple times, you will see terms like, the second proofing, or the second rise.
So, for all intent and purpose, all those terms means the exact same thing.
Different Methods for Controlling Pizza Dough Proofing Temperature
There are several methods you can use to control the temperature during pizza dough proofing. One of the simplest ways is to use a warm spot in your kitchen, such as a sunny windowsill or the top of your refrigerator.
You can also use a proofing box or a warm oven with the light on, which can help maintain a consistent temperature. Another option is to use a dough proofer, which is a specialized appliance designed specifically for proofing dough.
If you want to take things to the next level, you can use a temperature-controlled fermentation chamber, which allows you to set and maintain the exact temperature and humidity levels for your dough. These chambers are especially useful if you plan on making large quantities of pizza dough or if you want to experiment with different fermentation temperatures.
While temperature is a very important factor when it comes to dough proofing, it’s not the only one. Just as important is the humidity.
Proofing Humidity
In addition to temperature, humidity also plays a crucial role in pizza dough proofing. The ideal humidity level for proofing pizza dough is around 75%. If the humidity is too high, the dough’s surface may become sticky, and it will be challenging to work with. Conversely, if the humidity is too low, the dough may dry out and form a skin, preventing it from rising properly.
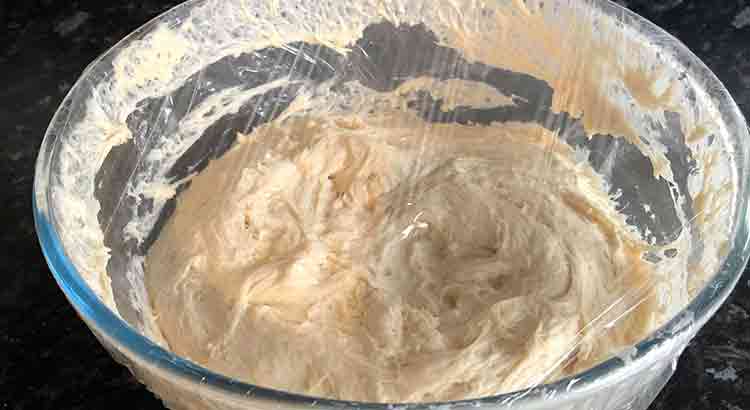
One way to maintain the ideal humidity level is to cover the dough with a damp cloth or plastic wrap during proofing. This helps to prevent the surface from drying out and provides the necessary moisture for proper fermentation. You can also use a proofing box or a proofer with a built-in humidifier to control the humidity level during proofing.
Why Pizza Dough Proofing Temperature Matters
Pizza dough proofing temperature is critical to achieving the perfect rise and texture in your pizza crust. If the temperature is too low, the dough will rise too slowly, and the crust will be dense and heavy. On the other hand, if the temperature is too high, the dough will rise too quickly, and the crust will be thin and airy, lacking in structure and flavor.
By maintaining the optimal proofing temperature, you can ensure that the yeast in the dough ferments at the right rate, creating the perfect balance of flavor and texture in the crust. Whether you’re using a slow rise or a fast rise method, adjusting the temperature to suit your dough will result in a delicious pizza crust.
Final Thoughts
Pizza dough proofing temperature is a critical factor in achieving the perfect crust for your homemade pizza. By understanding the different types of rises, testing for proofing, avoiding common mistakes, and using the right methods for controlling the temperature, you can create a delicious pizza crust that rivals your favorite pizzeria.
Remember that pizza dough proofing is not an exact science, and you may need to experiment a bit to find the perfect temperature and humidity levels for your dough. Don’t be afraid to try different methods and adjust the temperature as needed until you find what works best for you. With a bit of practice and patience, you’ll be able to create delicious homemade pizza that will impress your family and friends.
Common Questions
Can I proof pizza dough in the oven? If the oven is turned off, then yes. If the oven is on, then no.
If you do decide to try proofing pizza dough in a heated oven, it’s important to use the lowest possible temperature and cover the dough with a damp towel to help retain moisture. However, it’s generally best to use a different method for proofing pizza dough to ensure a light, airy crust.
Should you punch down pizza dough? In general, punching down pizza dough is not necessary or recommended. While this step may have been included in older recipes as a way to release gas and redistribute ingredients, modern pizza dough recipes are designed to develop gluten and trap gas naturally during the proofing process. Punching down the dough can disrupt this process and lead to a less desirable texture in the final crust.
Instead of punching down pizza dough, it’s better to handle it gently and shape it into the desired form before the final rise. This allows the dough to continue developing gluten and trap gas naturally, which leads to a more airy and flavorful crust. If you find that your pizza dough is rising too quickly or unevenly, you can adjust the proofing temperature or time, or try using a different type of yeast. However, punching down the dough should not be necessary if the dough is properly proofed and handled with care.
Do you knead pizza dough after proofing? After proofing pizza dough, it’s generally not necessary to knead it again. Kneading is an important step in developing gluten and ensuring a light, airy texture in the final crust, but it should be done before the proofing process. During proofing, the dough is left to rest and rise, allowing the yeast to produce carbon dioxide and develop flavor. Kneading the dough again at this stage can disrupt this process and lead to a less desirable texture in the final crust.
Instead of kneading pizza dough after proofing, it’s better to handle it gently and shape it into the desired form before baking. This can involve stretching the dough by hand or using a rolling pin, depending on your preference and the type of crust you’re going for. It’s important to handle the dough gently and avoid overworking it to ensure a light, airy texture in the final crust.
Overall, if you’ve proofed your pizza dough properly, there’s no need to knead it again. By handling it gently and shaping it carefully, you can create a delicious, flavorful crust that’s perfect for your favorite toppings.