Sourdough bread has a reputation of being hard to make at home. But I believe this reputation is not deserved.
Sourdough bread is not hard to make, the overall process is not complicated, but it can take a few hours. It all comes down to the recipe that you are using, some of them are very simple, while some of them are more complex.
There are a lot of misconceptions about the complexity of sourdough bread, and while some of them are partially true, most of them are overblown. So let’s have a look at them and see how hard it actually is to make sourdough bread.
Let’s start with the beginning, the sourdough starter, as you can’t make sourdough bread without a starter
Is It Hard to Maintain the Sourdough Starter?
This is probably what keeps most people away from making their own sourdough bread, as having to take care of the starter might seem like a real hassle. But it’s actually really simple.
You might have heard that starters have to be fed (add new water and flour) daily, but this is only partially true.
From my 8 years of making sourdough, I can tell you that starters are not as fragile as people make them out to be. The only time that you must be consistent with the feeding is the first week, after that the starter will have started maturing, and it won’t be affected if don’t follow an exact feeding schedule.
Even if you forget to feed it for a day or two, there won’t be any big problem, just start feeding it again and the starter will be back to full strength in just a few days, no harm done.
And regarding the daily feeding, you don’t have to feed the starter daily. If you store it in the fridge you will slow down the fermentation process, and you will only need to feed it once every two or three days.
Or if you want to get rid of the whole feeding hassle, you could freeze it. In order to do this, you will have to make a starter and feed it daily for a while, two weeks should be enough then you can take some sealable bags and portion the starter. When you want to make sourdough bread, take one bag out, wait for the starter to defrost, and feed it regularly for a couple of days so it can get back to shape, then you can use it to bake.
As you can see, having a sourdough starter doesn’t necessarily mean that you have to take care of it daily. The only period when you have to be extra careful with it is the beginning, but after a week or two, you are allowed to make some mistakes. And if you don’t want to do this at all after this point you can simply freeze it.
Making Sourdough Bread Is Not Time Consuming
Another reason why people dismiss the idea of making sourdough bread at home is the fact that it requires a lot of time.
And that is true, sourdough bread really does take a lot of time to make, but it’s not time consuming at all. In some cases you won’t have to spend more than 10 minutes working on the bread, 99% of the time the dough will be rising.
At the end of the article I will give you my own sourdough bread recipe, that only requires 10 minutes of hands-on work, but until then let’s continue discussing other reasons why sourdough bread is actually not that hard to make.
Sourdough Bread Doesn’t Require a Strict Schedule
Another big turn-off is that making sourdough bread seems to require a strict schedule, but again, this is not the case.
Most recipes will tell you that you need to let the dough rise for 2 hours, after which you have to stretch and fold 6 or 8 times, every 15 minutes, and then let it rise for another 12 hours, or something like that. But in reality, you don’t really have to do that, and certainly not at those exact same time intervals.
As you will see in the recipe at the end of the article, you can simply mix the ingredients and let the bread rise without touching it at all. And while it’s good to follow the time mentioned in the recipe, it’s not entirely required.
One extremely important thing that I learned about sourdough bread is that the most important thing is fermentation. The fermentation process that makes the sourdough starter rise and fall, happens in the dough as well. And just like in the case of the starter you can place the dough at a lower temperature, to slow down the fermentation process, or you could place it somewhere warmer to speed up the process.
So by adjusting the temperature you can make a 2-hour rise into an 8-hour rise or more. This way you can easily make sourdough bread even on a normal workday.
You Don’t Need Any Skill to Make Sourdough Bread
You’ve probably seen a few videos on youtube of people making sourdough bread and came to realize that you actually need some skillet to handle the dough correctly.
I have to admit that even now I found a lot of the things that I see in those videos intimidating, and I’ve been doing them for years. But despite this, everything that you see is really easy to do and doesn’t require any particular skill.
The dough itself is very elastic but resistant, and it’s really easy to handle. And while it needs one or two minutes of kneading until it’s completely malleable, everything is very easy to do.
You Can Be Flexible With the Measurements
Measurements are very important, but slightly more or slightly less won’t impact the recipe.
The first thing that you have to know about measuring ingredients is that it’s better to use grams, as they are more precise. The simplest way to measure them is with a scale, If you already own one, but it doesn’t measure in grams you should check the back of the scale and see if you can change the measuring unit. I didn’t know about this button and almost bought a new scale, so make sure you check first.
Another option is to use a measuring cup. Just make sure that you use one that has separate markings for flour, and for liquids. As one cup of flour is not the same as one cup of water. The “cup” measurement is used for volume, while grams measure weight. But as long as you don’t mix things up you can use a measuring cup instead of a scale, but in my opinion, using a scale is so much simpler, and it’s a good thing to have in a kitchen.
Adding 10 or 20 more grams of flour to your recipe won’t affect it at all, the same goes for water, and for the starter. In the worst-case scenario, if you add too much of an ingredient, you can simply add a little more of the rest.
So, while it’s a good idea to follow the exact measurements of the recipe, there is no problem if you add a little more or less of something, and if the dough doesn’t look as it should you can always add a little more flour or water.
Complicated Terminology
Some people can be slightly unlucky when they start looking into sourdough bread, as they end up on forums or recipe sites that use slightly complicated terminology. Even if you are not one of those unlucky people, you will most likely end up seeing a few of those words, so I will quickly go over some of the most common.
Autolyse – the 15 to 30 minute time period after mixing the flour and water, but before adding salt and yeast. This helps gluten development.
Banneton/Proofing Basket – a basket in which you let the bread rise. If you don’t own one you can use any bowl in your house and put a towel in it.
Bacteria – these are good bacteria that naturally live in/on flour, and they are the sole reason why sourdough bread is possible.
Crumb – it refers to the texture and the inside of the bread.
Discard – the part of the starter that you throw out when you add new water and flour.
Fermentation – the process of yeast consuming the sugar and starch found in the flour, and producing carbon dioxide and alcohol
Lame – the tool to score or slash dough.
Levain – the french name of a raising agent like baking soda, yeast, or sourdough starter, in this case.
Oven Spring – the rapid rise of yeast bread once it enters an oven.
Pre-ferment – a portion of the flour, water, and yeast in a recipe that’s mixed and allowed to ferment in before it’s mixed with the rest of the dough.
Proof – the final rise of dough before baking.
Scoring/Slashing – making cuts on the surface of a loaf before baking it. This will guide the expansion of the loaf, and it will give it a nice model.
Starter – A mix of flour and water that’s been left to ferment for a long period of time.
While those are not all the specific terms used in sourdough bread making, they are the most common.
Sourdough Bread Is Slightly Harder to Make Than Traditional Bread
While overall sourdough bread is not that hard to make, compared to traditional bread it is slightly harder, but not by much.
What makes sourdough bread slightly more complicated than traditional bread is the fact that it uses the starter as a growing agent, rather than commercial yeast, and the fact that it requires more time.
But as we discussed, the majority of the time is dedicated to the growth of the dough, and the starter only requires minimal care. Traditional bread can be made quickly (for a bread) and without having to be wary about any kind of starter.
But even so, you have to know that over time things will get a lot easier.
It Gets Easier Over Time
If you haven’t made any kind of bread until now, the first time won’t necessarily be hard, but probably not easy. But the second time you do it, things will get a lot better, by the third time you will be able to make sourdough bread without any effort. And I’m not exaggerating at all.
If you think about it there are very few steps in making sourdough bread, regardless of the recipe you choose. And those steps usually are kneading the dough, and shaping it. So there is no reason why you shouldn’t be able to master them after 2 or 3 tries. As I said some recipes will have some extra steps, but even those are not complicated, and you will have no problem mastering them.
And now, let me tell you my extremely simple sourdough bread recipe.
Simple Sourdough Bread Recipe
This is the simplest sourdough bread recipe that I could create. It has as few steps as possible, without sacrificing any taste or texture, and it’s the perfect recipe for a beginner.
Even if you don’t plan on following this recipe, you will still get an idea of how “hard” it’s to make sourdough bread.
Ingredients
500 grams of white flour
350 grams of water (room temperature)
50 grams starter
10 grams salt
Step 1 – Mixing
The best time to use a starter is right when it reaches its peak, if you want to know how to know exactly when a starter has reached its peak check out this article: When Will a Sourdough Starter Reach Its Peak? (With Pictures), but this is not a must, using it at its peak will give you the best taste and texture, but even if you use it before or after you should still get a great sourdough bread.
Pour the water and the starter into a bowl and mix them together until the starter is evenly spread, this way you won’t have to knead as much.
Now add the flour and salt and mix the dough for 2 or 3 minutes
Step 2 – The First Rise
Now cover the bowl with some plastic wrap and let it rise for 9 to 10 hours, at room temperature. Letting the dough rest for one or two more or less should be no problem at all.
If you want to increase the rising time to 24 hours, for example, you should place the dough in the fridge. If you want to reduce the time just keep it in a warm environment.
Step 3 – Pre-Shaping
After the time has passed is time to pre-shape the dough.
Normally, at this part it is advisable to not use any extra flour, but if you use this dough you can go ahead and as much flour as you need, just don’t go overboard.
This part requires you to do a few stretches and rolls. This means that you have to slightly pull and then roll back the dough. And after you do this a couple of times you should start shaping your dough.
Here is a great video that will show you a few techniques in which you can do this:
Step 4 – The Last Rise
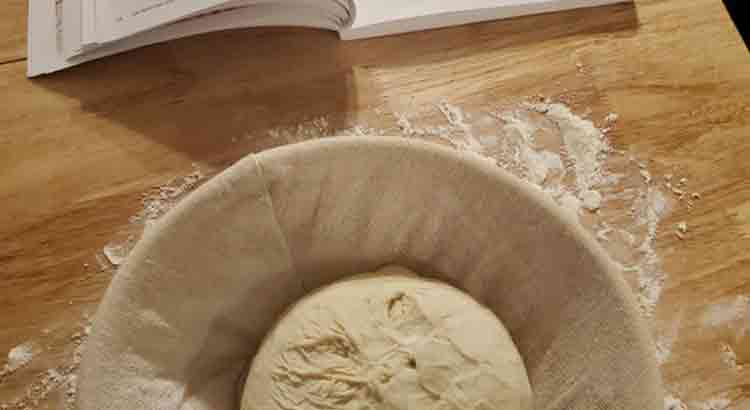
Now place your dough in a proofing basket, if you don’t have one you can use a bowl with a cotton kitchen towel in it. And make sure to sprinkle some flour before you put it in, regardless of what you are using.
At this point, you have two options. You can either leave it in the fridge for 12 to 24 hours (in my opinion 16 hours is the sweet spot), or you can let it rise at room temperature for 4 to 6 hours. The choice is up to you.
Step 5 – Baking
Preheat your oven at 430°F (220°C).
While your oven is heating up it’s time to take the bread out of the bowl/basket and score it.
I usually put some baking paper on my baking tray, then place the tray on top of the bowl, and then flip it over, this is much simpler than taking the dough out and then moving it to the tray.
Now it’s time to score the bread. I usually just cut a long straight line in the bread, but you can do something more artistic if you want.
Here is a video showing you 12 different ways in which you can score sourdough bread:
And if you don’t have a razor blade, you can always use a knife.
After you are done scoring and the oven is preheated, put the bread inside and let it cook for 30 to 45 minutes or until golden brown.
Step 6 – Let the Bread Rest
Despite what it might seem like, resting is a very important step. While your bread might look completely cooked, the inside is partially raw at this point. So you should let your bread rest for about 2 hours, to get the most out of it.
If you want to know why this is the case and see some pictures of what will happen if you don’t let your bread rest enough you should check out my article: How Long Should I Let My Sourdough Bread Rest? (+Pictures).
Final Thoughts
As you can see, making sourdough bread is not hard, but it will take a while.
Traditional bread can be made faster, but traditional bread and sourdough bread are not the same thing, so I don’t think it’s a good comparison, even though both of them are bread.
Overall, even the most complicated recipes won’t require more than 30 minutes of work, the bulk of the time is spent waiting for the dough to rise.
What puts most people off is the starter, but even there you don’t have to spend more than 2 minutes a day feeding it, and if you forget to feed it for a day or two there is no problem.
So, in the end, I would say that making sourdough is not hard, but it can take time.