Have you ever marveled at perfectly shaped cakes, muffins, or chocolates and wondered how they achieved such professional results? Well, wonder no more! Silicone molds are the secret behind those impeccable creations.
Not only are they non-stick and easy to clean, but they also offer flexibility and versatility like no other baking tool. Whether you’re aiming for elegant cakes, adorable cupcakes, or intricate chocolate designs, silicone molds have got you covered. So, let’s roll up our sleeves, put on our aprons, and embark on a baking journey that will leave us with treats that are not only scrumptious but also visually stunning!
How to Use Silicone Baking Molds
1. Grease the Silicone Mold
One of the great advantages of silicone molds is their non-stick properties, which eliminate the need for excessive greasing. However, it’s still recommended to lightly grease the mold to ensure easy release of your baked goods. Use a small amount of cooking spray or brush a thin layer of vegetable oil or melted butter onto the mold’s surface. This step will further enhance the mold’s non-stick capabilities and make it easier to remove your baked creations.
2. Place on Top of a Baking Sheet
To provide stability and prevent any potential spillage or deformation of the silicone mold, it’s advisable to place it on top of a sturdy baking sheet. This will also ensure an even distribution of heat during baking and help maintain the shape of your baked goods. The baking sheet acts as a support system and allows for easy transfer of the mold in and out of the oven.
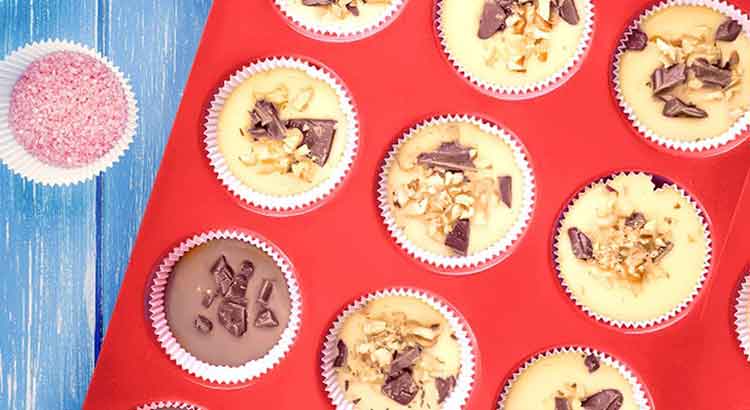
3. Pour the Batter
Once the silicone mold is prepared and secured on the baking sheet, it’s time to pour in the batter. Whether you’re making cakes, muffins, or other treats, fill each cavity of the mold to the desired level. Silicone molds are known for their flexibility, so you can use a spatula or spoon to smooth the surface and distribute the batter evenly. Be mindful not to overfill the cavities, as the batter may rise during baking and overflow.
4. Bake as Usual
When it comes to baking with silicone molds, you can follow your usual recipe and baking instructions. Silicone molds are oven-safe and can withstand a wide range of temperatures. Place the baking sheet with the silicone mold in the preheated oven and set the timer according to your recipe. Keep an eye on the baking progress through the oven window or by periodically opening the oven door if necessary. Once the baking time is complete, remove the baking sheet from the oven and allow the silicone mold to cool slightly.
5. Let It Cool
After removing the silicone mold from the oven, it’s essential to let it cool before attempting to remove your baked goods. The cooling process allows the structure of the baked goods to set and firm up, making it easier to remove them without any damage. Place the silicone mold on a wire rack and let it cool for the recommended time stated in your recipe. The cooling time may vary depending on the type and size of the baked goods.
6. Clean It Thoroughly
Once you’ve successfully removed your baked creations from the silicone mold, it’s important to clean it thoroughly. Silicone molds are known for their easy cleanup. Wash the mold with warm soapy water, using a sponge or a soft cloth to gently remove any residue. Rinse the mold thoroughly and ensure it is completely dry before storing it. Avoid using abrasive scrubbers or sharp objects that may damage the surface of the mold. By maintaining proper cleaning habits, your silicone molds will last for a long time and continue to be a reliable baking tool.
Should You Spray Silicone Molds When Baking?
The non-stick properties of silicone molds make them a popular choice among bakers. But do you still need to spray them with cooking spray? The short answer is no, it’s not necessary. Silicone molds are designed to be non-stick, and greasing them can sometimes lead to a greasy residue on your baked goods. However, if you prefer the extra assurance, you can lightly spray the mold with cooking spray or brush a thin layer of oil or melted butter. Just remember to use a minimal amount to avoid affecting the texture and appearance of your baked treats.
Do You Put Silicone Bakeware Directly on the Oven Rack?
When using silicone bakeware, it’s generally recommended to place it on a baking sheet or tray rather than directly on the oven rack. This is especially true for larger silicone molds, as they may become unstable and difficult to handle if placed directly on the rack. Placing the silicone bakeware on a baking sheet provides stability, prevents any potential spillage, and ensures even heat distribution during baking. It also makes it easier to transfer the mold in and out of the oven without the risk of damaging your baked goods or getting burned.
How Do You Get a Cake Out of a Silicone Mold?
Getting a cake out of a silicone mold can be a breeze if you follow these simple steps:
- Allow the cake to cool completely in the silicone mold. This ensures that the cake has set and will hold its shape when you remove it.
- Gently press on the sides of the mold to release any air pockets and loosen the cake from the sides.
- Place a cutting board or a flat plate on top of the silicone mold.
- Holding both the mold and the board/plate securely, flip them over in one smooth motion. The cake should release easily onto the board/plate.
- If the cake doesn’t come out right away, give the mold a gentle tap or wiggle it slightly to encourage the release.
- Carefully lift the silicone mold off the cake. If there are any stubborn spots, use a silicone spatula or your fingers to gently peel them away.
- Your cake is now ready to be served or decorated as desired. Enjoy!
Other Tips and Tricks
- Always follow the recommended baking time and temperature stated in your recipe when using silicone molds.
- To prevent spills and ensure even baking, place the silicone mold on a baking sheet or tray before adding the batter.
- Avoid using sharp utensils or metal objects that could scratch or damage the silicone mold. Stick to silicone or plastic tools instead.
- When making intricate designs or shapes with silicone molds, it can be helpful to freeze the mold for a few minutes before filling it with batter. This helps the batter maintain its shape during baking.
- For muffin or cupcake silicone molds, consider using a scoop or a piping bag to fill each cavity neatly and evenly.
- If you’re making a layered cake or a cake with multiple parts, ensure that each layer or component is completely cooled before assembling them to avoid any collapse or melting.
- Experiment with different flavors, fillings, and decorations to unleash your creativity with silicone molds. They are versatile and can create stunning desserts.
- Before purchasing silicone molds, make sure they are labeled as food-grade and BPA-free to ensure they are safe for baking.
- After using a silicone mold, store it in a clean and dry place to maintain its shape and durability. Avoid folding or squishing the mold.
- If your silicone mold has an unpleasant odor, wash it with warm soapy water and let it air dry. The odor should dissipate over time.
- Consider investing in a variety of silicone molds in different shapes and sizes to expand your baking possibilities.
- Don’t limit yourself to just cakes! Silicone molds can also be used for making chocolates, ice cubes, jellies, and even homemade soap.
Final Thoughts
Whether you’re making cakes, muffins, or even chocolates, these versatile molds can help you achieve impressive results. Just remember to lightly grease the molds or skip the greasing altogether, place them on a baking sheet for stability, pour in your batter with care, and bake as usual. Once your baked goods are done, let them cool completely before gently releasing them from the mold. And don’t forget to clean your silicone molds thoroughly for their long-lasting performance.
As you gain experience and confidence, you might even find yourself experimenting with different flavors, fillings, and decorations to create stunning desserts that will impress your friends and family. Don’t be afraid to explore various shapes and sizes of silicone molds, and consider trying your hand at making chocolates, jellies, and more. The possibilities are truly endless!
So, my baking buddy, it’s time to dust off those silicone molds, gather your ingredients, and embark on a delicious baking adventure. Enjoy the process, embrace your creativity, and most importantly, savor the sweet rewards that come out of your oven. Happy baking!