Are you a waffle enthusiast eager to create perfect, golden-brown waffles that make your taste buds dance with joy? Look no further! This step-by-step guide will walk you through using the Cuisinart Waffle Maker like a pro, from preheating to pouring the batter and achieving delicious results every time.
But that’s not all! In this article, we’ll cover essential tips to prevent sticking, check for doneness, and serve your delicious waffles with an array of delectable toppings. Plus, we’ll address frequently asked questions to troubleshoot any waffle-making challenges you may encounter.
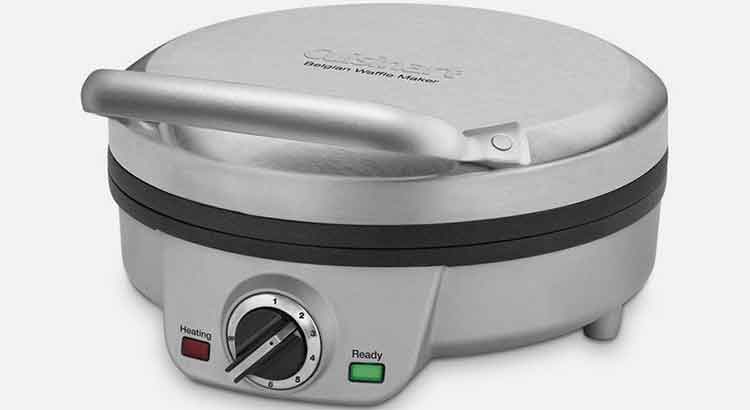
Step 1: Preheat the Waffle Maker
The first crucial step in making delicious waffles is to preheat the Cuisinart Waffle Maker properly. Before you start, make sure your waffle maker is clean and ready to use. Plug it into a power outlet and turn it on. Most Cuisinart Waffle Makers have indicator lights that will let you know when it’s ready. Wait for the indicator light to turn green or go off; this means the waffle maker has reached the desired temperature.
Preheating is essential because it ensures that your waffles cook evenly and have a crispy exterior while staying soft and fluffy inside. It usually takes a few minutes to preheat, so you can use this time to prepare the waffle batter.
Step 2: Prepare the Waffle Batter
While your Cuisinart Waffle Maker is preheating, it’s time to prepare the waffle batter. The recipe for waffle batter is quite simple and can be adjusted to suit your taste preferences. Here’s a basic waffle batter recipe:
- 1 ¾ cups all-purpose flour
- 2 tablespoons granulated sugar
- 1 tablespoon baking powder
- ¼ teaspoon salt
- 1 ¾ cups milk
- 1/3 cup vegetable oil
- 2 large eggs
- 1 teaspoon vanilla extract (optional)
To make the batter, start by combining the dry ingredients in a mixing bowl: flour, sugar, baking powder, and salt. In a separate bowl, whisk together the milk, vegetable oil, eggs, and vanilla extract (if using). Gradually add the wet mixture to the dry ingredients, stirring until you have a smooth batter.
Now that your batter is ready and the waffle maker is preheated, it’s time to pour the batter into the waffle maker and cook your waffles to perfection. But that’s a topic for the next steps!
Step 3: Grease the Waffle Plates
Greasing the waffle plates is an essential step to prevent your waffles from sticking and ensure easy removal once they’re cooked. Even if your Cuisinart Waffle Maker has a non-stick surface, adding a little extra grease is always a good idea to guarantee perfect waffles every time.
To grease the waffle plates, you can use cooking spray, melted butter, or vegetable oil. Using a pastry brush or a paper towel, apply a thin layer of grease to the plates. Make sure to coat all the nooks and crannies to avoid any potential sticking.
Step 4: Pour the Batter
Now that your waffle plates are greased and your batter is ready, it’s time to pour the batter into the Cuisinart Waffle Maker. Open the waffle maker and carefully pour the batter onto the center of the bottom plate. The amount of batter you pour will depend on the size of your waffle maker and how thick you want your waffles to be.
Once the batter is in place, close the waffle maker gently. The batter will spread out naturally towards the edges, so there’s no need to worry about spreading it manually. The waffle maker’s design ensures that the batter is evenly distributed, resulting in perfectly shaped waffles.
Now, all you have to do is wait for your waffles to cook. The indicator lights on the Cuisinart Waffle Maker will help you keep track of the cooking process. Typically, it takes about 4 to 5 minutes to get golden-brown waffles, but cooking times may vary depending on your waffle maker model and personal preferences.
Avoid opening the waffle maker too soon, as this can disrupt the cooking process and lead to undercooked waffles. Be patient and let the magic happen inside the waffle maker!
Congratulations! You’ve successfully preheated your Cuisinart Waffle Maker, prepared the waffle batter, greased the waffle plates, and poured the batter. Now, it’s time to enjoy the delightful rewards of your efforts – delicious homemade waffles!
Step 5: Close the Waffle Maker
Closing the waffle maker properly is essential to ensure that the batter cooks evenly and results in perfectly shaped waffles. Once you’ve poured the batter onto the bottom plate, close the Cuisinart Waffle Maker gently but firmly. The top lid should come down to meet the bottom plate, encasing the batter between the two waffle plates.
Make sure not to press down too hard, as this can cause the batter to ooze out from the sides, leading to uneven cooking and messy waffles. The waffle maker’s hinge is designed to keep the plates firmly in place, so you don’t need to apply excessive force.
Step 6: Cook the Waffle
Now comes the exciting part – cooking the waffle! Once the waffle maker is closed, the magic begins. The heat from the plates cooks the batter, transforming it into a delightful golden-brown waffle with a crisp exterior and a fluffy interior.
As mentioned earlier, cooking times may vary depending on your waffle maker model and personal preferences. The indicator lights on the Cuisinart Waffle Maker are your best friends during this step. They’ll help you keep track of the cooking process without the need to constantly open the waffle maker and peek inside.
While your waffle is cooking, you might notice a mouthwatering aroma filling your kitchen. This is a sure sign that your waffle is on its way to becoming a delicious treat! Avoid the temptation to open the waffle maker prematurely, as doing so can disrupt the cooking process and result in undercooked waffles.
Once the indicator light signals that your waffle is ready, carefully open the waffle maker. You should see a beautifully cooked waffle, ready to be enjoyed. Use a non-metallic utensil, like a silicone spatula or wooden tongs, to gently remove the waffle from the plates. The non-stick surface and greasing should make the waffle easy to lift off without any sticking.
Step 7: Check for Doneness
Checking for doneness is a crucial step to ensure that your waffle is perfectly cooked and ready to be enjoyed. The indicator lights on the Cuisinart Waffle Maker give you a good idea of when the waffle is done, but it’s always a good idea to double-check for visual cues.
Open the waffle maker and take a peek at your waffle. A well-cooked waffle should have a golden-brown color on the outside and should be slightly crispy to the touch. If you prefer a darker or crispier waffle, you can close the waffle maker and let it cook for a little longer.
To avoid overcooking your waffle, it’s a good idea to keep track of the cooking time. If you’re making multiple waffles, you can start a timer after closing the waffle maker for the first batch. This way, you’ll have a reference point for subsequent batches.
Step 8: Remove and Serve
Once your waffle is cooked to perfection, it’s time to remove it from the waffle maker and serve it up! Using a non-metallic utensil, carefully lift the waffle from the plates. The non-stick surface should make this process smooth and easy.
Place the waffle on a plate and get ready to customize your delicious creation. Waffles are incredibly versatile, and you can serve them in various ways to suit your taste. Here are some popular topping ideas to consider:
- Classic Combo: Drizzle your waffle with maple syrup and top it with a dollop of whipped cream or a pat of butter for a traditional and delightful treat.
- Fresh Fruits: Add a burst of freshness by topping your waffle with sliced strawberries, blueberries, or bananas. You can also add a sprinkle of powdered sugar for an extra touch of sweetness.
- Nutty Delight: Sprinkle chopped nuts like almonds, pecans, or walnuts over your waffle for a delightful crunch and nutty flavor.
- Indulgent Indulgence: For a decadent treat, spread Nutella or chocolate spread over your waffle and add some chocolate chips or mini marshmallows.
- Savory Twist: If you prefer savory waffles, top them with fried chicken, bacon, or a fried egg for a mouthwatering combination of sweet and savory flavors.
The possibilities are endless, and you can get as creative as you like with your waffle toppings. Once you’ve added your favorite toppings, it’s time to dig in and enjoy your homemade waffle creation!
Step 9: Cleaning the Waffle Maker
Congratulations on creating a batch of delicious waffles with your Cuisinart Waffle Maker! As you relish the delightful flavors, it’s essential to remember that proper cleaning and maintenance are key to keeping your waffle maker in top-notch condition for future waffle-making adventures.
Cleaning your waffle maker is relatively simple, and following these steps will ensure that it stays pristine and ready for the next use:
- Unplug and Cool Down: Before you begin the cleaning process, make sure to unplug your waffle maker and allow it to cool down. Safety always comes first!
- Remove Excess Crumbs: Gently open the waffle maker and use a soft brush or cloth to remove any loose crumbs or excess batter from the plates. This prevents any build-up and ensures a clean surface for your next waffle batch.
- Wipe with Damp Cloth: Take a damp cloth or sponge and wipe down the plates and exterior of the waffle maker. Avoid using abrasive sponges or harsh cleaning agents, as they can damage the non-stick surface.
- Clean Hard-to-Reach Areas: If there are stubborn residues stuck in the nooks and crannies of the waffle plates, use a soft toothbrush or a wooden toothpick to gently remove them.
- Deep Cleaning Option: For a more thorough cleaning, you can occasionally remove the waffle plates (if your waffle maker allows it) and wash them separately in warm, soapy water. Be sure to follow the manufacturer’s instructions for safe removal and reattachment of the plates.
- Dry Thoroughly: After cleaning, make sure to dry the waffle plates and exterior thoroughly before storing the waffle maker. Moisture can lead to rust or damage, so it’s essential to keep it dry.
- Store Properly: Once your waffle maker is clean and dry, store it in a cool and dry place. If possible, store it upright to save counter space.
Remember, regular cleaning and maintenance not only ensure the longevity of your waffle maker but also contribute to the quality of your waffles. A clean waffle maker prevents any unwanted flavors from previous uses and guarantees a fresh and delightful waffle experience every time.
Final Thoughts
Mastering the art of using the Cuisinart Waffle Maker is a delightful journey that leads to mouthwatering waffle creations. With the step-by-step guide provided, you can confidently prepare perfect waffles every time, bringing joy and satisfaction to your breakfast or brunch table. Remember to start by preheating the waffle maker, ensuring it reaches the right temperature for evenly cooked waffles. Then, prepare the waffle batter, combining simple ingredients to create a delicious base for your waffles.
Greasing the waffle plates is a crucial step to prevent sticking and ensure easy removal, while pouring the batter evenly onto the plates guarantees well-shaped and fluffy waffles. Once the waffle maker is closed, the magic begins, and your kitchen fills with the delightful aroma of freshly baked waffles. Be patient during the cooking process, relying on the indicator lights to gauge doneness accurately.
When your waffle is ready, unleash your creativity with a variety of toppings, from classic syrup and whipped cream to indulgent chocolate spreads or savory combinations. The possibilities are endless, allowing you to tailor your waffle to your taste preferences. As you savor the goodness of your homemade waffles, don’t forget to properly clean and maintain your Cuisinart Waffle Maker, ensuring it remains in excellent condition for future waffle-making endeavors.
Embrace the joy of waffle making, experimenting with different flavors and toppings to craft the perfect waffle experience for yourself and your loved ones. Whether you’re a beginner or a seasoned waffle enthusiast, the Cuisinart Waffle Maker is a reliable kitchen companion that promises delectable results with every use. So, gather your ingredients, preheat the waffle maker, and let your culinary journey begin! Enjoy the process, relish the aroma, and indulge in the satisfaction of creating scrumptious homemade waffles that bring smiles to all who taste them. Happy waffle making!
FAQ
Q: Can I use pancake batter in the Cuisinart Waffle Maker?
A: Yes, you can use pancake batter in the waffle maker, but there are a few things to keep in mind. Pancake batter is generally thinner than waffle batter, so your waffles may turn out thinner and less fluffy than traditional waffles. To get better results, try adding a little more flour to the pancake batter to thicken it up before pouring it into the waffle maker.
Q: How do I prevent my waffles from sticking to the plates?
A: Preventing sticking is essential for easy waffle removal and a pleasant cooking experience. First, make sure to properly grease the waffle plates with cooking spray, melted butter, or vegetable oil before pouring the batter. Additionally, avoid opening the waffle maker too soon during cooking, as this can cause the waffle to tear and stick to the plates. Once the indicator light signals that the waffle is done, gently lift it off with a non-metallic utensil to avoid scratching the non-stick surface.
Q: Can I freeze leftover waffles for later?
A: Absolutely! Freezing leftover waffles is a great way to enjoy them on busy mornings or as a quick snack. Allow the waffles to cool completely before placing them in a single layer on a baking sheet. Freeze the waffles for about an hour, and then transfer them to an airtight container or resealable plastic bags. Frozen waffles can be reheated in a toaster or toaster oven, making them a convenient and delicious option for a quick breakfast or snack.
Q: My waffles are turning out unevenly cooked. What should I do?
A: Uneven cooking can happen for various reasons. First, ensure that you have evenly distributed the batter on the waffle plates before closing the waffle maker. If your waffle maker has adjustable temperature settings, try adjusting the heat to achieve more even cooking. It’s also essential to follow the recommended cooking times provided by the manufacturer. If some areas of your waffle maker tend to cook faster than others, consider rotating the waffle maker halfway through the cooking process.
Q: Can I make waffles without a non-stick waffle maker?
A: While a non-stick waffle maker is preferred for easy waffle release, you can make waffles in a regular waffle maker with a few precautions. Make sure to grease the plates thoroughly with cooking spray or butter to prevent sticking. Be gentle when removing the waffles to avoid tearing them or leaving bits behind on the plates. Additionally, cleaning a non-stick waffle maker is easier compared to a regular one, so be sure to clean it thoroughly after each use.
Q: How do I clean the exterior of the waffle maker?
A: Cleaning the exterior of the waffle maker is simple. Use a damp cloth or sponge with a mild detergent to wipe down the outside surfaces. Avoid using abrasive materials that could damage the waffle maker’s finish. Always make sure the waffle maker is unplugged and cooled down before cleaning.
Q: Can I use gluten-free flour in the waffle batter?
A: Yes, you can use gluten-free flour to make waffles for those with gluten sensitivities or dietary restrictions. Simply replace the all-purpose flour in the waffle batter recipe with your preferred gluten-free flour blend. Keep in mind that the texture and taste may be slightly different from traditional waffles, but with some experimentation, you can achieve delicious gluten-free waffles.
Q: How can I make my waffles crispy?
A: For extra crispiness, try adjusting the cooking time or temperature settings on your waffle maker. Cooking the waffles for a little longer than recommended can lead to a crispier exterior. Additionally, using a little more oil or butter in the waffle batter can help achieve a crispier texture. Experimenting with different batters and cooking times will help you find the perfect balance between crispy and fluffy waffles.
Q: What else can I cook in my waffle maker?
A: The versatility of a waffle maker extends beyond waffles. You can get creative and try making hash browns, omelets, cinnamon rolls, and even grilled cheese sandwiches! Just like with waffles, make sure to grease the plates before adding your ingredients for easy removal. Be adventurous and see what delicious creations you can whip up using your Cuisinart Waffle Maker!
Q: Is the Cuisinart Waffle Maker dishwasher safe?
A: The Cuisinart Waffle Maker is generally not dishwasher safe. To clean the plates and the exterior, it’s best to follow the manual’s instructions and clean them by hand with a damp cloth or sponge. Some models may have removable plates that can be washed separately, but it’s always best to refer to the product manual for specific cleaning instructions.
In summary, the Cuisinart Waffle Maker is a versatile and reliable kitchen tool that opens up a world of delicious possibilities. Whether you’re making classic waffles, experimenting with different batters, or trying out new toppings, this waffle maker is sure to delight your taste buds and impress your family and friends. With proper preheating, greasing, pouring, and cooking, you can achieve perfectly cooked waffles every time. Take care of your waffle maker by cleaning it regularly, and don’t forget to get creative by exploring other tasty treats you can make with this handy appliance. Enjoy the process of waffle making and let your culinary imagination soar!