Rolling out pie dough may seem daunting, but fear not! With a few simple steps, you’ll be on your way to creating flaky and delicious pie crusts. Get ready to embark on a dough-rolling adventure that will leave you with delectable homemade pies to enjoy.
When rolling dough, the most important step is to start with well-prepared dough. It all begins with combining flour, butter, and water to create a workable dough that holds its shape. The right amount of moisture and the proper handling techniques are key to success.
But wait, there’s more! In this article, we’ll not only discuss how to prepare and shape the dough but also cover tips on maintaining even thickness, transferring the dough to the pie dish, and adding those final touches for a picture-perfect crust. Plus, we’ll address common questions and concerns beginners might have along the way.
Step 1: Prepare the Dough
Before we discuss how to roll pie dough, first let’s cover the basics: preparing the dough. Making pie dough from scratch is a rewarding experience that allows you to create delicious homemade pies. To get started, gather your ingredients: all-purpose flour, salt, cold unsalted butter, and ice water.
In a large mixing bowl, combine 2 ½ cups of all-purpose flour with 1 teaspoon of salt. Cut 1 cup (2 sticks) of cold unsalted butter into small cubes and add them to the flour mixture. Using a pastry cutter or your fingertips, work the butter into the flour until the mixture resembles coarse crumbs.
Next, drizzle 6-8 tablespoons of ice water over the mixture. Use a fork or your hands to gently combine the ingredients until the dough starts to come together. Be careful not to overmix; you want the dough to be just moist enough to hold together when squeezed.
Once the dough has formed, divide it in half and shape each half into a flat disk. Wrap the disks tightly in plastic wrap and refrigerate for at least an hour, or preferably overnight. This resting time allows the gluten to relax and makes the dough easier to roll out later.
Step 2: Shape the Dough
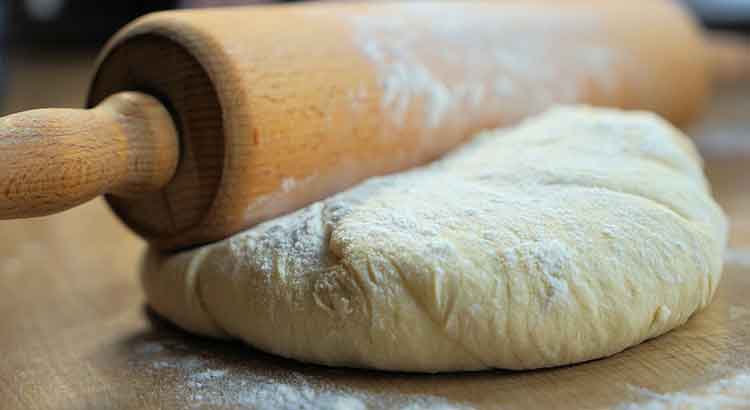
Now that your dough has chilled and rested, it’s time to shape it. Start by lightly flouring your work surface and rolling pin. Take one disk of dough out of the refrigerator and let it sit at room temperature for a few minutes to soften slightly. This will make it easier to roll out.
Place the dough disk on the floured surface and sprinkle a little more flour on top. Using the rolling pin, begin rolling the dough from the center outwards, applying gentle pressure. Roll in one direction, then lift the dough and rotate it a quarter turn. This ensures an even thickness and prevents sticking.
Continue rolling and rotating the dough until you achieve the desired size and thickness for your pie crust. Remember, the size should be larger than your pie dish to allow for overhang. Aim for a thickness of about 1/8 to 1/4 inch, depending on your preference.
If the dough starts to stick, sprinkle a little more flour underneath and on top. Be cautious not to add too much flour, as it can make the dough tough. If the dough becomes too soft or warm while rolling, simply place it back in the refrigerator for a few minutes to firm up.
Once you’ve rolled out the dough, you’re ready to move on to the next step: starting to roll it onto your rolling pin and transferring it to the pie dish. But that’s a topic for the next part of this guide.
Step 3: Start Rolling
Now that you have shaped your pie dough into a round disk, it’s time to start rolling it onto your rolling pin. This technique helps you transfer the dough more easily to the pie dish without it tearing or losing its shape.
To begin, lightly flour your rolling pin to prevent sticking. Place the pin at one edge of the dough, about a quarter of the way in. Gently roll the pin towards the center, allowing the dough to wrap around it. Once the dough has adhered to the rolling pin, carefully lift the pin and dough together.
Position the rolling pin over the pie dish, ensuring it is centered. Slowly unroll the dough, guiding it into the dish as you go. Be gentle to avoid stretching or tearing the dough. The excess dough should hang over the edges of the dish.
Step 4: Maintain Even Thickness
Maintaining an even thickness throughout your rolled-out pie dough is crucial for a uniform crust that bakes evenly. Here are some tips to help you achieve this:
- Rotate and Flip: As you continue to roll out the dough, periodically rotate it a quarter turn and flip it over. This prevents it from sticking to the surface and helps ensure even thickness. Sprinkle a little more flour underneath and on top of the dough as needed.
- Apply Even Pressure: When rolling, apply even pressure across the entire surface of the dough. This prevents certain areas from becoming thinner than others. If you notice uneven spots, gently press and roll the dough in those areas until it evens out.
- Measure Thickness: To ensure consistency, use a ruler or a set of rolling pin rings to measure the thickness of the dough as you roll. Aim for a thickness of about 1/8 to 1/4 inch, depending on your preference and the recipe you’re following.
- Patch and Repair: If the dough tears or develops holes while rolling, don’t worry! Simply pinch the torn edges back together or use a small piece of dough to patch any gaps. Smooth out the patched areas by gently rolling over them with the pin.
- Check for Air Bubbles: Occasionally, air bubbles may form beneath the dough while rolling. If you notice any, use a fork or a toothpick to prick the bubbles and release the trapped air. This prevents the crust from puffing up unevenly during baking.
By following these tips, you’ll be able to maintain an even thickness while rolling out your pie dough. Remember, practice makes perfect, so don’t be discouraged if your first attempts aren’t flawless. With time and experience, you’ll become a pie-dough-rolling pro!
Step 5: Adjust and Shape
Once you have rolled out your pie dough and transferred it to the pie dish, it’s time to make any necessary adjustments and shape the dough to fit perfectly. Here’s how:
- Trim Excess Dough: Use a sharp knife or kitchen shears to trim the excess dough hanging over the edges of the pie dish. Leave about 1 inch of overhang to allow for sealing and crimping the crust.
- Tuck and Fold: Gently lift the overhanging dough and fold it inward, towards the center of the pie. This creates a double layer of dough along the edge, making it sturdier and providing a nice crust shape.
- Crimp the Edge: To create a decorative crust, use your fingers or a fork to crimp the folded edge. Simply press the dough between your thumb and index finger, or use the tines of the fork to create a pattern. This not only adds a visual appeal but also helps seal the crust.
- Patch and Repair: If you notice any cracks or gaps in the dough, use extra bits of dough to patch them up. Press the dough firmly to seal the gaps and smooth out any imperfections.
Step 6: Transfer the Dough
Now that your pie dough is shaped and adjusted, it’s time to transfer it to the oven for baking. Follow these steps to ensure a smooth and successful transfer:
- Chill the Dough: Before transferring, place the shaped dough in the refrigerator for about 15 minutes. This helps to firm it up, reducing the risk of it losing its shape or shrinking during baking.
- Preheat the Oven: While the dough chills, preheat your oven to the temperature specified in your pie recipe. It’s essential to have a hot oven to achieve a crisp and golden crust.
- Place the Pie Dish: Carefully place the pie dish with the shaped dough on a baking sheet. This makes it easier to handle and catches any potential spills or drips during baking.
- Optional: Blind Bake: Depending on your recipe, you may need to blind bake the crust before adding the filling. To do this, line the dough with parchment paper or aluminum foil and fill it with pie weights or dried beans. Bake for a short time to set the crust before proceeding with the rest of the recipe.
With your pie dough properly adjusted, shaped, and transferred to the oven, you’re well on your way to creating a delicious homemade pie. Stay tuned for the next steps in this beginner’s guide to rolling out pie dough!
Step 7: Trim and Finish
You’re almost there! Now that your pie dough is shaped and transferred to the pie dish, it’s time for the final touches to make your pie crust look beautiful and professional. Here’s what you need to do:
- Trim the Excess Dough: Using a sharp knife or kitchen shears, carefully trim the excess dough that extends beyond the edge of the pie dish. Follow the edge of the dish and make clean cuts to remove the extra dough.
- Create a Vent: For pies with a double crust or a lattice top, it’s essential to create vents to allow steam to escape during baking. You can use a small sharp knife to make a few slits or use decorative pie crust cutters to add a touch of flair.
- Brush with Egg Wash: To give your pie crust a beautiful golden color and a glossy finish, brush it with an egg wash. Simply beat an egg with a tablespoon of water or milk, then brush a thin layer over the crust using a pastry brush.
- Sprinkle with Sugar: For sweet pies, you can sprinkle a little granulated or coarse sugar over the crust before baking. This adds a delightful crunch and extra sweetness to your finished pie.
- Add Decorative Touches: If you’re feeling creative, you can add decorative touches to your pie crust. Use small cookie cutters to create shapes, braid strips of dough for a lattice design, or make a rope edge by rolling small pieces of dough and attaching them around the edge.
With these finishing touches, your pie crust is ready for the oven. Follow the baking instructions in your recipe and enjoy the anticipation of a delicious homemade pie!
Final Thoughts
And there you have it! You’ve reached the end of this beginner’s guide to rolling out pie dough. I hope that these step-by-step instructions have given you the confidence to tackle homemade pies with ease. Remember, practice and patience are key, so don’t worry if your first attempts aren’t perfect. With time and experience, you’ll become a pro at rolling out pie dough and creating delicious, flaky crusts that will impress your friends and family.
One of the best things about making your own pie dough is the opportunity for creativity. Don’t be afraid to experiment with different types of crusts, flavorings, and fillings. Whether you’re making a classic apple pie, a savory quiche, or a decadent chocolate tart, the possibilities are endless. Let your imagination run wild and have fun in the kitchen. After all, baking should be a joyful and delicious adventure.
Lastly, remember that baking is a labor of love. It’s not just about the end result; it’s about the process. Embrace the therapeutic nature of kneading the dough, the anticipation as your kitchen fills with the sweet aroma of a pie baking in the oven, and the joy of sharing your homemade creation with loved ones. So grab your rolling pin, dust off your apron, and embark on the wonderful journey of rolling out pie dough. May your pies be filled with love, laughter, and the scrumptious taste of homemade goodness.
Happy baking!
FAQ
As you embark on your pie-making adventure, you may have some questions that need answers. Fear not, for I’m here to address some frequently asked questions about rolling out pie dough. Let’s dive right in:
Q: Can I use store-bought pie dough instead of making it from scratch? A: Absolutely! While making your own pie dough can be a rewarding experience, there’s no shame in using store-bought dough. It saves time and can still result in a delicious pie. Just follow the package instructions for rolling out the dough and proceed with your chosen recipe.
Q: How do I prevent the dough from sticking to the rolling pin or the work surface? A: To prevent sticking, lightly flour both your rolling pin and the work surface. Additionally, you can try rolling the dough between two sheets of lightly floured parchment paper. This technique minimizes direct contact with the rolling pin and surface, reducing the chances of sticking.
Q: Can I roll out pie dough in advance? A: Yes, you can! If you’re short on time, you can roll out the dough in advance and refrigerate it until you’re ready to use it. Wrap the rolled-out dough tightly in plastic wrap and refrigerate for up to two days. Just remember to let the dough sit at room temperature for a few minutes to soften slightly before transferring it to the pie dish.
Q: What if my dough tears or cracks while rolling? A: Don’t panic! Pie dough can be a bit delicate, but tears and cracks can be easily fixed. Simply pinch the torn edges back together or use a small piece of dough to patch any gaps. Gently press and roll the dough in those areas to smooth out any imperfections.
Q: How do I prevent the edges of the crust from burning? A: To prevent the edges of your pie crust from burning while baking, you can use a pie shield or create one yourself using aluminum foil. Place the shield over the edges of the crust to protect them from excessive heat. Remove the shield during the last few minutes of baking to allow the edges to brown.
Q: Can I freeze pie dough? A: Absolutely! Pie dough freezes well, making it convenient for future use. Wrap the dough tightly in plastic wrap and place it in a freezer bag. It can be frozen for up to three months. When ready to use, thaw the dough in the refrigerator overnight before rolling it out.
Q: How do I achieve a flaky crust? A: The key to a flaky pie crust lies in the proper distribution of fat and moisture. Ensure that the butter or shortening is cold when incorporating it into the flour to create pockets of fat that will melt during baking, resulting in flakiness. Also, avoid overmixing the dough to prevent gluten development, which can make the crust tough.
I hope these answers have helped clear up some common doubts about rolling out pie dough. Remember, practice and patience are essential in mastering the art of pie making. Don’t be afraid to experiment, make mistakes, and learn along the way. With each pie you bake, your skills will improve, and the joy of homemade pie will be yours to savor.