Do you dream of sinking your teeth into a warm, flaky croissant without waiting hours for the proofing process? Well, you’re in luck! In this article, we’ll show you the quickest way to proof frozen croissants, so you can enjoy these buttery delights in no time.
The quickest way to proof a frozen croissant is by thawing them overnight in the refrigerator and then utilizing a warm proofing environment. Thawing the croissants slowly in the fridge ensures the dough maintains its integrity, while creating a warm environment expedites the proofing process.
So, if you’re looking to satisfy your croissant cravings without the lengthy wait, keep reading! We’ll guide you through the entire process, from thawing the croissants to the final golden bake. Get ready for a culinary adventure that will fill your kitchen with the irresistible aroma of freshly baked pastries. Let’s dive in and discover how to proof frozen croissants quickly and effortlessly!
Thaw the Croissants
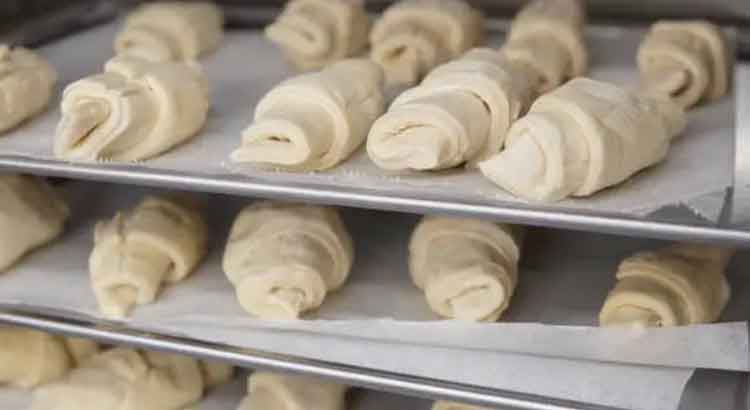
Thawing frozen croissants properly is the first step in quickly proofing them to perfection. While there are various methods to defrost croissants, one of the most effective and efficient ways is to let them thaw in the refrigerator overnight.
Place the frozen croissants on a baking sheet lined with parchment paper and transfer them to the refrigerator. By allowing them to thaw slowly in a chilled environment, you ensure that the dough maintains its integrity and doesn’t become soggy or overproofed. It also allows for a more even rise during the proofing process.
It’s essential to plan ahead and factor in the thawing time when you want to enjoy your freshly baked croissants. By following this method, you can have the croissants ready for proofing the next morning, ensuring a delightful breakfast or snack without compromising on quality.
Warm the Proofing Environment
Creating an optimal proofing environment is crucial for accelerating the proofing process of frozen croissants. The ideal temperature for proofing croissants is around 75°F (24°C) to 80°F (27°C). Here’s how you can achieve this warm environment:
- Preheat your oven to the lowest possible temperature (usually 170°F or 75°C). Once it reaches the desired temperature, turn it off.
- Boil some water and pour it into a heatproof container. Place this container on the bottom rack of the oven. The hot water will create a moist environment, perfect for proofing the croissants.
- Cover the croissants lightly with a clean kitchen towel or plastic wrap to prevent them from drying out during proofing.
- Place the baking sheet with the croissants on the middle rack of the oven. Close the oven door gently.
The warm environment inside the oven will expedite the proofing process by providing the necessary heat and humidity for the yeast to activate and the dough to rise. Be mindful not to set the temperature too high, as it may cause the butter in the croissants to melt.
Proof in the Warm Oven
Once the croissants are in the warm oven, the proofing process begins. This step is crucial for allowing the dough to rise and develop its signature light and flaky texture. Here’s what you need to do:
- Keep the croissants in the warm oven for about 1 to 2 hours. The exact proofing time may vary depending on the temperature and humidity of your kitchen, as well as the size and thickness of the croissants.
- Avoid opening the oven door frequently, as it can cause a loss of heat and disrupt the proofing process. Trust the warm environment you’ve created and let the croissants work their magic.
During this time, the yeast in the dough will ferment, releasing carbon dioxide gas. This gas gets trapped within the layers of buttery dough, causing the croissants to rise and become light and airy. The longer you let them proof, the more the flavors will develop.
Check and Rotate
After a sufficient proofing time, it’s essential to check on the progress of your croissants and ensure even baking. Here’s how you can do it:
- Carefully open the oven door and take a look at the croissants. They should have visibly increased in size and become puffy. The dough layers should be well-defined, and you might notice a slight jiggle when you gently shake the baking sheet.
- To ensure even baking, rotate the baking sheet by 180 degrees. This helps compensate for any hot spots in the oven and ensures that the croissants brown evenly.
- Close the oven door gently and continue baking for the remaining time indicated in your recipe or until the croissants turn golden brown.
Checking and rotating the croissants allows you to maintain consistent heat distribution and avoid any undercooked or overcooked spots. It ensures that each croissant bakes to perfection, with a beautiful golden exterior and a tender, flaky interior.
Final Rise at Room Temperature
After proofing the croissants in the warm oven, the next step is to allow them to undergo a final rise at room temperature. This step helps the croissants achieve their desired shape and texture. Here’s what you need to do:
- Carefully remove the croissants from the warm oven and place them on a clean countertop or a baking sheet lined with parchment paper.
- Let the croissants rest at room temperature for about 30 minutes to 1 hour. This allows the dough to relax and continue rising, resulting in lighter and more delicate croissants.
During the final rise, you may notice that the croissants expand slightly further and develop a smoother appearance. This is a sign that the yeast is still active and working its magic. It’s important not to rush this step and give the dough enough time to reach its full potential.
Bake
The final and most exciting step in the process is baking the proofed croissants. This step transforms the dough into golden, flaky pastries that are irresistibly delicious. Here’s how to do it:
- Preheat your oven to the recommended temperature stated in your croissant recipe. Typically, it’s around 375°F (190°C).
- Carefully place the fully proofed croissants in the preheated oven. Make sure there is enough space between them to allow for expansion during baking.
- Bake the croissants for approximately 15 to 20 minutes or until they turn golden brown and develop a beautiful crispy crust.
While the croissants are baking, the layers of butter and dough will melt and separate, creating those signature flaky pockets. The aroma of freshly baked croissants will fill your kitchen, building anticipation for the delightful treat to come.
Once the croissants are golden and baked to perfection, remove them from the oven and let them cool for a few minutes. Enjoy them warm or at room temperature, plain or filled with your favorite ingredients. Serve alongside a hot cup of coffee or tea for a truly indulgent experience.
Final Thoughts
The key to achieving quick results lies in properly thawing the croissants in the refrigerator overnight. This ensures that the dough maintains its integrity and rises evenly during proofing. Creating a warm proofing environment with a gentle heat and moisture helps expedite the process, allowing the croissants to develop their signature texture and flavor.
As you enjoy your freshly baked croissants, take a moment to savor the aroma, the crispy crust, and the tender layers within. Experiment with different fillings and toppings to add your personal touch to these delectable pastries. Whether you’re indulging in them for breakfast, brunch, or as a special treat, homemade croissants have a way of brightening up any occasion.
Now that you’ve mastered the art of quickly proofing frozen croissants, you can confidently share your newfound expertise with friends and family. Spread the joy of homemade pastries and inspire others to embark on their own croissant-making adventures. With a little time and effort, anyone can enjoy the satisfaction of biting into a warm, freshly baked croissant that they’ve made themselves.
So go ahead, embrace the process, and enjoy the rewards of your labor. Happy baking, and may your kitchen continue to be filled with the delightful aroma of freshly baked croissants!
FAQ
Now that you’ve learned how to proof frozen croissants quickly, you may have some lingering questions. Don’t worry, we’ve got you covered with this FAQ section to address common queries and provide you with the answers you need.
1. Can I proof frozen croissants without thawing them overnight?
While it’s generally recommended to thaw frozen croissants overnight in the refrigerator, you may be tempted to speed up the process. However, it’s essential to avoid proofing frozen croissants directly without proper thawing. Thawing the croissants slowly in the refrigerator helps maintain the dough’s integrity and prevents it from becoming soggy or overproofed. It also allows for a more even rise during the proofing process. Patience is key when it comes to achieving the best results with your croissants.
2. Can I proof frozen croissants at room temperature?
Proofing frozen croissants at room temperature is not recommended. The temperature fluctuations can lead to uneven proofing, resulting in croissants that don’t rise properly or have inconsistent texture. It’s best to follow the thawing and proofing steps outlined in this guide to ensure the dough develops its characteristic lightness and flakiness.
3. Can I freeze the croissants after proofing?
Yes, you can freeze croissants after they have been proofed. Once the croissants have undergone the final rise, you can place them in an airtight container or wrap them tightly with plastic wrap and freeze them. When you’re ready to enjoy them, simply thaw them in the refrigerator overnight and bake them according to the instructions provided earlier in this guide. Freezing proofed croissants allows you to have freshly baked pastries at your convenience without going through the entire proofing process again.
4. How long can I keep frozen croissants before baking them?
Frozen croissants can be stored for up to three months before baking. It’s essential to label the container or wrap them properly with the date to ensure you use them within a reasonable time frame. Beyond three months, the quality of the croissants may begin to deteriorate. Always check for any signs of freezer burn or spoilage before baking.
5. Can I add fillings to the croissants before proofing?
It’s generally recommended to add fillings to the croissants after they have been proofed and just before baking. This ensures that the fillings don’t affect the rise of the croissants and prevent them from achieving their desired flaky texture. However, you can experiment with fillings during the proofing process if you prefer a different approach. Just keep in mind that it may impact the final result.
With these frequently asked questions answered, you’re well-equipped to embark on your croissant-making journey. Remember to enjoy the process, be patient, and savor the delicious rewards. Happy baking!