Have you ever dreamt of biting into a warm, flaky croissant with a heavenly aroma wafting through your kitchen? Well, you’re in luck! In this beginner’s guide, we’ll walk you through the process of proofing frozen croissants overnight, so you can enjoy freshly baked croissants in the comfort of your own home.
The most important thing when proofing frozen croissants overnight is to ensure a slow and controlled thawing and rising process. This allows the dough to develop its signature flakiness and the buttery layers to meld together, resulting in a delightful pastry.
By mastering the art of proofing frozen croissants overnight, you’ll have a delectable breakfast or snack ready in no time. So, let’s dive into the step-by-step process and unlock the secrets to making perfect croissants at home. Get ready to impress yourself and others with your newfound baking skills!
Thaw the Croissants
Thawing frozen croissants properly is the first step towards achieving that perfect flaky texture and buttery taste. Here’s a beginner’s guide on how to proof frozen croissants overnight.
When you have a batch of frozen croissants ready to be transformed into a delightful breakfast treat, it’s important to thaw them correctly. Improper thawing can lead to uneven rising and affect the final result. To ensure your croissants turn out light, airy, and delicious, follow these steps:
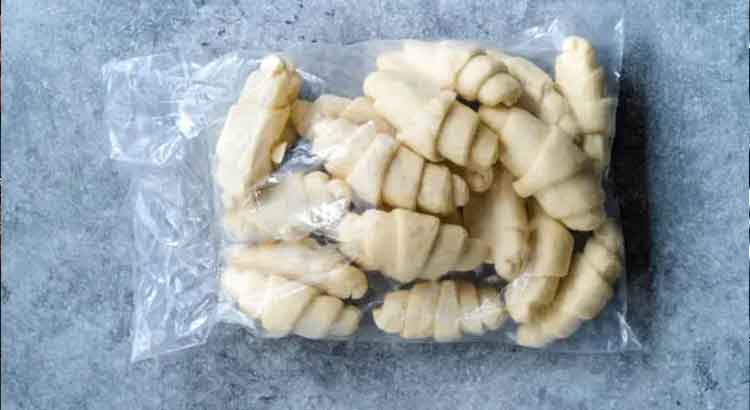
- Remove the croissants from the freezer: Take the desired number of croissants out of the freezer and place them on a baking sheet lined with parchment paper. Make sure to leave enough space between each croissant to allow for expansion during proofing.
- Cover the croissants: Cover the baking sheet loosely with plastic wrap or a clean kitchen towel to prevent the croissants from drying out during the thawing process. This will also protect them from absorbing any odors from the refrigerator.
- Transfer to the refrigerator: Place the baking sheet with the covered croissants in the refrigerator. Let them thaw overnight or for approximately 8 to 10 hours. The slow thawing process in the refrigerator helps preserve the texture and flavor of the croissants.
- Check for readiness: After the thawing time has passed, gently touch the croissants. They should feel soft and pliable, indicating that they are fully thawed and ready for the next step.
Refrigerate Overnight
Once the croissants are fully thawed, the next step in the process is to refrigerate them overnight. This step helps develop the flavors and allows for controlled proofing, resulting in light and airy croissants. Here’s how to proceed:
- Prepare the croissants for refrigeration: Keep the croissants on the baking sheet and cover them with plastic wrap or a clean kitchen towel. This step ensures that the croissants stay moist and prevents them from forming a dry crust in the refrigerator.
- Transfer to the refrigerator: Place the covered croissants in the refrigerator and let them rest overnight. This extended resting period allows the dough to ferment slowly, enhancing the taste and texture of the croissants.
- Avoid overcrowding: Ensure that there is enough space in your refrigerator to accommodate the baking sheet without any obstructions. Overcrowding may result in uneven proofing or deformation of the croissants’ shape.
- Keep away from strong odors: Make sure the croissants are stored away from strong-smelling foods or ingredients. Croissants easily absorb odors, which can affect their flavor.
By following these steps and giving your frozen croissants enough time to thaw and rest in the refrigerator overnight, you’re setting the stage for a delightful breakfast experience. The next morning, you can proceed with the final steps of bringing the croissants to room temperature, baking them as directed, and enjoying the heavenly aroma of freshly baked croissants.
Check in the Morning
After a restful night of refrigeration, it’s time to check on your croissants in the morning. This step ensures that the dough has proofed properly and is ready for the final stages of preparation. Here’s what you need to do:
- Remove the croissants from the refrigerator: Carefully take the baking sheet with the croissants out of the refrigerator and uncover them. As you do this, you might notice that the croissants have expanded slightly in size due to the proofing process.
- Observe the croissants: Take a moment to examine the croissants. They should have increased in volume and have a puffy appearance. This indicates that the dough has properly proofed overnight.
- Perform the “poke” test: Gently press your fingertip into the side of one of the croissants. If the indentation slowly springs back, it means the croissants are ready for the next step. If the indentation remains, allow them to rest for a bit longer.
Bring to Room Temperature
Before baking the croissants, it’s important to bring them to room temperature. This step helps the dough rise evenly and ensures that the croissants bake to a golden and flaky perfection. Here’s how to proceed:
- Place the croissants in a warm spot: Find a warm area in your kitchen, away from any drafts or direct sunlight. It could be near a window or on top of the stove (make sure it’s off). This allows the croissants to gradually come to room temperature.
- Allow time for tempering: Depending on the ambient temperature, it may take 1 to 2 hours for the croissants to reach room temperature. Be patient and resist the temptation to rush this step, as it’s crucial for achieving the desired texture and flavor.
- Observe the croissants: As the croissants warm up, you will notice them becoming more supple and pliable. They will also feel slightly lighter to the touch. This indicates that the dough is ready for the final stages of baking.
Bake as Directed
Now that your croissants have thawed, proofed, and reached room temperature, it’s time to bake them to perfection. Follow the instructions provided with your frozen croissants or use the following general guidelines:
- Preheat the oven: Preheat your oven to the temperature specified on the packaging or recipe. This ensures that the croissants bake evenly and achieve that desirable flaky texture.
- Place the croissants on a baking sheet: Transfer the room temperature croissants onto a baking sheet lined with parchment paper. Leave enough space between each croissant to allow for further expansion during baking.
- Egg wash (optional): If desired, you can give your croissants a beautiful golden shine by applying an egg wash. Beat an egg in a small bowl and brush it lightly over the croissants using a pastry brush.
- Bake to perfection: Slide the baking sheet with the croissants into the preheated oven and bake according to the instructions provided. The baking time will vary depending on the size and thickness of your croissants. Keep a close eye on them to prevent over-browning.
- Remove from the oven: Once the croissants are baked to a golden brown and have a flaky texture, carefully remove them from the oven. Use oven mitts or a kitchen towel to handle the hot baking sheet.
Cool and Serve
After the croissants are freshly baked, it’s essential to let them cool slightly before enjoying them. This allows the layers to set and ensures a pleasant eating experience. Follow these steps to cool and serve your croissants:
- Transfer to a wire rack: Using a spatula, gently transfer the baked croissants from the hot baking sheet to a wire rack. This helps to prevent them from becoming soggy on the bottom.
- Cool to room temperature: Allow the croissants to cool on the wire rack for about 10 to 15 minutes or until they reach room temperature. This time will vary depending on the size and thickness of the croissants.
- Enjoy while fresh: Once cooled, your homemade croissants are ready to be enjoyed. Serve them warm or at room temperature, and savor their delicate, buttery flavor and flaky texture. They pair wonderfully with a cup of coffee or tea.
Final Thoughts
By following the simple steps outlined in this beginner’s guide, you’ve taken frozen croissants and turned them into flaky, buttery delights that are perfect for a scrumptious breakfast or a delightful treat any time of the day.
The process of thawing, refrigerating, bringing to room temperature, baking, and finally cooling the croissants requires a little bit of patience and planning. But the end result is well worth it. There’s something incredibly satisfying about biting into a freshly baked croissant with its golden, crispy exterior and soft, buttery layers.
Now that you’ve mastered the basics, feel free to experiment and get creative with your croissants. You can add fillings like chocolate, cheese, or almond paste before rolling and shaping them. Or sprinkle some powdered sugar on top for an extra touch of sweetness. The possibilities are endless, and you can truly make these croissants your own.
Remember, practice makes perfect. With each batch of croissants you make, you’ll gain more confidence and finesse in the process. Don’t be discouraged if your first attempt doesn’t turn out exactly how you envisioned it. Baking is an art that takes time to master, and the joy is in the journey.
So, gather your ingredients, follow the steps, and let your kitchen be filled with the aroma of freshly baked croissants. Enjoy the process, share them with loved ones, and bask in the satisfaction of creating something delicious from scratch. Happy baking!
FAQ
As you embark on your journey of proofing frozen croissants overnight, you may have some questions along the way. Here are answers to frequently asked questions that can help you navigate through the process with confidence.
Q: Can I proof frozen croissants at room temperature instead of in the refrigerator?
A: While it’s possible to proof frozen croissants at room temperature, it’s not recommended. Thawing and proofing the croissants in the refrigerator allows for a slower and more controlled rise, which results in better texture and flavor. Room temperature proofing may lead to uneven rising, affecting the final outcome of your croissants.
Q: How long can I keep thawed croissants in the refrigerator before baking?
A: Once your croissants are fully thawed, it’s best to bake them within 24 hours. Keeping them in the refrigerator for too long may cause the dough to over-ferment, resulting in a sour taste and compromised texture. For the best results, aim to bake the croissants as soon as they have thawed and rested overnight.
Q: Can I freeze the proofed croissants instead of baking them immediately?
A: Yes, you can freeze the proofed croissants if you’re not ready to bake them right away. After the croissants have properly proofed overnight, place them in an airtight container or wrap them tightly with plastic wrap. They can be stored in the freezer for up to one month. When you’re ready to bake them, thaw them in the refrigerator overnight before proceeding with the baking instructions.
Q: Can I reheat the baked croissants?
A: Absolutely! If you have leftovers or want to enjoy the croissants at a later time, you can easily reheat them. Preheat your oven to 350°F (175°C), place the croissants on a baking sheet, and warm them for about 5 to 10 minutes until they are heated through. This will revive the flakiness and restore their delightful texture.
Q: Can I proof and bake the croissants on the same day?
A: While it’s possible to proof and bake croissants on the same day, the overnight method yields better results. Proofing the croissants overnight allows the dough to develop complex flavors and achieve a lighter, flakier texture. If you’re short on time, you can opt for a quicker proofing method, but keep in mind that the final result may not be as optimal as with the overnight method.
Q: Can I use homemade croissant dough instead of frozen croissants?
A: Absolutely! If you prefer to make your croissant dough from scratch, you can follow a homemade recipe and apply the same principles of proofing and baking as outlined in this guide. The process may take longer, as you’ll need to make the dough, let it rest, laminate it with butter, and then proceed with the proofing and baking stages. Homemade croissants can be a rewarding and delicious project for baking enthusiasts.
Hopefully, these frequently asked questions have provided you with valuable information and insights as you embark on your croissant-making adventure. Remember, don’t be afraid to experiment, adapt, and make these techniques your own. Enjoy the process, have fun, and savor the satisfaction of creating homemade, bakery-quality croissants. Happy baking!