Are your cupcake liners always playing hide and seek with your delicious treats?
The simplest way to keep cupcake liners from pulling away is to give them a sturdy foundation. Place your cupcake tin on a baking sheet. This not only helps the cupcakes bake evenly but also prevents liners from wandering off.
Curious to find out more tricks? Whether you’re a baking newbie or a seasoned pro, these liner-holding hacks will have your cupcakes looking perfect every time. From batter consistency to cooling techniques, we’ve got a treasure trove of tips to ensure your cupcakes stay cozy in their liners. Get ready to transform your baking game and enjoy cupcakes that stay dressed to impress!
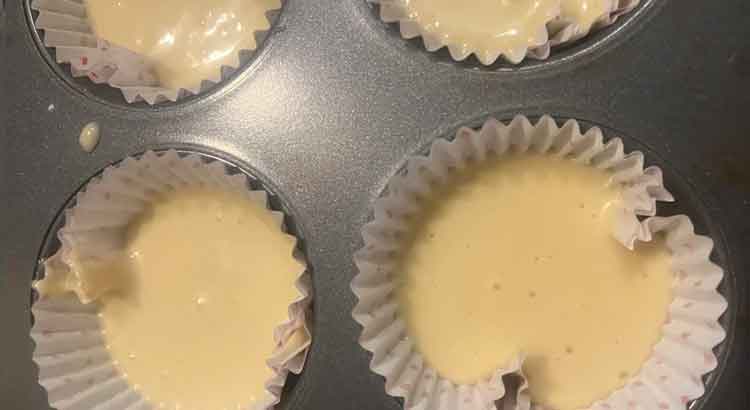
Proper Filling Level
Fill it just right: The key to preventing cupcake liners from pulling away lies in the way you fill your cupcake molds. When pouring your batter, aim for about two-thirds full. This Goldilocks zone gives your cupcakes room to rise without causing the liners to break free from the sides. Overfilling might seem generous, but it can lead to unsightly liner peeling.
Airy, not heavy: Cupcake batter is like a cozy hug for your liners. If it’s too dense or heavy, it might pull the liners away as it expands during baking. For light and airy cupcakes, ensure your batter is well-mixed and doesn’t contain large pockets of dry ingredients. Mixing gently and not overdoing it can save your cupcakes from the dreaded liner escape.
Quality over quantity: You’re not just baking cupcakes; you’re crafting edible art. Choose high-quality cupcake liners that can withstand the heat and moisture of baking. Sturdy liners stay put, ensuring your cupcakes remain happily nestled until it’s time to indulge.
Use Quality Liners
Seek the good stuff: Not all cupcake liners are created equal. Invest in liners made from greaseproof or high-quality paper. These liners hold their shape and stay firmly attached to your cupcakes. They’re like the trusty sidekicks that ensure your baking masterpiece shines.
Grease is not the enemy: Greasing your cupcake liners might sound counterintuitive, but a light spritz of cooking spray can actually help liners adhere. Be cautious not to go overboard; a light mist will do the trick without causing your cupcakes to turn greasy.
Double the layers, double the fun: For extra security, try using double liners. Simply place one liner inside another before adding your batter. This extra layer adds stability, making it more challenging for liners to make a run for it.
Grease the Pan
A greased path: Before you even think about placing those liners, give your cupcake pan a little love. A light coating of cooking spray or a dab of butter in each cavity can work wonders. This helps anchor the liners to the pan, making it less likely for them to go astray during baking.
Go parchment-style: Parchment paper squares can be your cupcake’s best friend. Cut them to fit the bottom of each cupcake cavity before adding liners and batter. This extra layer beneath the liner acts as a safety net, preventing any untimely escapes.
Baking cups to the rescue: Silicone baking cups are like liner protectors. Place them inside your cupcake pan and pour the batter directly into these reusable cups. Not only do they keep the liners in place, but they also reduce the risk of liners peeling away when it’s time to indulge.
Bake at the Right Temperature
Temperature precision: Baking isn’t just about throwing things in the oven and hoping for the best. It’s a delicate dance between ingredients, time, and temperature. Ensure your oven is preheated to the correct temperature before sliding in your cupcakes. An oven thermometer can be your secret weapon to ensure that the temperature is accurate, resulting in cupcakes that rise beautifully without liner detachment.
Middle ground magic: Position your cupcake pan in the center of the oven. This placement allows for even heat distribution, preventing one side of your cupcakes from baking faster than the other. This balance is key to cupcakes that rise consistently, keeping liners intact throughout the baking process.
Patience is a virtue: When the timer dings, resist the urge to yank your cupcakes out immediately. Instead, turn off the oven and crack the door open slightly. Let your cupcakes cool in the oven for a few minutes before transferring them to a wire rack. This gradual cool-down helps the liners adjust to temperature changes without pulling away.
Avoid Overmixing Batter
Gentle hands: It might be tempting to give your cupcake batter a hearty stir, but too much mixing can lead to trouble. Overmixing causes the batter to become tough, resulting in cupcakes that expand rapidly and forcefully during baking. This excessive force can cause the liners to detach, leaving you with less-than-photogenic cupcakes.
Mix it right: To avoid this, mix your cupcake batter until just combined. A few lumps are okay; they’ll dissolve during baking. This gentler approach to mixing ensures that your cupcakes rise evenly and gracefully, keeping the liners firmly in place.
Flour power: Sift your dry ingredients before adding them to the batter. Sifting not only aerates the flour but also prevents clumps from forming. Even distribution of dry ingredients leads to a smoother batter that doesn’t require aggressive mixing. And a batter that doesn’t require aggressive mixing means liners that stay put.
Preheat the Oven
Hot and ready: Preheating your oven is like giving your cupcakes a warm welcome. A fully heated oven ensures that your cupcakes start baking as soon as they hit the heat, helping them rise steadily and consistently. Without preheating, your cupcakes might struggle to develop the perfect texture, leading to liner detachment.
Time matters: Don’t rush the preheating process. It’s not just about reaching the desired temperature; it’s about maintaining that temperature for a few minutes before baking. This ensures that the oven, shelves, and pan are all evenly heated, creating an ideal environment for your cupcakes to shine.
Avoid peeking: While it’s tempting to check on your cupcakes frequently, resist the urge to open the oven door during baking. Sudden temperature changes can cause cupcakes to sink or crack, leading to liner issues. Use the oven light to monitor their progress and only open the door when it’s close to the recommended baking time.
Use Cupcake Pans
Designed for success: Cupcake pans aren’t just convenient; they’re designed to give your cupcakes the support they need. When batter is placed directly in the pan’s cavities, liners are less likely to detach as the cupcakes rise and expand. The pan acts as a stable framework, ensuring your cupcakes stay snug and cozy within their liners.
Perfect fit: Choose a cupcake pan that matches the size of your liners. If the cavities are too big, liners can shift during baking. A well-fitted cupcake pan provides the ideal environment for your liners to stay in place while your cupcakes work their magic.
Silicone love: Silicone cupcake pans offer even more insurance against liner detachment. Their flexibility and non-stick properties make it harder for liners to separate from the cupcakes. Plus, removing cupcakes from silicone pans is a breeze, meaning your treats will emerge intact and stunning.
Cool in the Pan
Hold your horses: As tempting as it is to dive into those freshly baked cupcakes, patience pays off. Allowing your cupcakes to cool in the pan for about 5-10 minutes after baking can prevent liner separation. During this crucial cooling period, your cupcakes settle and firm up, adhering to the liners as they should.
Gradual liberation: After their brief stay in the pan, gently remove your cupcakes and place them on a wire rack to cool completely. This gradual transition from warm to room temperature prevents sudden changes that could cause liners to pull away. It’s like giving your cupcakes a smooth and steady transition to their final presentation.
Avoid Overfilling Liners
Moderation is key: While it’s tempting to be generous with your batter, overfilling cupcake liners can lead to liner troubles. When cupcakes rise and expand excessively, the liners might not be able to handle the pressure, causing them to peel away. Stick to the two-thirds full rule for perfectly-sized cupcakes and liners that stay put.
Watch the rise: Keep a close eye on how your cupcakes rise during baking. If they’re ballooning out of control, it’s a sign you might be overfilling the liners. Adjust the amount of batter you use until you find the sweet spot that lets your cupcakes rise without straining the liners.
Avoid the domes: Overfilled cupcakes can sometimes form domed tops that push against the liners. This can weaken the liner’s grip and lead to detachment. To keep your cupcakes level and well-behaved, ensure you’re using the right amount of batter in each liner.
Use Cooling Racks
Cooling champions: Cooling racks are more than just a resting place for your cupcakes; they’re liner-saving heroes. Placing your freshly baked cupcakes on a cooling rack allows air to circulate around them, preventing trapped moisture that can cause liners to peel. A well-ventilated cupcake is a happy cupcake.
Timing matters: Don’t rush the cooling process. Give your cupcakes ample time to cool on the rack before attempting to remove the liners. This gradual cool-down helps the cupcakes settle and adhere to the liners, reducing the chances of liner separation.
Patience pays off: Once your cupcakes are completely cool, gently peel away the liner. If you encounter any resistance, pause and give the cupcake a little wiggle. This movement can help detach the cupcake from the liner without causing any tearing.
Choose the Right Size Liners
Fit like a glove: The size of your cupcake liners matters more than you might think. Using liners that are too big or too small can lead to liner pull-away woes. Opt for liners that fit snugly within your cupcake pan cavities, ensuring they maintain contact with the sides as the cupcakes rise.
Measure and match: Before you start baking, check the dimensions of your cupcake pan and choose liners that are designed for its size. A liner that’s too large might detach during baking, while one that’s too small can cause cupcakes to stick to the pan instead.
Test and adjust: If you’re experimenting with a new liner brand or size, bake a small batch first. This test run allows you to observe how the liners behave during baking. Make adjustments as needed to find the perfect fit that guarantees liner adherence.
Don’t Overcrowd the Oven
Give them space: Just like people, cupcakes appreciate personal space. Crowding too many cupcake pans in the oven can disrupt airflow, leading to uneven baking and possible liner detachment. For evenly baked cupcakes with liners that stay put, leave enough room between pans.
Bake in batches: If you have more cupcakes than your oven can comfortably accommodate, consider baking them in batches. This not only ensures proper airflow but also allows you to focus on keeping each batch perfect, liners and all.
Rotate for equality: If you’re baking multiple pans of cupcakes at once, rotate the pans halfway through the baking time. This helps compensate for any hotspots in your oven, ensuring all cupcakes rise and bake uniformly, giving your liners a better chance to stay attached.
Use an Oven Thermometer
Temperature assurance: Your oven’s temperature might not always be what it claims to be. An oven thermometer acts as a trusty sidekick, ensuring you’re baking at the right temperature. Consistent and accurate heat is crucial for cupcakes that rise beautifully and liners that stay in place.
Calibration counts: Before you start baking, test your oven’s temperature accuracy using an oven thermometer. If you find any discrepancies, adjust the oven’s temperature accordingly. This extra step guarantees that your cupcakes bake under optimal conditions, minimizing the risk of liner detachment.
Peace of mind: With an oven thermometer by your side, you can bake with confidence, knowing that your cupcakes are enjoying the perfect baking environment. No more guessing games, just reliable results that include intact liners and flawless treats.
Rotate the Cupcake Pan
Turn for perfection: While your oven might promise even baking, a little rotation can go a long way. Rotate your cupcake pan 180 degrees halfway through the baking time. This simple step ensures that cupcakes receive uniform heat, preventing uneven rising that could lead to liner troubles.
Equal exposure: Ovens can have hotspots, causing some cupcakes to bake faster than others. Rotating the pan ensures that all cupcakes have a fair chance to bake evenly and develop the right texture. Liners will thank you for the extra care and attention.
Midway magic: Don’t forget to rotate the pan only once the cupcakes have set and are no longer batter-like. Opening the oven prematurely can lead to cupcakes sinking or deflating, which can result in liner detachment. Aim for that sweet spot where rotation benefits the cupcakes without disturbing their rise.
Avoid Rapid Temperature Changes
Steady transitions: Just as abrupt changes can startle us, they can unsettle your cupcakes too. Avoid subjecting your cupcakes to sudden temperature shifts, as they can cause liners to peel away. When removing cupcakes from the oven, place them in a draft-free area to cool gradually before transferring them to a cooling rack.
Warm and cozy: Allow your cupcakes to cool at room temperature. Placing hot cupcakes directly on a cooling rack can shock the liners, potentially causing them to detach. Let your cupcakes enjoy a gradual cooldown, gently hugging their liners as they settle into their final shape.
Patience pays off: While it might be tempting to dive into your cupcakes as soon as they’re out of the oven, a little patience goes a long way. Waiting for your cupcakes to cool ensures that the liners have a chance to bond with the cupcakes, minimizing the risk of separation.
Final Thoughts
Whisking your way through the world of cupcakes has been an exciting adventure, hasn’t it? From batter to oven, from liners to cooling, you’ve absorbed a treasure trove of knowledge that sets you on a path to cupcake perfection. These simple yet effective tricks have transformed you into a liner-retaining guru, ready to face any cupcake challenge that comes your way.
Remember, practice makes progress. Don’t be disheartened if your first batch doesn’t turn out magazine-worthy. Baking is as much about experimenting as it is about following instructions. Embrace each batch as an opportunity to fine-tune your skills and tweak your techniques.
As you whip up these delectable treats, take pride in not only the taste but also the presentation. A cupcake with a securely attached liner is like a small victory—a sign of your dedication and newfound expertise. So gather your ingredients, preheat your oven, and let your creative baking spirit soar. With these tricks at your fingertips, you’re well-equipped to bake cupcakes that not only taste scrumptious but also look irresistible. Happy baking!
FAQ
Can I use regular liners or should I opt for greaseproof ones? Regular liners can do the trick, but greaseproof liners are like the A-team of liners. They resist moisture better and maintain their structure during baking, reducing the chances of detachment. If you’re serious about liner security, greaseproof liners are your go-to.
What if my cupcakes have already cooled and the liners are peeling? If you notice your liners pulling away after cooling, it could be due to rapid temperature changes. Try gently reattaching them by pressing the liner against the cupcake. If this doesn’t work, consider a light brushing of icing or frosting on the edge of the cupcake. It’s like a tasty adhesive that can keep liners in place.
Can I use cupcake liners with intricate designs? Absolutely! Intricately designed liners can add a touch of elegance to your cupcakes. However, keep in mind that elaborate designs might hide any liner detachment. Stick to these liner-saving tricks regardless of the liner design, ensuring that your cupcakes look as stunning as they taste.
Is it okay to leave cupcakes in the pan after baking? While it’s tempting to dive into your freshly baked treats, it’s best to remove the cupcakes from the pan after a brief cooling period. Leaving them in the pan for too long can lead to trapped moisture, potentially causing liners to peel away. Let your cupcakes cool on a wire rack for the perfect liner-hugging transition.
Can I skip using an oven thermometer? While you can certainly bake without an oven thermometer, it’s a valuable tool for achieving consistent results. Oven temperatures can vary, affecting your cupcakes’ rise and liner adherence. An oven thermometer ensures that you’re baking at the right temperature, setting the stage for liner success.
Should I rotate the cupcake pan even if my oven seems to bake evenly? Yes, rotating the pan is a good practice regardless of your oven’s behavior. Ovens can have subtle hotspots that might go unnoticed. Rotating the pan halfway through baking ensures that all cupcakes receive equal exposure to heat, helping liners stay in place uniformly.
What’s the best way to store cupcakes without liners peeling? Once your cupcakes are completely cooled, store them in an airtight container. Adding a piece of bread to the container can help maintain moisture and prevent liners from peeling. Just be sure to replace the bread as needed to keep your cupcakes in tip-top shape.
What if I’ve tried all the tricks and my liners still peel? Don’t fret! Baking is a journey filled with experimentation. If one batch doesn’t go as planned, don’t be discouraged. Take note of what might have gone wrong, whether it’s batter consistency, oven temperature, or liner quality. Each attempt is a step toward mastering the art of keeping liners in place.
With these common questions addressed, you’re now equipped with knowledge to bake cupcakes that stay adorned in their liners. Whether you’re a casual baker or a dedicated cupcake enthusiast, these tips ensure that your cupcakes not only taste fantastic but also look like works of art. Keep honing your skills, perfecting your techniques, and delighting in the wonderful world of baking!