Have you ever wondered how to remove stubborn stains or lingering residue from your silicone molds? Well, wonder no more! This step-by-step guide is designed especially for beginners like you, who are eager to learn the secrets of keeping silicone molds spotless. We’ll walk you through the entire process, from gathering the necessary supplies to properly storing your molds after cleaning.
So, don’t worry if you’re new to this – we’ve got you covered! With our friendly instructions, you’ll be well-equipped to tackle any cleaning challenge and enjoy the benefits of pristine silicone molds in no time. Let’s dive in and make your cleaning journey a success!
Step 1: Gather Your Supplies
Before you begin cleaning your silicone molds, it’s essential to gather all the necessary supplies. Having everything you need at hand will ensure a smooth and efficient cleaning process. Some of the supplies you will need include dish soap, warm water, a sponge or soft brush, a clean towel, and possibly a mild cleaning solution like vinegar.
By having these items ready, you won’t have to interrupt the cleaning process to search for missing supplies. Prepare a designated area where you can comfortably clean the molds, ensuring you have access to a sink or a basin with warm water. Taking a few moments to gather your supplies beforehand will save you time and make the cleaning process more convenient.
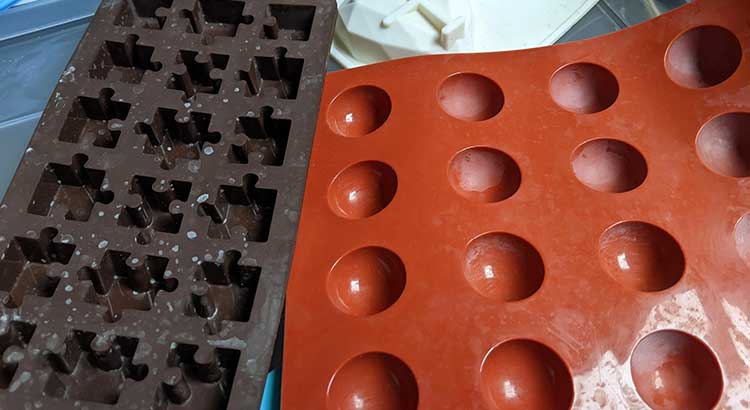
Step 2: Remove Excess Residue
Once you have your supplies ready, it’s time to remove any excess residue or debris from the silicone molds. Begin by inspecting the mold’s surface and gently scrape off any leftover particles with a soft brush or a damp cloth. Be careful not to use any sharp or abrasive tools that could damage the mold. Pay close attention to the crevices and corners of the mold, ensuring you remove all visible debris.
By thoroughly removing the excess residue, you’ll create a clean surface for the subsequent cleaning steps. This step is particularly important if you’re cleaning molds used for baking or crafting, as residual substances can affect the quality of your future creations.
Step 3: Rinse With Warm Water
After removing the excess residue, it’s time to rinse the silicone mold with warm water. This step helps to eliminate loose particles and prepares the mold for the cleaning solution. Hold the mold under running warm water, ensuring that the water flows over all parts of the mold.
Gently rub the surface of the mold with your fingers or a soft brush to dislodge any remaining debris. The warm water will help to loosen and flush away any dirt or grime, leaving the mold in a cleaner state. Make sure to rinse the mold thoroughly, ensuring no soap or debris remains before proceeding to the next step.
Step 4: Create a Cleaning Solution
Now it’s time to create a suitable cleaning solution for your silicone molds. You have a few options to consider. One effective choice is using mild dish soap. Fill a basin or sink with warm water and add a small amount of dish soap, creating a soapy solution. Alternatively, you can make a cleaning solution using vinegar.
Mix equal parts of water and vinegar in a container. Both dish soap and vinegar are gentle yet effective cleaners for silicone molds. Choose the option that suits your preference and the level of cleaning required. Remember, a little goes a long way, so avoid using excessive amounts of cleaning solution.
Step 5: Submerge the Mold
With the cleaning solution prepared, it’s time to submerge the silicone mold. Carefully place the mold into the basin or container filled with the cleaning solution. Ensure that the mold is fully immersed in the solution, allowing the cleaning agents to penetrate all areas of the mold’s surface. If needed, gently press down on the mold to ensure it remains submerged.
Allowing the mold to soak in the cleaning solution will help to break down any stubborn stains or residues, making them easier to remove during the cleaning process. Leave the mold to soak for a recommended duration, typically around 15-30 minutes, depending on the level of dirtiness.
Step 6: Clean the Mold
After the soaking period, it’s time to clean the silicone mold. Take a sponge or a soft brush and begin gently scrubbing the mold’s surface. Work in circular motions, paying close attention to any intricate details or hard-to-reach areas.
The sponge or brush will help remove any remaining dirt or residue. Be cautious not to apply excessive force or use abrasive tools that could damage the mold. If you encounter stubborn stains or areas that require extra attention, you can dip the sponge or brush into the cleaning solution and focus on those specific spots. Take your time to ensure thorough cleaning, ensuring all surfaces of the mold are addressed.
Step 7: Rinse Thoroughly
After cleaning the mold, it’s crucial to rinse it thoroughly to remove any traces of the cleaning solution. Rinse the mold under running warm water, ensuring that all soap or vinegar residue is completely washed away. Continue rinsing until the water runs clear, indicating that the mold is free from any cleaning agents.
Pay attention to corners and crevices, as these areas can easily trap residue. By thoroughly rinsing the mold, you’ll prevent any potential residue from affecting the quality or taste of future creations.
Step 8: Dry the Mold
Once the silicone mold has been thoroughly rinsed, it’s time to dry it properly. There are a few methods you can use to ensure the mold dries completely. One option is to air-dry the mold by placing it on a clean, dry surface or a drying rack. Allow the mold to sit undisturbed in a well-ventilated area until it is completely dry. This method is suitable for molds with simple shapes and no intricate details.
Alternatively, you can use a clean towel to pat the mold dry. Gently blot the mold with the towel, absorbing any excess water. Take care not to rub the mold vigorously, as it could cause damage. Pay attention to hard-to-reach areas, ensuring they are adequately dried. If needed, you can also use a soft cloth or paper towel to dry the mold’s crevices and corners. It’s essential to ensure the mold is completely dry before storing it to prevent any moisture buildup, which can lead to mold or mildew growth.
Step 9: Store Properly
Proper storage is essential to maintain the quality and shape of your silicone molds. Before storing, ensure the mold is completely dry. Choose a clean, dry area for storage that is away from direct sunlight and extreme temperatures. Excessive heat or sunlight can cause the silicone to degrade over time. If possible, store the mold in a dust-free container or wrap it in a clean cloth or plastic bag to protect it from dust or debris.
Avoid stacking heavy objects on top of the mold, as it can distort its shape. By storing your silicone molds properly, you’ll ensure their longevity and be ready to use them for your next baking or crafting project.
Final Thoughts
Congratulations on successfully cleaning your silicone molds! By following this step-by-step guide, you’ve taken a big step towards maintaining their quality and extending their lifespan. Now, you can confidently create beautiful baked goods or crafts without worrying about any leftover residue or contaminants. Remember, regular cleaning is key to ensuring your silicone molds stay in optimal condition and produce fantastic results every time.
Cleaning silicone molds doesn’t have to be a daunting task. With the right supplies and a little effort, you can easily remove dirt, stains, and unwanted substances from your molds. Taking the time to gather your supplies beforehand and properly remove excess residue will set you up for success. Remember to rinse the molds thoroughly, use a suitable cleaning solution, and gently scrub the surface. Finally, ensure your molds are completely dry before storing them in a safe, dust-free environment.
So, whether you’re a beginner or experienced, keeping your silicone molds clean will undoubtedly enhance your baking or crafting experience. By following this beginner’s guide, you’ll be able to enjoy the benefits of well-maintained silicone molds for years to come. Happy cleaning, and happy creating!