Cleaning a cookie sheet doesn’t have to be a difficult task, especially when you have a simple step-by-step guide to follow. Whether you’re a beginner in the kitchen or just looking for a refresher, this article will provide you with easy-to-follow instructions on how to clean your cookie sheet and bring back its shine. So roll up your sleeves, put on your favorite music, and let’s get started on making your cookie sheet look as good as new!
Step 1: Gather Your Supplies
Before you begin cleaning your cookie sheet, it’s important to gather all the necessary supplies. Having everything ready beforehand will save you time and prevent interruptions during the cleaning process. For this task, you will need:
- Baking soda: This natural cleaning agent helps to break down stubborn stains and neutralize odors.
- Vinegar: Vinegar reacts with the baking soda to create a foaming action that helps to lift away dirt and grime.
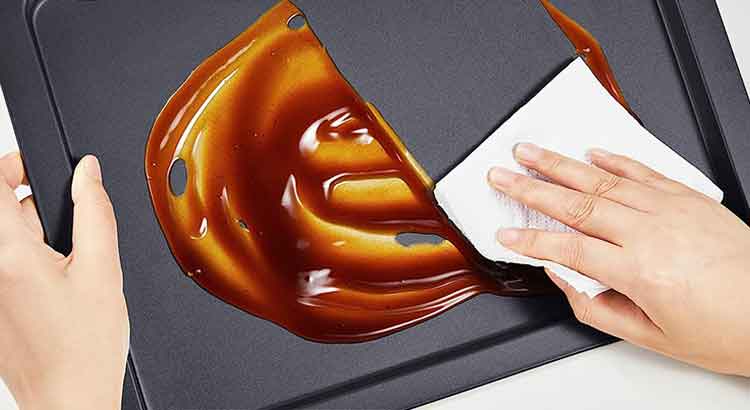
- Sponge or scrub brush: Use these tools to scrub the surface of the cookie sheet.
- Warm water: You will need warm water for rinsing the sheet.
- Towel for drying: Ensure you have a clean towel on hand for drying the cookie sheet.
Make sure you have all these supplies within reach before you get started.
Step 2: Remove Excess Debris
To begin the cleaning process, start by removing any excess debris from the cookie sheet. This can include leftover food particles, burnt bits, or any other residue that may have accumulated. Using a spatula or your hands, scrape off the larger pieces of debris and discard them into a garbage bin or compost. By removing the excess debris, you prevent it from spreading and making the cleaning process more difficult.
Step 3: Sprinkle Baking Soda
Once the excess debris is removed, it’s time to tackle the stains and grease on the cookie sheet. Sprinkle a generous amount of baking soda over the entire surface of the sheet. Baking soda is a natural and effective cleaning agent that helps to break down stubborn stains and neutralize odors. Spread the baking soda evenly, ensuring that all areas, especially those with visible stains, are covered.
Step 4: Add Vinegar
After sprinkling the baking soda, it’s time to introduce vinegar to the equation. Pour a small amount of vinegar onto the cookie sheet, focusing on the areas with the most stubborn stains. Vinegar reacts with the baking soda, creating a foaming action that helps to lift away dirt and grime. The combination of baking soda and vinegar forms a powerful cleaning solution.
Step 5: Let It Sit
Allow the baking soda and vinegar mixture to sit on the cookie sheet for about 15 to 20 minutes. This resting period is crucial as it allows the cleaning agents to penetrate the stains and loosen them from the surface. While you wait, you can use this time to prepare for the next step or tackle another cleaning task around the kitchen.
Step 6: Scrub the Surface
Once the baking soda and vinegar mixture has had time to work its magic, it’s time to scrub the surface of the cookie sheet. Using a sponge or scrub brush, gently scrub the entire surface, paying extra attention to areas with stubborn stains. Apply a bit of pressure while scrubbing to effectively remove the grime. The combination of baking soda, vinegar, and scrubbing action will work together to lift away the tough stains and restore the shine of the sheet.
Step 7: Rinse With Warm Water
After you have scrubbed the surface of the cookie sheet, it’s time to rinse away the cleaning agents. Rinse the sheet with warm water, ensuring that you remove all traces of baking soda and vinegar. You can use your hands or a clean cloth to wipe away any residue. Rinse thoroughly to ensure that no cleaning agents are left behind, as they can affect the taste of your future baked goods.
Step 8: Check for Remaining Stains
After rinsing, take a close look at the cookie sheet to check for any remaining stains. If you spot any stubborn spots or residue, don’t worry! You can repeat steps 3 to 7 to give them extra attention. Sometimes, more persistent stains may require a bit of extra effort to remove completely. Be patient and persistent, and soon your cookie sheet will be gleaming.
Step 9: Dry the Cookie Sheet
Finally, once the cookie sheet is clean and free of stains, it’s important to dry it thoroughly. Use a clean towel to dry the sheet or let it air dry. Ensuring that the sheet is completely dry before storing it is essential to prevent any moisture-related issues, such as rust or mold. Once dry, your cookie sheet will be ready for future baking endeavors.
Final Thoughts
And there you have it! Cleaning a cookie sheet doesn’t have to be a daunting task. By following these simple steps, you can restore your cookie sheet to its shiny and clean state. Remember, gathering your supplies, removing excess debris, sprinkling baking soda, adding vinegar, letting it sit, scrubbing the surface, rinsing with warm water, checking for remaining stains, and drying the sheet are the key steps to a successful cleaning process.
Don’t be discouraged if you encounter stubborn stains along the way. Just give them some extra attention and keep scrubbing. With a little patience and persistence, your cookie sheet will be stain-free in no time. So go ahead and get your supplies ready, put on some music or your favorite podcast, and make the cleaning process a fun and rewarding activity.
Now, your cookie sheet is ready to accompany you on countless baking adventures. With each batch of cookies, you’ll be reminded of the effort you put into keeping your baking tools clean and well-maintained. So roll up your sleeves, grab that sponge, and let’s get those cookie sheets looking brand new. Happy baking, and may your cookies always come out perfectly golden and delicious!