Understanding dough hydration is a fundamental aspect that can greatly influence the outcome of your homemade bread. But fear not, dear beginners! Calculating dough hydration doesn’t have to be complicated or intimidating. In this simple guide, we’ll walk you through the process step by step, empowering you to create the perfect dough consistency for your desired bread texture.
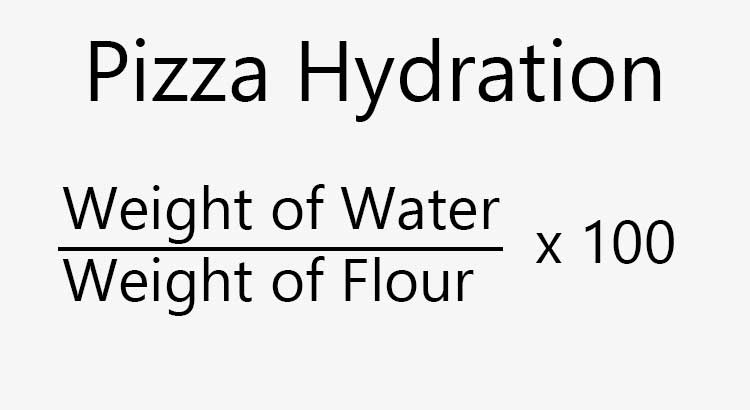
The simplest way to calculate the hydration of a dough is to divide the weight of water used in the recipe by the weight of flour and multiply the result by 100. (Water weight ÷ ingredients weight) x 100.
So, put on your apron and get your measuring cups ready! We’ll explore the basics of dough hydration, discover which ingredients count towards hydration besides water, and learn how different types of flour can affect hydration levels. By the end of this guide, you’ll be equipped with the knowledge and confidence to calculate dough hydration like a pro.
Simple Method of Calculating Dough Hydration
Follow this simple step-by-step guide to calculate dough hydration accurately.
- Gather the Ingredients: Before you begin calculating dough hydration, make sure you have the necessary ingredients on hand. You’ll need flour and water, which are the primary components of the dough. Depending on your recipe, you may also require other ingredients like yeast, salt, and sugar.
- Measure the Flour: Start by measuring the amount of flour you will be using in your recipe. Use a kitchen scale for precise measurements. For example, if your recipe calls for 500 grams of flour, make a note of this measurement.
- Measure the Water: Next, measure the amount of water required in your recipe. Again, use a kitchen scale for accurate measurements. Let’s say your recipe calls for 350 milliliters of water. Take note of this measurement as well.
- Calculate the Hydration: To calculate the dough hydration, divide the weight of the water by the weight of the flour and multiply by 100. Using the measurements from our previous examples, the calculation would be as follows: (350 grams of water / 500 grams of flour) * 100 = 70%. This means the dough hydration is 70%.
- Adjust as Needed: Depending on your desired consistency and the type of bread you’re making, you can adjust the hydration level. Higher hydration results in a more open crumb and chewier texture, while lower hydration produces a denser and drier texture. Experiment with different hydration levels to find what works best for your recipe and personal preference.
- Note Other Ingredients: Keep in mind that certain ingredients, such as eggs, milk, or oil, will also contribute to the overall hydration of the dough. Take these into account when calculating the hydration and adjust accordingly.
Calculating dough hydration may seem daunting at first, but with practice, it becomes second nature. By understanding and controlling the hydration level, you can create breads, pastries, and other baked goods that turn out just the way you want them to.
How to Calculate Dough Hydration Backwards
Calculating dough hydration can also be done in reverse, meaning you can determine the amount of water needed based on the desired hydration level. This method is particularly useful when you want to adjust a recipe to achieve a specific texture or consistency. Here’s how you can calculate dough hydration backwards:
Choose a Target Hydration: Start by deciding on the hydration level you want to achieve for your dough. Higher hydration results in a wetter and stickier dough, while lower hydration produces a drier and firmer dough. Let’s say you want a hydration level of 75% for your bread recipe.
Measure the Flour: Begin by measuring the amount of flour you plan to use in your recipe. Once again, use a kitchen scale for accurate measurements. For example, let’s say you have 600 grams of flour.
Calculate the Water: To calculate the amount of water needed, multiply the weight of the flour by the desired hydration level (expressed as a decimal) and divide by 100. Using our previous example, the calculation would be: (600 grams of flour * 0.75) / 100 = 4.5 grams of water.
Adjust as Necessary: Keep in mind that this calculation gives you a rough estimate of the water needed. Factors such as flour absorption, environmental conditions, and personal preference can influence the final result. Start with the calculated amount of water, but be prepared to make small adjustments during the dough mixing process to achieve the desired consistency.
Calculating dough hydration backwards allows you to fine-tune your recipes to meet your specific preferences. It gives you more control over the texture and structure of your baked goods. Experiment with different hydration levels and observe how they affect the final outcome. With time and practice, you’ll gain confidence in adjusting hydration levels to create the perfect dough for your culinary creations.
Which Ingredients Besides Water Count Towards Hydration?
When calculating dough hydration, it’s important to consider that other ingredients besides water can also contribute to the overall hydration level. These ingredients include milk, eggs, oil, honey, and other liquids. Here’s a general guide to understanding how these ingredients affect hydration:
Milk: Milk is approximately 87% water, so it contributes to the hydration of the dough. When a recipe calls for milk, you can consider its weight as part of the water measurement. For example, if your recipe calls for 100 grams of milk, you can treat it as 87 grams of water and adjust the water measurement accordingly.
Eggs: Eggs are composed of approximately 75% water. If your recipe includes eggs, you can consider their weight as part of the water measurement. For instance, if your recipe calls for 2 eggs weighing a total of 100 grams, you can treat them as 75 grams of water and adjust the water measurement accordingly.
Oil and Other Liquids: While oil and other liquids don’t contain water in the same proportion as milk or eggs, they can still contribute to the overall hydration of the dough. Take into account the weight of these liquids and adjust the water measurement accordingly.
Remember, the inclusion of these ingredients affects not only hydration but also the flavor, texture, and overall characteristics of your baked goods. Be mindful of their impact and make adjustments accordingly to achieve the desired results.
Different Flour Types Influence Hydration Level
The type of flour you use can significantly impact the hydration level of your dough. Different flours have varying levels of protein and absorb water differently, leading to variations in texture and hydration. Here are a few flour types and their effects on hydration:
All-Purpose Flour: All-purpose flour is a versatile choice for many recipes. It typically has a protein content of around 10-12%. When using all-purpose flour, you can expect it to absorb water moderately, resulting in a balanced hydration level. Adjustments may still be necessary based on the specific recipe and desired outcome.
Bread Flour: Bread flour contains a higher protein content, usually around 12-14%. This increased protein content allows bread flour to absorb more water, resulting in a higher hydration level. When using bread flour, you may need to increase the water measurement slightly compared to all-purpose flour recipes.
Whole Wheat Flour: Whole wheat flour contains the entire grain, including the bran and germ. It has a higher protein content and absorbs more water than all-purpose flour. When working with whole wheat flour, you may need to increase the water measurement significantly to maintain an appropriate hydration level.
Gluten-Free Flours: Gluten-free flours, such as rice flour, almond flour, or coconut flour, require different considerations. These flours have different absorption rates and behave differently in doughs. Follow recipes specifically designed for gluten-free flours and adjust the hydration accordingly.
Understanding how different flour types behave will help you adapt your hydration calculations and achieve the desired results in your baking. Remember to read recipes carefully and adjust the water measurement based on the specific flour you’re using.
What Is Considered High Hydration or Low Hydration?
In the world of baking, hydration levels can vary, and it’s important to understand what is considered high hydration or low hydration. Hydration levels are typically expressed as a percentage and refer to the ratio of water to flour in a dough. Here’s a breakdown of high and low hydration levels:
High Hydration: High hydration doughs have a higher ratio of water to flour. They are wetter and stickier in consistency. Generally, hydration levels above 75% are considered high. High hydration doughs often result in breads with an open crumb structure, a lighter texture, and a chewier crust. These doughs require careful handling and may be more challenging for beginner bakers.
Low Hydration: Low hydration doughs have a lower ratio of water to flour. They are drier and firmer in consistency. Hydration levels below 60% are typically considered low. Low hydration doughs result in breads with a denser texture and a crust that tends to be crisper. These doughs are easier to handle and may be more suitable for certain types of bread and pastries.
Understanding the distinction between high and low hydration levels allows you to choose the appropriate hydration for your desired baked goods and adjust your recipes accordingly.
But What Does Hydration Do?
You might be wondering, what exactly does hydration do in dough? Well, hydration plays a crucial role in determining the final texture, structure, and overall quality of your baked goods. Here are a few key effects of hydration in dough:
Gluten Development: Hydration is essential for gluten development. Gluten, a protein formed when flour combines with water, gives dough its elasticity and strength. Adequate hydration helps the gluten strands develop and align properly, resulting in a more elastic and stretchy dough.
Dough Consistency: Hydration directly affects the consistency of the dough. Higher hydration makes the dough more fluid and extensible, allowing it to spread and rise more easily. Lower hydration makes the dough stiffer and less pliable, making it easier to shape and control.
Crumb Structure: Hydration influences the crumb structure of bread. Higher hydration levels promote a more open and irregular crumb structure, with larger air pockets and a lighter texture. Lower hydration levels result in a denser and more uniform crumb structure.
Texture and Shelf Life: Hydration affects the final texture of baked goods. Higher hydration tends to produce bread with a softer, moister crumb and a chewier crust. Lower hydration yields a drier and firmer texture. Additionally, hydration can impact the shelf life of baked goods, as higher hydration can contribute to increased moisture retention.
By understanding the effects of hydration, you can manipulate the texture, structure, and overall quality of your baked goods to achieve the desired results.
Why You Should Calculate Dough Hydration
Calculating dough hydration is an essential practice for any baker, whether you’re a beginner or experienced. Here’s why you should make the effort to calculate dough hydration:
Consistency: Calculating dough hydration allows you to achieve consistent results in your baking. By accurately measuring the water-to-flour ratio, you can replicate successful recipes and achieve the desired texture and structure consistently.
Customization: Calculating dough hydration gives you the flexibility to customize your recipes. By adjusting the hydration level, you can create breads with different textures and crust characteristics. It allows you to tailor your baked goods to your personal preference or specific recipe requirements.
Problem Solving: Understanding dough hydration helps you troubleshoot baking issues. If you encounter problems like a dense crumb or a collapsed structure, knowing the hydration level can help identify potential causes and make appropriate adjustments in your future attempts.
Learning and Growth: Calculating dough hydration is a valuable skill that contributes to your growth as a baker. It deepens your understanding of the baking process, improves your ability to experiment with different recipes, and empowers you to create unique and delicious baked goods.
Is Higher Hydration Always Better?
While higher hydration levels in dough can result in desirable characteristics like an open crumb and a chewy texture, it’s important to note that higher hydration is not always better. The ideal hydration level depends on the type of bread you’re making, personal preference, and specific recipe requirements. Here are a few considerations regarding higher hydration:
Handling Challenges: Higher hydration doughs can be more challenging to handle, especially for beginners. The stickier consistency may make shaping and scoring more difficult. It requires practice and technique to work with higher hydration dough effectively.
Recipe Suitability: Not all bread recipes are suitable for high hydration. Certain bread types, such as rustic artisan loaves or ciabatta, benefit from higher hydration. However, recipes for sandwich bread or enriched doughs may require lower hydration for better structure and sliceability.
Flour Characteristics: The characteristics of the flour you’re using can impact the success of higher hydration. Some flours have a lower protein content and may struggle to develop sufficient gluten structure at higher hydration levels. Understanding the flour you’re working with and its limitations is essential.
Remember, higher hydration is not inherently better or worse—it’s a matter of understanding the requirements of your recipe and your desired outcome.
How to Adjust Hydration
Sometimes, you may find the need to adjust the hydration level of your dough to achieve the desired texture and consistency. Here are a few ways you can adjust hydration:
Adding Water: If your dough feels too dry and stiff during mixing, gradually add small amounts of water to increase hydration. Add water in increments and observe the dough’s consistency before adding more. Be cautious not to overhydrate the dough, as it can become difficult to work with.
Adding Flour: If your dough feels too wet and sticky, you can adjust hydration by gradually adding small amounts of flour. Mix the flour into the dough thoroughly before making further adjustments. Remember that adding flour will affect the overall hydration level and may impact the final outcome.
Autolyse Technique: The autolyse technique involves combining flour and water and allowing them to hydrate before adding other ingredients. This technique can enhance gluten development and improve dough handling. Adjusting the duration of the autolyse can influence hydration and subsequent adjustments in the recipe.
Adjusting Recipe Ratios: If you frequently encounter issues with hydration, consider adjusting the hydration ratio in the recipe itself. Increase or decrease the amount of water or flour to achieve the desired hydration level. Keep in mind the impact on other recipe components and adjust them accordingly.
Experimenting with adjustments and finding the balance that works best for your recipe and preferences is part of the joy of baking. Be patient, make small changes, and pay attention to the consistency and feel of the dough as you go along.
5 Tips for Dealing With High-Hydration Breads
Working with high-hydration bread dough requires some special techniques and considerations. Here are five tips to help you navigate the challenges:
- Use Wet Hands and Tools: Wetting your hands and tools, such as bench scrapers or dough scrapers, can make handling high-hydration dough easier. The moisture prevents excessive sticking, allowing you to shape and handle the dough more effectively.
- Practice Stretch and Fold: Incorporating the stretch and fold technique during fermentation helps develop gluten structure and strengthens the dough. This technique is particularly useful for high-hydration doughs as it aids in creating tension and structure.
- Use a High-Quality Banneton or Proofing Basket: A banneton or proofing basket with a well-floured surface can assist in maintaining the shape and structure of high-hydration dough during the final proofing stage. The floured surface helps prevent excessive sticking and aids in achieving a better rise.
- Be Mindful of Fermentation Time: High-hydration doughs often require longer fermentation times to develop flavor and structure. Monitor the dough closely during fermentation and adjust the time as needed. Be patient and allow the dough to ferment adequately to achieve optimal results.
- Experiment with Baking Methods: Consider using a Dutch oven or a baking stone with steam when baking high-hydration bread. These methods help create a favorable baking environment, promoting better oven spring and crust development.
Working with high-hydration dough can be challenging but rewarding. Embrace the process, keep practicing, and don’t be discouraged by any initial difficulties. With time and experience, you’ll become more comfortable and confident in handling high-hydration breads, and the results will be well worth the effort.
Final Thoughts
In the wonderful world of baking, understanding dough hydration is a key ingredient to creating delicious breads and pastries. By calculating hydration levels, adjusting as needed, and considering the characteristics of different flours, you can achieve the perfect texture and structure in your baked goods. Remember, higher hydration isn’t always better, and it’s essential to find the balance that suits your recipe and preferences.
Working with high-hydration dough can be a bit tricky, but don’t be discouraged! With practice and the right techniques, you’ll soon master the art of handling sticky dough. Keep those hands and tools moist, embrace the stretch and fold technique, and don’t forget the importance of proper fermentation. And when it comes to baking, don’t be afraid to experiment and make adjustments to achieve the desired results.
So, go forth and conquer the world of dough hydration! Dive into the joy of creating beautiful loaves, fluffy pastries, and artisanal breads. Remember, baking is a journey of discovery and growth, so enjoy every step along the way. May your baking adventures be filled with delicious aromas, mouthwatering flavors, and the satisfaction of creating something truly special. Happy baking!