Understanding the timing of the second rise is crucial for achieving that perfect, fluffy loaf. In this beginner’s guide, we’ll break down the process step by step. Whether you’re a seasoned baker or just starting out, you’ll find valuable tips to help you master the art of breadmaking.
On average, bread should rise for about 30-60 minutes during its second rise. However, this can vary depending on factors like room temperature and the type of bread you’re making. Keep an eye on your dough, and when it has visibly puffed up, it’s ready to be baked.
Join us as we unravel the secrets of achieving that golden, pillowy texture that makes homemade bread so irresistible. From doughy beginnings to oven-fresh perfection, this guide will walk you through the journey of bread rising with simplicity and ease.
Step-by-Step Beginners Guide
Choosing the Right Environment
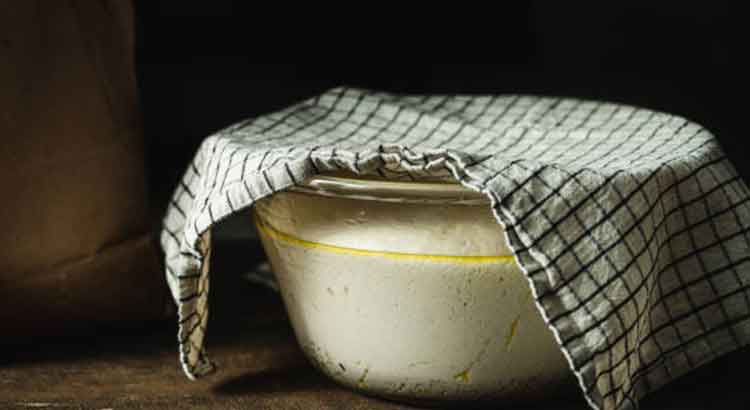
Find a warm, draft-free spot for your dough to rise. A consistent temperature helps the yeast do its job. If your kitchen is on the cooler side, consider placing the dough in a slightly warmed oven (turned off) or near a sunny window.
Patience is Key
On average, bread should rise for about 30-60 minutes during its second rise. Keep an eye on your dough and wait until it has visibly puffed up. This indicates that the yeast is active and doing its job. Remember, rushing this step can lead to a dense, underwhelming loaf.
The Finger Test
A simple way to check if your bread has risen enough is by using the “finger test”. Gently press your finger into the dough. If the indentation remains and slowly fills back in, your bread is ready for the oven. If it springs back immediately, it needs more time.
Be Mindful of Over-Rising
While waiting for your dough to rise, keep an eye on it. Over-rising can lead to a flat, deflated loaf. If you notice the dough has doubled in size, it’s time to move on to the next step. Don’t be discouraged if it takes a few tries to get the timing just right.
Baking Your Perfect Loaf
Once your dough has completed its second rise, it’s time to bake. Follow the recipe instructions for oven temperature and baking time. Keep in mind that every oven is different, so it’s a good idea to check on your bread towards the end of the recommended baking time.
Enjoy the Fruits of Your Labor
The moment has arrived – your freshly baked bread is ready to be savored. Allow it to cool slightly before slicing into it. The aroma of warm, homemade bread is a reward in itself. Whether you enjoy it with butter, as a sandwich, or simply on its own, take pride in your baking achievement.
Troubleshooting Tips
If Your Bread Rises Too Quickly
If your bread rises too quickly during the second rise, it may result in an overly airy or fragile texture. To prevent this, try placing the dough in a slightly cooler environment for a longer rise time.
If Your Bread Takes Too Long to Rise
If your dough is taking longer than expected to rise, consider increasing the ambient temperature or using a bit more yeast in your recipe. Remember, patience is key, but a little nudge in the right direction can help speed things up.
Dealing with a Flat Loaf
If your bread turns out flat, it may be due to over-rising or using expired yeast. Pay close attention to rise times and always use fresh yeast for the best results.
Additional Tips
Embrace Experimentation
Don’t be afraid to tweak recipes to suit your preferences. Whether it’s adjusting the rise time or incorporating different flours, each experiment is a step towards discovering your perfect loaf. Keep a journal to track what works best for you.
The Importance of Consistency
Consistency in measurements and techniques is crucial for successful breadmaking. Invest in a kitchen scale for accurate ingredient weights. This small tool can make a big difference in the outcome of your bread.
Get to Know Your Yeast
Understanding the behavior of yeast is key to achieving the desired rise. Active dry yeast and instant yeast may have slightly different requirements. Follow the recommended usage on the packaging and adjust accordingly.
Don’t Rush the Cooling Process
After baking, allow your bread to cool completely before slicing. Cutting into a hot loaf can result in a gummy texture. Patience pays off here, as a properly cooled loaf will have a better texture and flavor.
Store Bread Properly
To keep your bread fresh, store it in a paper bag or wrapped in a clean kitchen towel. Avoid sealing it in a plastic bag, as this can trap moisture and lead to a soggy crust.
Practice Makes Perfect
Breadmaking is a skill that improves with practice. Don’t be discouraged by initial setbacks. Each batch teaches you something new. Celebrate your progress and enjoy the delicious journey of creating homemade bread.
Connect with the Breadmaking Community
Joining a baking group or forum can provide valuable insights and a sense of camaraderie. Learning from others’ experiences and sharing your own can be incredibly enriching.
Trust Your Senses
While recipes provide guidelines, trust your instincts and senses. Pay attention to the look, feel, and aroma of your dough. You’ll develop an intuitive sense for when it’s just right.
Remember, It’s All About Enjoyment
Ultimately, the joy of breadmaking lies in the process and the delightful end result. Whether you’re baking for yourself or sharing with loved ones, savor every moment. The simple act of creating something from scratch is a gratifying experience.
Final Thoughts
In the world of breadmaking, patience and practice go hand in hand. Perfecting the art of the second rise is a journey that may come with a few bumps along the way, but the rewards are well worth the effort. With every batch, you refine your understanding of yeast, dough, and the unique conditions of your kitchen. Remember, there’s no one-size-fits-all approach to breadmaking. Embrace the learning process and trust your instincts.
As you embark on this delicious adventure, don’t forget to savor the moments. The aroma of freshly baked bread, the satisfaction of a well-risen loaf – these are the simple pleasures that make the process so gratifying. Whether you’re baking for yourself, your family, or friends, each loaf is a testament to your dedication and craftsmanship.
In the end, it’s important to remember that there’s no such thing as a failed loaf of bread. Even if a batch doesn’t turn out exactly as you hoped, there’s always something to learn from the experience. Perhaps it’s a reminder to adjust your rise times, or a cue to explore new techniques. With each attempt, you’re honing your skills and inching closer to achieving that perfect, pillowy loaf. So, embrace the journey, celebrate your successes, and enjoy the delicious fruits of your labor. Happy baking!
FAQ
Q: Why is the second rise important in breadmaking?
A: The second rise, also known as the final proof, allows the dough to develop its flavor and texture. It gives the yeast a chance to create those desirable air pockets that result in a light, airy crumb. Skipping or rushing this step can lead to a dense, less flavorful loaf.
Q: Can I let bread rise for too long during the second rise?
A: Yes, over-rising can be a pitfall. If the dough is left to rise for too long, it may become weak and collapse during baking. Keep an eye on your dough, and once it has visibly puffed up, it’s ready for the oven. Remember, patience is key, but be mindful of overextending the rise time.
Q: What if my dough doesn’t seem to be rising during the second proof?
A: There could be a few reasons for this. Firstly, check if your yeast is still active. Expired yeast may not be able to provide the necessary leavening. Additionally, ensure that your dough is in a warm, draft-free environment. If all else fails, consider giving it a bit more time or using a bit more yeast in your recipe.
Q: Can I speed up the second rise process?
A: While it’s best not to rush the second rise, there are ways to help it along. Placing the dough in a slightly warmer environment or using a bit more yeast can expedite the process. However, be cautious not to overdo it, as a rushed rise can lead to a less than stellar outcome.
Q: How do I know when the dough has risen enough during the second rise?
A: The “finger test” is a handy way to check. Gently press your finger into the dough. If the indentation remains and slowly fills back in, your bread is ready for the oven. If it springs back immediately, it needs more time. Trust your senses and you’ll develop an intuitive feel for when the rise is just right.
Q: Can I refrigerate dough during the second rise?
A: While the second rise is typically done at room temperature, you can refrigerate dough if needed. This slows down the rising process and allows for a longer fermentation period, which can enhance flavor. Just be sure to give it some time to come back to room temperature before baking.
Q: What if my bread turns out too dense after the second rise?
A: If your bread is consistently turning out dense, it may be due to a few factors. Ensure you’re using the correct type of flour and measuring accurately. Additionally, double-check your rise times and that your dough is in a warm enough environment.
Q: Can I use the same proofing time for different types of bread?
A: Different types of bread may have varying proofing requirements. For example, a hearty whole-grain loaf may benefit from a longer second rise, while a lighter, airy bread may need less time. Always refer to the specific recipe for guidance on proofing times.
Q: How can I prevent a soggy crust after the second rise?
A: To avoid a soggy crust, allow your bread to cool completely before storing. If you wrap it up while it’s still warm, condensation can form and lead to a less desirable texture. Storing your bread in a paper bag or wrapped in a clean kitchen towel can also help maintain the crust’s integrity.