Have you ever wondered how long you should wait before slathering your freshly baked cake with luscious frosting? The answer lies in finding the perfect balance between patience and anticipation. Let’s dive into the question of how long a cake should cool before frosting it!
The ideal cooling time for a cake is typically 1 to 2 hours at room temperature. This period allows the cake to set and firm up, making it easier to handle without compromising its texture. Waiting for the cake to cool completely ensures that the frosting adheres well, creating a beautiful and delectable treat.
But what if you’re short on time and can’t resist the urge to frost? While it’s best to exercise patience, there are techniques to speed up the process. By understanding the importance of proper cooling and exploring ways to cool your cake faster, you’ll be equipped with the knowledge to make the best decision for your baking adventures.
How Long Should a Cake Cool Before Frosting?
Cooling the cake properly is vital to ensure the frosting adheres well and doesn’t melt or slide off.
The general rule of thumb is to let the cake cool completely before frosting it. This typically takes about 1 to 2 hours, depending on the size and thickness of the cake. Cooling allows the cake to set and firm up, making it easier to handle and frost without causing damage.
If you’re in a hurry and can’t wait for the cake to cool naturally, you can place it in the refrigerator to speed up the process. However, it’s essential to note that refrigeration may cause the cake to become slightly denser. So, while it’s a convenient option when time is limited, it’s best to allow the cake to cool at room temperature whenever possible.
Remember, patience is key when it comes to cake baking and frosting. Rushing the process may lead to a disappointing outcome. Take the time to let your cake cool properly, and you’ll be rewarded with a beautifully frosted creation that is both delicious and visually appealing.
Frosting a Hot Cake
So, you’ve just taken your cake out of the oven, and it smells absolutely divine. The temptation to slather on the frosting right away is strong, but hold on! Frosting a hot cake can lead to a messy disaster. Here’s why:
Hot cakes have a higher moisture content, and the heat causes the frosting to melt and slide off. This not only makes a mess but also results in an uneven and runny appearance. Additionally, frosting a hot cake can cause the frosting to absorb into the cake, making it soggy and compromising the texture.
To avoid these issues, it’s crucial to let the hot cake cool down before applying the frosting. Place the cake on a wire rack and let it sit at room temperature for at least 1 to 2 hours. This allows the cake to firm up and reach a temperature that is safe for frosting.
If you’re short on time and need to cool the cake quickly, you can use a few tricks. One option is to place the cake in the refrigerator for about 30 minutes to an hour. However, be cautious not to leave it in for too long, as excessive chilling can affect the texture of the cake.
Remember, patience is key. Taking the time to let your hot cake cool properly will result in a well-structured cake with a beautiful, smooth layer of frosting.
Frosting a Warm Cake
What if you’re in a hurry and can’t wait for the cake to cool completely? Can you frost a warm cake? The answer is yes, but with a few precautions:
A warm cake is more stable than a hot cake, but it still poses some challenges. Frosting a warm cake can cause the frosting to melt and slide off, resulting in a messy appearance. However, if you’re careful and follow some guidelines, you can successfully frost a warm cake.
First, let the warm cake sit on a wire rack for about 15 to 20 minutes after taking it out of the oven. This allows it to cool slightly and reduces the risk of the frosting melting excessively.
Next, choose a frosting that has a thicker consistency, such as a ganache or a whipped cream stabilizer. These types of frosting are less likely to melt and will hold their shape better on a warm cake.
When applying the frosting, do it gently and avoid spreading it too vigorously. Start with a thin layer and let it set for a few minutes before adding more. This allows the frosting to cool and firm up slightly, helping it adhere better to the warm cake.
How to Cool Your Cake Faster
Sometimes, waiting for a cake to cool completely before frosting can feel like an eternity, especially when you’re eager to indulge in a slice of sweet goodness. Fortunately, there are a few techniques you can use to speed up the cake cooling process without sacrificing the final result. Here’s how to cool your cake faster:
- Slice the Cake: If you’re working with a thick cake, consider slicing it horizontally into layers. By doing this, you expose more surface area to the air, allowing the heat to dissipate more quickly. Just make sure to handle the cake gently to prevent it from crumbling or breaking.
- Use a Cooling Rack: A cooling rack is a valuable tool for promoting airflow around the cake, which aids in the cooling process. Place the cake on the rack, ensuring that it is elevated to allow air to circulate underneath. This method helps the cake cool faster and evenly.
- Place in the Fridge or Freezer: While it’s generally recommended to let a cake cool at room temperature, using your refrigerator or freezer can be a helpful shortcut. If you opt for the fridge, place the cake on the cooling rack and let it chill for about 30 minutes. The cooler environment will expedite the cooling process. However, avoid leaving it in the fridge for too long, as it may result in a denser texture.
- Utilize a Fan: Setting up a fan near the cake can create a gentle breeze that speeds up the cooling process. Ensure that the fan is on a low setting and positioned a few feet away from the cake. The airflow will assist in evaporating moisture from the cake’s surface, helping it cool down faster.
- Ice Bath Method: For smaller cakes or cupcakes, you can employ the ice bath method. Fill a large bowl or basin with cold water and ice cubes. Place the cake pans or cupcakes into a separate, slightly larger container and then immerse it in the ice bath. Be careful not to let any water come into contact with the cake. The cold temperature from the ice bath will help cool the cakes more rapidly.
Is It Ok to Cool Your Cake Faster?
When you’re eager to frost your cake and can’t wait for it to cool naturally, it’s tempting to seek ways to speed up the process. But is it okay to cool your cake faster? Let’s take a closer look:
Cooling a cake too quickly can have some potential drawbacks. One risk is that the cake might become denser than desired. The gradual cooling process allows the structure of the cake to set properly, resulting in a light and fluffy texture. Rapid cooling can hinder this process and lead to a denser crumb.
Another concern is the potential for uneven cooling. When a cake cools too quickly, the exterior may cool faster than the interior, creating a temperature disparity. This can cause the cake to develop a tough or dry crust, while the center remains undercooked. Achieving even cooling ensures a consistent texture throughout the cake.
However, there are times when cooling your cake faster is acceptable. If you’re planning to crumb coat your cake (a thin layer of frosting to seal in crumbs before applying the final layer), you can cool the cake more quickly since the crumb coat will be covered. Just be mindful of the potential texture changes and temperature disparities mentioned earlier.
Ultimately, the decision to cool your cake faster depends on your priorities and the specific situation. While it’s generally recommended to allow the cake to cool naturally for the best results, there are techniques, such as those mentioned earlier, that can help expedite the process without compromising the overall quality too much.
Crumb Coat
Now that your cake has cooled sufficiently, it’s time to talk about the crumb coat. What is a crumb coat, and why is it important?
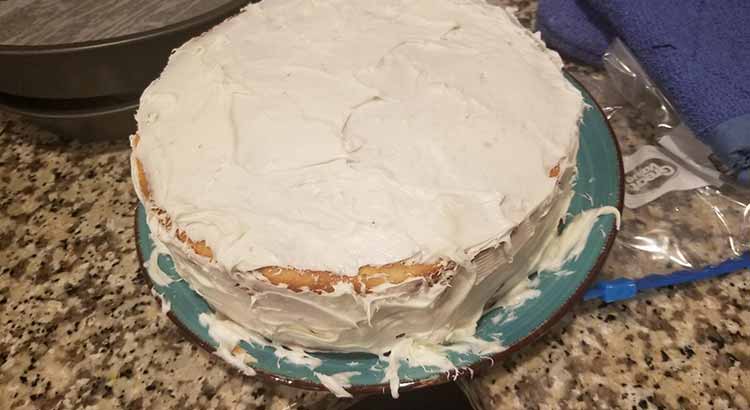
A crumb coat is a thin layer of frosting that is applied to the cake before the final layer of frosting. Its primary purpose is to seal in the crumbs and provide a smooth base for the final coat of frosting. This technique helps achieve a professional-looking finish and prevents unsightly crumbs from peeking through the outer layer.
To apply a crumb coat, start by placing a generous dollop of frosting on the center of the cake. Using a spatula or an offset icing spatula, spread the frosting evenly over the top and sides of the cake, making sure to fill in any gaps and cover the surface completely. The layer should be thin and smooth, acting as a barrier to trap any loose crumbs.
Once the crumb coat is applied, place the cake in the refrigerator for about 15 to 20 minutes to allow the frosting to firm up. This will make it easier to apply the final layer of frosting without disturbing the crumbs or creating a messy appearance.
After the crumb coat has set, you can proceed with adding the final layer of frosting. This layer can be thicker and more decorative, as the crumb coat has already created a clean canvas for your frosting design.
Final Thoughts
So, there you have it—the importance of properly cooling your cake before frosting, the techniques to cool it faster, and the significance of the crumb coat. As you embark on your cake baking and decorating adventures, keep these key points in mind.
Patience is indeed a virtue when it comes to cake baking. Allowing your cake to cool completely before frosting ensures the best texture, flavor, and appearance. While it may be tempting to rush the process, taking the time to let your cake cool naturally yields better results. Remember, good things come to those who wait!
However, we all find ourselves in situations where time is limited and we need a shortcut. When that happens, the techniques shared for cooling your cake faster can be a helpful option. Slicing the cake, using a cooling rack, or employing the fridge or freezer can help expedite the cooling process while maintaining an acceptable outcome. Just be mindful of the potential texture changes and keep an eye on the cake to avoid any mishaps.
Lastly, don’t underestimate the power of the crumb coat. This thin layer of frosting plays a crucial role in achieving a flawless final look. It seals in crumbs, provides a smooth base, and ensures that your final layer of frosting shines. So, take the time to apply a crumb coat and let it set before adding the final layer—it’s the secret to a professional finish!
Whether you’re baking a cake for a special occasion or simply indulging in a homemade treat, the process of cooling and frosting can be an enjoyable journey. Embrace the artistry, take pride in your creations, and savor every delectable bite. With proper cooling, a well-executed crumb coat, and a touch of creativity, you’ll be able to create cakes that are not only visually stunning but also a delight to the taste buds. Happy baking and frosting!
FAQ
Baking and frosting cakes can bring about various questions and uncertainties. To provide further clarity, here are some frequently asked questions to address common concerns and help you on your cake journey.
1. Can I frost a cake while it’s still warm?
While it’s best to wait for the cake to cool completely before frosting, you can frost a warm cake with some precautions. Allow the cake to cool on a wire rack for a short period to prevent excessive melting of the frosting. Choose a frosting with a thicker consistency, and apply it gently, allowing time for it to cool and set between layers. Keep in mind that frosting a warm cake may not yield the same perfect results as frosting a fully cooled cake, but it can be a viable option when time is limited.
2. How long should I let my cake cool before applying the crumb coat?
Once the cake has cooled completely, it’s ready for the crumb coat. Cooling times can vary depending on factors such as the size and thickness of the cake. As a general guideline, allow the cake to cool for at least 1 to 2 hours at room temperature. This cooling period ensures that the cake has set and is firm enough to handle without any damage. It’s important to note that a properly cooled cake provides a solid foundation for the crumb coat and subsequent layers of frosting.
3. What can I do if I don’t have a cooling rack?
A cooling rack is a handy tool for promoting air circulation around the cake, but if you don’t have one, don’t worry! You can still cool your cake effectively by improvising with household items. Place the cake on an overturned baking sheet or a wire cooling rack from your toaster oven. The key is to elevate the cake slightly to allow air to circulate underneath and facilitate the cooling process. Just ensure that the surface you place the cake on is clean and heat-resistant.
4. How can I prevent my frosting from melting in hot weather?
Hot weather can pose a challenge when it comes to frosting cakes. To prevent your frosting from melting, consider using a stable frosting recipe or opting for frosting alternatives that are less prone to melting, such as whipped cream stabilizers or fondant. Keep the frosted cake refrigerated until shortly before serving, and avoid exposing it to direct sunlight or high temperatures. If necessary, you can place the frosted cake in a cool area or use chilled serving plates to help maintain its stability.
5. Can I freeze a cake before frosting it?
Yes, freezing a cake before frosting it is possible and can even be beneficial in some cases. Freezing helps to lock in moisture and make the cake more manageable when it comes to frosting. To freeze a cake, ensure it has cooled completely, wrap it tightly in plastic wrap or place it in an airtight container, and freeze for up to a few weeks. When ready to frost, allow the cake to thaw in the refrigerator overnight or at room temperature for a few hours before applying the frosting. This method can be particularly useful for preparing cakes in advance for special occasions or when time constraints arise.
Baking and frosting cakes can be a delightful and rewarding experience. By addressing these common questions, we hope to have provided you with valuable insights and guidance for achieving cake perfection. Remember to take your time, be creative, and have fun on your cake baking journey!