Do you ever find yourself staring at a bowl of sourdough starter, wondering if you really need to go through the whole autolyse process?
It’s not necessary to autolyse sourdough dough. Instead, try this simpler method.
Many home bakers grapple with this question, unsure of the benefits and complexities of autolysing. In this article, we’ll demystify the art of sourdough and introduce you to an alternative approach that guarantees great results. So, if you’re curious about the world of sourdough baking but want to keep it straightforward, read on to discover a more accessible way to make your delicious, tangy loaves.
Step-by-Step Beginners Guide
Preparing Your Ingredients
Start by gathering your ingredients: flour, water, salt, and sourdough starter. Measure them precisely according to your chosen recipe. For a basic loaf, you’ll need 500 grams of flour, 350 grams of water, 10 grams of salt, and 100 grams of active sourdough starter.
Mixing the Ingredients
Combine the flour and water in a large bowl. Don’t worry about any fancy techniques at this stage – simply mix them until you have a shaggy, rough dough. It’s okay if there are lumps; they’ll even out later. Let the dough rest for about 30 minutes; this is your “rest period.”
Adding the Salt
After the rest period, sprinkle the salt over your dough and continue mixing. You’ll notice the dough becoming smoother and more cohesive. Keep kneading until the salt is fully incorporated. This usually takes about 5-10 minutes.
Folding the Dough
Now comes the crucial part: instead of autolysing, we’ll fold the dough. Wet your hands and reach underneath the dough, gently lifting and folding it over itself. Turn the bowl a quarter turn and repeat. Do this for about 2-3 minutes, or until you feel the dough has tightened up slightly.
Bulk Fermentation
Cover your bowl with a damp cloth or plastic wrap and let the dough bulk ferment for 3-4 hours. During this time, perform a series of folds every 30 minutes, gently lifting and folding the dough as before. This builds strength and structure.
Shaping the Dough
After the bulk fermentation, it’s time to shape your dough. Gently turn it out onto a lightly floured surface. Fold the edges towards the center, creating a tight ball. Place the dough seam-side down in a floured proofing basket or a bowl lined with a floured kitchen towel.
Final Proof
Cover your shaped dough with the same damp cloth or plastic wrap and let it rest for another 1-2 hours. You can also place it in the fridge overnight for a slower, more flavorful final proof.
Baking
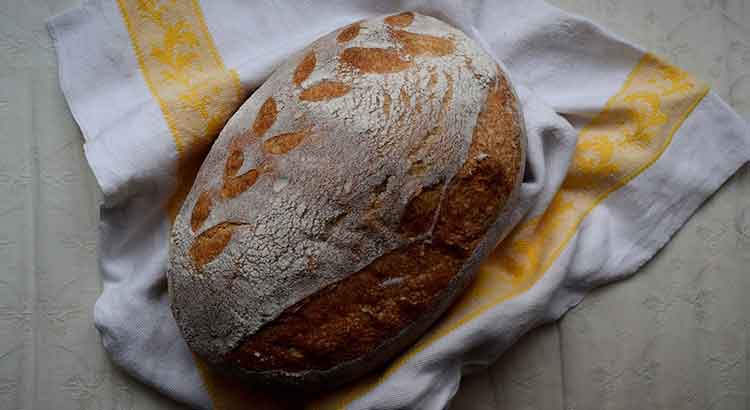
Preheat your oven to 450°F (230°C) with a Dutch oven or baking stone inside. Once the oven is hot, carefully transfer your dough into the preheated vessel, seam-side up. Score the top with a sharp knife or lame to allow for controlled expansion. Bake for 20-25 minutes with the lid on and another 20-25 minutes with the lid off until your loaf is beautifully browned.
Cooling and Enjoying
Once your sourdough has baked to perfection, allow it to cool on a wire rack for at least an hour. This is the hardest part – resisting the urge to cut into it immediately! But letting it cool ensures a better texture and flavor.
Additional Tips
Experiment with Flours
Don’t hesitate to explore different types of flour. While all-purpose flour is a safe bet, you can achieve unique flavors and textures by using whole wheat, rye, or spelt flours. Experimentation is the key to discovering your signature sourdough taste.
Adjust Water Levels
The amount of water you need may vary depending on the flour type and humidity. If your dough feels too dry and stiff, add a little more water during mixing. Conversely, if it’s too wet and sticky, sprinkle in extra flour. Trust your instincts – the dough should be soft but not overly sticky.
Embrace Temperature Control
Room temperature plays a vital role in sourdough fermentation. A warmer environment speeds up fermentation, while a cooler one slows it down. You can manipulate this by adjusting the water temperature during mixing or proofing in different locations of your home.
Maintain a Consistent Schedule
Establishing a regular sourdough routine helps build a strong starter and consistent results. Feed your starter at the same time daily, and aim to mix and bake your dough around the same time too. Consistency leads to predictability in your bread-making process.
Practice Patience
Sourdough is all about taking it slow. Longer fermentation times enhance flavor and texture. So, don’t rush the process. Allow your dough to ferment and proof adequately, even if it means waiting a little longer. The result is worth it.
Flour Your Work Surface Sparingly
When shaping your dough, use a light dusting of flour on your work surface. Too much flour can make your dough dry and affect its texture. If your dough is sticking excessively, consider using wet hands instead of adding more flour.
Observe and Learn
Each batch of sourdough is a learning opportunity. Pay attention to the details – the rise, the smell, and the taste. Take notes and adjust your techniques accordingly. With every bake, you’ll get closer to mastering your sourdough.
Share the Love
Sourdough baking can be a rewarding experience to share with friends and family. Make extra loaves to gift or trade with others who appreciate the art of homemade bread. It’s a wonderful way to connect and spread the joy of baking.
Don’t Fear Mistakes
Mistakes are part of the learning process. If your sourdough doesn’t turn out as expected, don’t be disheartened. Analyze what went wrong, adjust, and try again. Every mishap is a stepping stone toward becoming a better baker.
Final Thoughts
In the world of sourdough, simplicity often reigns supreme. While some enthusiasts swear by autolysis as a fundamental step, it’s important to remember that baking should be enjoyable, not daunting. The alternative method we’ve explored in this guide offers a straightforward approach for beginners and experienced bakers alike. By skipping the autolyse step, you can dive right into the heart of sourdough without the need for complex techniques.
The beauty of sourdough lies in its versatility and the room it leaves for personal experimentation. Whether you’re a seasoned baker or just starting, the key is to find a method that works best for you. While autolysis may have its merits, it’s not the only path to delicious, homemade sourdough bread. The steps outlined here provide an accessible and rewarding way to embark on your sourdough journey, producing loaves that are flavorful, crusty, and uniquely your own.
So, as you venture into the world of sourdough, remember that it’s not about adhering to rigid rules but rather about the joy of creating something wholesome and delightful. The aroma of freshly baked bread wafting through your kitchen and the satisfaction of sharing your creations with loved ones are the true rewards of this culinary adventure. Whether you choose to autolyse or not, the magic of sourdough lies in your hands, and there’s no better time to start than now. Happy baking!
FAQ
Q: What is autolyse, and why is it commonly used in sourdough baking?
A: Autolyse is a technique in bread making where flour and water are mixed and left to rest for a specific duration before adding salt and additional ingredients. This rest period allows the flour to fully hydrate, making it easier to knead and resulting in improved dough structure and texture. Autolysis is often used in sourdough baking to enhance the dough’s extensibility and flavor development.
Q: Can I achieve the same results without autolysis?
A: Absolutely! The method outlined in this guide demonstrates that you can create exceptional sourdough bread without the need for autolysis. The key is to follow the steps carefully, including the folding and resting periods, which help develop the dough’s strength and flavor. While autolysis can be beneficial, it’s not the only path to success in sourdough baking.
Q: How do I know when my sourdough bread is ready to bake?
A: Your dough is ready to bake when it has undergone bulk fermentation and final proofing, allowing it to rise adequately. During bulk fermentation, the dough should increase in volume by about 20-30%. For the final proof, look for signs of increased volume and a slightly jiggly, aerated texture. Additionally, a finger poke test can help determine readiness – if the dough springs back slowly, it’s ready; if it springs back rapidly, it needs more time.
Q: Can I use this simplified method for different types of sourdough bread, like whole wheat or rye?
A: Yes, you can adapt this method for various types of sourdough bread. Different flours may require adjustments to the hydration level, but the general process remains the same. For whole wheat or rye bread, you may need to use slightly less water to maintain the right consistency. Experiment and adjust until you achieve the desired results.
Q: What if my sourdough starter is not very active?
A: If your sourdough starter seems sluggish, consider feeding it more regularly and keeping it in a warmer environment. A strong starter is essential for successful sourdough baking. You can also use a levain build to give your starter a boost by mixing it with fresh flour and water a few hours before mixing the main dough.
Q: How can I add flavors like herbs, seeds, or nuts to my sourdough bread using this method?
A: To incorporate additional flavors into your sourdough bread, you can add herbs, seeds, or nuts during the initial mixing phase. Simply fold them into the dough along with the flour and water. Be mindful not to overdo it; a handful of your chosen ingredients should suffice to avoid affecting the dough’s consistency.
Q: Can I make sourdough bread without a Dutch oven or baking stone?
A: While a Dutch oven or baking stone is preferred for achieving a crispy crust and even baking, you can still bake sourdough without them. A heavy, oven-safe pot with a lid or a cast-iron skillet with a tight-fitting lid can work as alternatives. Alternatively, you can shape the dough and bake it on a preheated baking sheet with a water tray in the oven to create steam.
Q: My sourdough loaves always turn out too dense. What am I doing wrong?
A: Dense sourdough can result from several factors, including insufficient fermentation, overhandling the dough, or improper shaping. Ensure you follow the recommended fermentation times and gentle handling techniques. Proper shaping, with sufficient tension on the dough’s surface, also helps create an open crumb structure. Experimenting with these elements can help you achieve lighter, airier loaves.
Q: Can I refrigerate the dough at any point in this process for a delayed bake?
A: Yes, you can refrigerate your dough during the bulk fermentation or final proof to schedule your baking time. Simply cover the dough tightly with plastic wrap and place it in the fridge. A longer, cold fermentation can enhance flavor. When you’re ready to bake, allow the dough to come to room temperature before proceeding with shaping and baking.
Q: How can I store my sourdough bread to keep it fresh longer?
A: To keep your sourdough bread fresh, store it in a paper bag or a breathable bread bag at room temperature for the first day or two. After that, transfer it to a plastic bag or an airtight container. You can also freeze slices for longer storage. When reheating frozen slices, wrap them in a damp towel and warm them in the oven to revive their freshness.
Q: Is sourdough baking an exact science, or is there room for creativity and adaptation?
A: Sourdough baking is both a science and an art. While there are fundamental principles to follow, there’s ample room for creativity and adaptation. The best sourdough bread is the one you enjoy making and eating. Don’t be afraid to experiment, learn from your experiences, and develop your unique approach to sourdough baking. It’s a journey of delicious discovery!