Do you ever find yourself craving the warm, comforting aroma of freshly baked bread, but you only have pizza dough on hand? Wonder no more – you can absolutely transform that pizza dough into a loaf of delicious homemade bread!
In order to make bread out of pizza dough, a few adjustments are needed. Pizza dough is designed to be chewy and crispy, perfect for those cheesy slices, while bread demands a softer, fluffier texture.
Don’t worry, it’s a simple process, and with the right tweaks, you’ll be enjoying warm slices of homemade bread in no time. Let’s roll up our sleeves and dive into the world of baking magic!
Adjust the Flour
If you’re a pizza lover like me, you might have wondered whether you can use pizza dough to make bread. Well, wonder no more – it’s totally possible! However, there are a few tweaks you need to make to ensure your bread turns out perfectly. Let’s dive right into it.
When you’re using pizza dough to make bread, the first thing you need to do is adjust the flour. Pizza dough is typically designed to be more elastic and chewy, which is great for a thin and crispy crust. But for bread, you want a softer texture, so you’ll need to modify the flour quantity.
Here’s the trick: When preparing your pizza dough, try using a bit less flour than the recipe calls for. This will give your bread a lighter and airier consistency. Using all-purpose flour instead of bread flour can also work wonders. The lower protein content in all-purpose flour will prevent your bread from becoming too tough.
Remember, the key is to strike a balance between elasticity and tenderness. By adjusting the flour, you’re already on your way to turning your pizza dough into delicious homemade bread.
Add Sugar
Now that you’ve tackled the flour situation, let’s move on to the next step: adding sugar. Sugar is a crucial ingredient when making bread from pizza dough. It not only adds a touch of sweetness but also helps in activating the yeast, leading to better rise and flavor.
When you’re making pizza, the dough doesn’t necessarily need as much sugar because the primary focus is on the savory toppings. However, with bread, you want that subtle sweetness to enhance the overall taste.
Here’s what you do: When preparing your pizza dough for bread, add a tablespoon or two of sugar to the mix. This small addition will make a noticeable difference in the final product. The yeast will thrive on the sugar, creating those lovely air pockets that give your bread its characteristic lightness.
Proof the Dough
Now that you’ve adjusted the flour and added a pinch of sugar to your pizza dough, it’s time to give that dough a chance to rise. This step is called proofing, and it’s where the magic happens.
Proofing the dough allows the yeast to work its wonders, creating those delightful air bubbles that make your bread light and fluffy. Here’s what you need to do:
- Cover and Wait: After mixing in the sugar and kneading the dough slightly, cover it with a clean kitchen towel or plastic wrap. Find a warm spot in your kitchen and let the dough sit for about an hour or until it doubles in size.
- Patience is Key: The waiting might feel like forever, but trust me, it’s worth it. This is when the yeast is doing its thing, breaking down the sugars and producing carbon dioxide, which gives your bread that sought-after rise.
- Check the Rise: Once the dough has doubled, gently press a finger into it. If the indentation remains, you’re good to go. If not, give it a bit more time to rise. Remember, nature works on its own clock, so be patient.
By proofing the dough, you’re ensuring that your bread will be light, airy, and oh-so-delicious. So go ahead and get cozy while you let that dough work its magic.
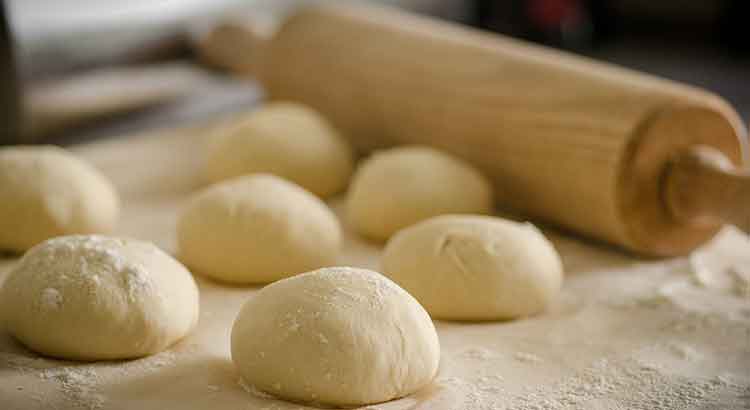
Knead and Shape
Now that your dough has proofed and risen beautifully, it’s time to give it a little love through kneading and shaping.
- Punch Down: Gently deflate the dough by giving it a light punch. This releases any excess carbon dioxide and readies the dough for the next step.
- Knead Smoothly: On a lightly floured surface, knead the dough for a few minutes. Fold the dough in half, then push it away from you with the heels of your hands. Give it a quarter turn, fold, and repeat. Kneading helps develop the gluten, giving your bread structure.
- Shape It Up: Depending on what you’re aiming for – a loaf, rolls, or even a baguette – shape the dough accordingly. Place the shaped dough onto a baking sheet or into a greased loaf pan, cover it, and let it rest for a final 15-20 minutes.
Rise Again
We’re almost at the finish line! Your dough has gone through quite the transformation, from pizza potential to bread perfection. Now, it’s time to give it one last rise before it hits the oven.
- Second Rise: After shaping the dough, cover it again and let it rise for the second time. This step, known as the “final proof,” is shorter than the first rise. In about 30-45 minutes, your dough will expand slightly, becoming puffy and ready for baking.
- Finger Test: To check if the dough is ready for the oven, gently press your fingertip into the dough. If the indentation slowly fills back in, you’re good to go. If it springs back quickly, give it a bit more time.
- Preheat the Oven: While your dough is undergoing its final rise, preheat your oven to the temperature indicated in the next section. This ensures that the oven is perfectly heated and ready to work its magic.
Baking Temperature and Time
Alright, it’s the moment you’ve been waiting for – time to bake that pizza dough into delightful bread. The right baking temperature and time are crucial to achieving that golden crust and tender interior.
- Temperature Matters: For most bread recipes, a baking temperature of around 375°F to 425°F (190°C to 220°C) works wonders. This temperature range allows the bread to bake evenly, forming that desirable crust.
- Baking Time: The baking time can vary based on the size and shape of your bread. Generally, a loaf will take about 25-35 minutes, while rolls might be ready in 15-20 minutes. Keep an eye on your bread as it bakes – it should turn a lovely golden brown color.
- Tap Test: To ensure your bread is fully baked, give it a gentle tap on the bottom. If it sounds hollow, it’s done! This indicates that the interior is well-cooked and the crust is perfectly crisp.
Steam
Adding steam to the baking process helps create that beautiful, crispy crust we all love in artisanal bread. Here’s how to do it:
- Steamy Start: As you preheat your oven and get ready to bake, place a heatproof pan at the bottom of the oven. You can use a metal baking pan, a cast iron skillet, or even a disposable aluminum pan.
- Hot Water Magic: Once your bread is ready to go in the oven, quickly pour hot water into the pan you placed at the bottom. The hot water will create steam, which is the secret to achieving that professional bakery-style crust.
- Cover It Up: To make the most of the steam, you can also cover your bread with a lid or a roasting pan during the first 10-15 minutes of baking. This traps the steam around the bread and encourages a crust that’s delightfully crisp and golden.
By introducing steam into the baking process, you’ll elevate your homemade bread to new heights of deliciousness. The steam encourages a thin, crackly crust that contrasts wonderfully with the soft interior of your bread. It’s a small step that can make a big difference in your baking results.
Final Thoughts
As we wrap up our journey from pizza dough to homemade bread, let’s take a moment to reflect on the steps we’ve explored. Turning pizza dough into bread might sound like a culinary leap, but with a little patience and experimentation, it’s a rewarding endeavor that can fill your home with the comforting aroma of freshly baked goodness.
Throughout this process, we’ve learned how adjusting the flour, adding sugar, proofing the dough, kneading and shaping, allowing for a second rise, and employing steam can all contribute to creating that perfect loaf of bread. Each step plays a crucial role in transforming simple ingredients into a delectable treat that can be enjoyed in a multitude of ways.
Remember, baking is a mix of science and art. While these guidelines provide a solid foundation, don’t be afraid to embrace your creativity and make tweaks based on your preferences. Whether you’re a beginner or a seasoned baker, the journey from pizza dough to bread opens up a world of possibilities. So gather your ingredients, roll up your sleeves, and embark on your own bread-baking adventure. The end result? Warm, fragrant slices of satisfaction that showcase your culinary prowess. Happy baking!
FAQ
Can I use any type of pizza dough for making bread? Absolutely! While some pizza dough recipes might be better suited for bread-making due to their elasticity and structure, you can experiment with various types of pizza dough. Keep in mind that thin-crust pizza dough might produce a lighter bread, while thicker and more enriched pizza dough could lead to a heartier loaf.
Why is adjusting the flour important? Adjusting the flour helps you achieve the desired texture for your bread. Pizza dough is typically designed to be chewy and crispy, while bread demands a softer, fluffier interior. By using slightly less flour or opting for all-purpose flour, you’re ensuring your bread isn’t overly dense and tough.
Do I really need to add sugar? Yes, adding sugar is a key step when using pizza dough for bread. Sugar not only enhances the flavor of the bread but also aids in activating the yeast. The yeast feeds on the sugars, producing carbon dioxide that creates those lovely air pockets and gives your bread its rise.
Can I skip the second rise? The second rise, also known as the final proof, is essential to achieving the right texture and flavor in your bread. It allows the dough to relax, ensuring an even crumb and preventing your bread from being overly dense. Skipping this step might result in a less enjoyable eating experience.
What if I don’t have a pan for steam? If you don’t have a heatproof pan to create steam in the oven, you can achieve similar results by using a spray bottle filled with water. Just spritz the inside of the oven walls a few times during the initial minutes of baking to create a steamy environment.
Can I freeze the bread I make from pizza dough? Absolutely! Once your bread has cooled completely, you can wrap it tightly in plastic wrap or aluminum foil and store it in the freezer for up to a few months. To enjoy, simply thaw the bread at room temperature or reheat it in the oven.
What if my bread turns out too dense? If your bread turns out denser than you’d like, there could be a few reasons. It might be due to over-kneading the dough or not allowing it to rise sufficiently. Ensuring proper proofing, kneading, and rising times can help you achieve a lighter texture in your bread.
Can I add other ingredients to my bread, like herbs or cheese? Absolutely! Feel free to get creative with your bread by adding herbs, cheese, or other flavor-enhancing ingredients during the mixing or shaping stages. Just keep in mind that certain additions might impact the rise or texture of the bread, so it’s a good idea to experiment on a smaller scale before making a larger batch.
How do I know when my bread is done baking? A good indicator that your bread is done baking is its color – it should be a lovely golden brown. Additionally, tapping the bottom of the bread and listening for a hollow sound is a reliable test. If you have a kitchen thermometer, you can also insert it into the center of the bread – the internal temperature should read around 190°F (88°C).
Can I use this method for gluten-free pizza dough? The process of turning pizza dough into bread can be adapted for gluten-free dough as well. However, due to the different properties of gluten-free flours, the texture and rise might vary. Experimenting with gluten-free pizza dough and making adjustments to the process accordingly will help you achieve the best results.
By addressing these frequently asked questions, I hope I’ve provided you with valuable insights and guidance for your pizza dough to bread transformation. Remember, baking is a journey of learning and exploration, and there’s always room for experimentation. Embrace the process, savor the aroma, and revel in the joy of homemade bread. Happy baking!