Are your sugary creations taking over the kitchen counter? Ever wondered if you could hit pause on that fondant masterpiece? Freeze fondant? Hmm…
Absolutely! Freezing fondant can help preserve your edible art for future celebrations. First, ensure your cake is well-covered with a thin layer of fondant. Then, pop it in the freezer until firm. Once it’s solid, wrap it tightly with plastic wrap and aluminum foil, shielding it from freezer burn. To thaw, gently transfer your fondant-covered cake to the fridge and give it time to defrost slowly.
Now, let’s unravel the secrets of freezing fondant without the hassle. Learn the step-by-step process and how to avoid dreaded pitfalls. From freezing timeframes to thawing techniques, our beginner-friendly guide ensures your fondant remains flawless, making your next cake creation a piece of (frozen) cake!
Wrap in Plastic Wrap
When it comes to freezing fondant, there’s a simple trick to keep your edible creations looking as good as new. All you need is some plastic wrap and a bit of patience. Once your fondant-covered cake is ready to go, take a moment to appreciate your masterpiece, and then let’s get down to business.
Step 1: Smooth it Out Before you begin, make sure your fondant is smooth and flawless. Any imperfections will be preserved during freezing, so take your time to ensure it’s looking its best.
Step 2: Plastic Wrap Protection Gently wrap your cake in several layers of plastic wrap. This will create a barrier that prevents moisture from getting to your fondant, helping it stay fresh and intact. Make sure the wrap is snug but not too tight, as you don’t want to squash your beautiful design.
Step 3: Aluminum Foil Shield After the plastic wrap, add a layer of aluminum foil. This extra layer will provide further protection against freezer burn and help maintain the shape of your cake.
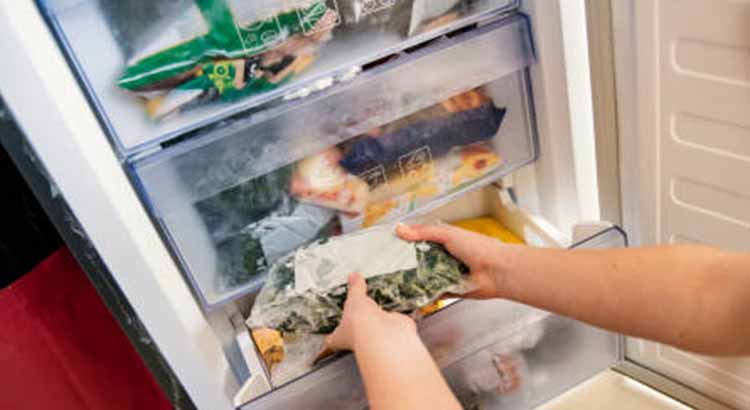
Step 4: Into the Freezer Now your fondant masterpiece is ready for the freezer. Find a safe spot where it won’t get squished or bumped. It’s a waiting game from here. Let it freeze until it’s completely solid, usually a few hours should do the trick.
Freezing your fondant-covered cake is a handy way to prepare for future celebrations. Whether you’re a baking beginner or a seasoned pro, this method helps you keep your creations in top shape until it’s time to shine.
Label and Date
Once your fondant-covered cake is snugly wrapped and tucked away in the freezer, there’s one more step to ensure you don’t forget about your sweet masterpiece. It’s all about labeling and dating – a simple habit that can save you from any guesswork later on.
Step 1: Grab Some Tape Find some masking tape or painter’s tape along with a marker. These will be your trusty tools for labeling.
Step 2: Name and Date Write down a brief description of the cake on the tape. This could be something like “Anna’s Birthday Cake” or “Floral Anniversary Cake.” Alongside the description, jot down the date you’re putting it in the freezer.
Seal and Freeze
Now that you’ve wrapped your fondant-covered cake with care and labeled it for the future, it’s time to seal the deal – literally. Properly sealing your cake before freezing ensures that it retains its flavor, texture, and overall appeal. So, let’s dive into the next steps of the freezing process.
Step 1: Airtight Container Magic Once your cake is wrapped in plastic wrap and aluminum foil, consider placing it in an airtight container. This extra layer of protection helps to prevent any unwanted odors or flavors from infiltrating your cake while it’s in the freezer.
Step 2: Remove the Air If you’re using a zip-top freezer bag or a vacuum sealer, be sure to remove as much air as possible before sealing. Air can lead to freezer burn and impact the quality of your fondant and cake. Suck it out or press it out – just make sure your cake is snug and cozy.
Step 3: Keep it Level When placing your cake in the freezer, try to keep it level. If you’re using a container, make sure it’s not tilted. This will help your cake maintain its shape and design, ensuring it looks just as stunning when it’s time to thaw and serve.
Step 4: Time to Freeze Your fondant-covered cake is now ready for its chilly adventure. Place it in the freezer where it won’t get bumped or squashed. Try to keep it away from other frozen items that might cause damage or create moisture. And that’s it – your cake is safely tucked away, waiting for its grand appearance.
Sealing your fondant-covered cake might seem like a small step, but it plays a crucial role in preserving the integrity of your creation. With these extra precautions, you can be confident that when the time comes to thaw and serve, your cake will be as delightful as when you first crafted it.
Thawing Methods
Alright, you’ve done the hard work – your fondant-covered cake is safely frozen and patiently waiting for its moment in the spotlight. But how do you bring it back to life without sacrificing its taste and beauty? Fear not, for we’ve got the lowdown on thawing methods that will ensure your cake is just as scrumptious as the day you made it.
Method 1: Fridge Time The gentlest way to thaw your frozen fondant masterpiece is by transferring it from the freezer to the fridge. Plan ahead, as this method requires some patience. Place your cake on a sturdy plate or cake board to catch any condensation as it thaws. Depending on the size of your cake, it might take anywhere from several hours to overnight. The slow thawing process helps to preserve the texture and flavors of both the fondant and the cake.
Method 2: Room Temperature Shortcuts If you’re short on time, you can opt for the room temperature thawing method. However, this requires careful monitoring. Remove your cake from the freezer and place it on a stable surface. Keep an eye on it, as fondant can soften quickly at room temperature. This method is best suited for smaller cakes or individual cake slices. Once your cake is thawed, be sure to serve it promptly to avoid any loss of quality.
Method 3: Fondant Friends – The Hybrid Approach For larger cakes or tiered designs, a combination of thawing methods might work best. Start by transferring your cake to the fridge for a few hours to kick-start the thawing process. Then, move it to room temperature to finish thawing. This approach offers a balance between preserving the cake’s structure and getting it ready to serve in a timely manner.
Method 4: The Final Touches No matter which thawing method you choose, there are a few additional steps to consider before presenting your revived cake. As your cake thaws, it might accumulate condensation on the surface due to the change in temperature. Gently blot the condensation with a clean paper towel to prevent any unwanted moisture from affecting your fondant’s design.
Method 5: The Taste Test Before serving your cake, do a taste test to ensure that both the fondant and the cake itself are still delicious. If you notice any changes in flavor or texture, remember that freezing can sometimes alter the characteristics of baked goods. While the appearance might be flawless, the taste is equally important.
Final Thoughts
And there you have it – your crash course in freezing fondant is complete! From wrapping your masterpiece with care to labeling, sealing, and choosing the right thawing method, you’ve covered all the bases to ensure your cake remains a delightful centerpiece for any occasion.
As a baking enthusiast, it’s empowering to know that you can freeze fondant without compromising its beauty and taste. Whether you’re a beginner or a seasoned cake decorator, these straightforward steps can make a world of difference when it comes to preserving your creations. Just imagine the joy of pulling out a perfectly thawed fondant-covered cake, ready to impress and delight your loved ones.
Remember, practice makes perfect. Each time you freeze and thaw a fondant-covered cake, you’ll gain more confidence and finesse. So, don’t be afraid to experiment, adapt, and discover the methods that work best for your unique creations. With these techniques under your belt, you’re well-equipped to take on any baking challenge that comes your way.
In the end, freezing fondant isn’t just about preserving a cake; it’s about preserving the memories and moments associated with it. From birthdays to weddings and every sweet occasion in between, your carefully crafted cakes hold the power to bring smiles and create lasting memories. So go ahead, freeze that fondant – and let your creativity and delicious treats shine on.
FAQ
Can I freeze a fondant-covered cake with decorations? Absolutely! Freezing a fondant-covered cake with decorations is possible. Just make sure that the decorations are firm and securely attached before freezing. Delicate and intricate decorations might be prone to damage during freezing and thawing, so it’s a good idea to choose decorations that can withstand these temperature changes.
How long can I keep a fondant-covered cake in the freezer? Fondant-covered cakes can be stored in the freezer for up to 2-3 months. Beyond this timeframe, the quality of the cake might start to degrade. To ensure the best taste and texture, it’s recommended to consume the cake within this period. Remember to label your cake with the freezing date so you can keep track of its storage time.
Can I freeze fondant-covered cupcakes or cookies? Absolutely! The same principles apply to fondant-covered cupcakes or cookies. Just like with cakes, ensure that the decorations are securely attached. For cupcakes, it’s a good idea to freeze them individually before placing them in an airtight container to prevent any decorations from sticking together. Cookies can be frozen in a single layer before being transferred to a freezer-safe container.
How do I prevent condensation on the fondant after thawing? Condensation can form on the surface of the fondant as it thaws, which might affect its appearance. To prevent this, gently blot the condensation with a clean paper towel. Avoid touching the fondant directly with your hands, as this can leave marks. Once the condensation is removed, allow the cake to air-dry for a short period before serving.
Can I freeze a fondant-covered cake that has already been cut? While it’s possible to freeze a fondant-covered cake that has been cut, it’s important to note that the exposed cake edges might dry out faster during freezing. To mitigate this, consider covering the cut sections with a thin layer of buttercream or ganache before wrapping and freezing the cake. This extra layer will help retain moisture and keep the cake edges from becoming overly dry.
Can I freeze a fondant-covered cake that has cream or perishable fillings? If your fondant-covered cake contains cream or other perishable fillings, freezing might not be the best option. Cream fillings can separate and become watery upon thawing, affecting the cake’s texture and taste. If you’re determined to freeze such a cake, consider freezing it without the cream filling, and add the filling after thawing.
Do I need to reapply any decorations after thawing? In some cases, you might need to touch up or reapply certain decorations after thawing. Delicate decorations like sugar flowers or fine details might become slightly distorted during freezing and thawing. Keep some extra fondant and edible glue on hand to fix any decorations that might need a little adjustment.
Can I freeze a fondant-covered cake more than once? It’s generally not recommended to freeze a fondant-covered cake more than once. Each freezing and thawing cycle can impact the cake’s quality, causing changes in texture and taste. If you have leftovers from a previously thawed cake, it’s best to consume them rather than refreezing the cake.
With these frequently asked questions answered, you’re armed with the knowledge you need to confidently freeze and thaw fondant-covered cakes, cupcakes, and cookies. Whether you’re planning ahead for a special occasion or simply want to enjoy your creations over time, these tips will help you achieve the best results while preserving the deliciousness and artistry of your baked treats.