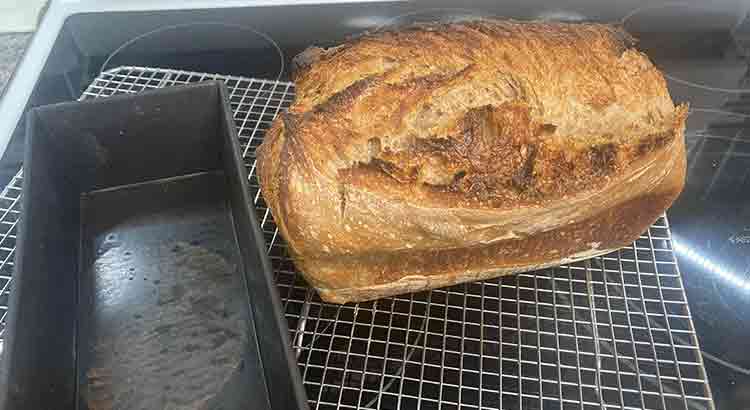
Sourdough bread has become increasingly popular over the last few years, and for good reason. It’s not only delicious, but it’s also a healthier alternative to store-bought bread. However, baking sourdough bread can be a daunting task for beginners, especially if you don’t have the right equipment. While many bakers use a Dutch oven or a bread cloche to bake their sourdough bread, there’s another option that’s often overlooked – the loaf pan.
Yes, you can bake sourdough bread in a loaf pan, and it’s a great option for beginners or those who don’t have access to other baking equipment. Using a loaf pan for your sourdough bread can also give you a more consistent shape, making it easier to slice and perfect for sandwiches.
However, baking sourdough bread in a loaf pan requires a slightly different process than baking in other types of equipment. From shaping the dough to adjusting baking times, there are a few things to keep in mind to ensure that your loaf turns out perfectly. In this detailed guide, we’ll take you through each step of the process, including tips and tricks to help you achieve a beautiful, delicious loaf of sourdough bread in a loaf pan.
Advantages Of Baking Sourdough In A Loaf Pan
- Easier to shape
- Simpler to bake
- A softer crust
- Perfect shape for sandwiches and toast
- Easier to handle
- Better for over fermented dough
- Easier to cut
Easier to Shape
When it comes to baking sourdough bread, the shaping technique you use is crucial in determining the outcome of your loaf. One of the main factors that can be affected by the shaping technique is the oven spring of the bread. The oven spring is the rise in the bread that occurs during the first few minutes of baking. It is caused by the expansion of the gases in the dough that are released due to the heat of the oven.
When shaping sourdough bread, the way you manipulate the dough can impact the amount of tension and structure that the dough develops. This, in turn, can affect the way that the dough expands and rises during baking. The shaping technique can also affect the appearance of the loaf once it is baked.
However, when using a loaf pan to bake sourdough bread, the shaping technique becomes less important. This is because the dough takes on the shape of the pan during proofing. The pan provides a more controlled environment for the dough to rise, resulting in a uniform shape and size.
Furthermore, baking sourdough bread in a loaf pan provides additional support for the dough during baking. As a result, the bread often rises higher and develops better oven spring overall. This is because the dough is contained within the pan, which helps to trap the steam and heat, creating a more stable environment for the bread to rise.
While the shaping technique is an important aspect of baking sourdough bread, using a loaf pan can simplify the process and produce a consistent and impressive result. Whether you choose to shape your dough by hand or use a loaf pan, the key to great sourdough bread is to be patient, experiment, and have fun!
Simpler to Bake
When it comes to baking sourdough bread, the choice of baking vessel can have a significant impact on the baking temperature required for optimal results. Traditional sourdough bread is typically baked in a piping hot Dutch Oven, often at temperatures above 230C/446F, which helps to create a steamy environment that promotes a crispy crust and a tender crumb.
However, when using a loaf pan to bake your sourdough bread, the dough is not covered for the entire bake. This means that you need to lower the temperature to prevent the crust from burning or becoming too hard and tough. I recommend a baking temperature of 200C/392F for the entire bake, rather than starting at a higher temperature and then lowering it later on.
One of the benefits of using a loaf pan for your sourdough bread is that you can bake at a lower temperature. This can be particularly advantageous if your oven doesn’t reach super high temperatures, or if you are baking bread during the summer months when you don’t want to heat up your kitchen too much.
By using a lower baking temperature, you can also achieve a more even bake and avoid overcooking the crust, which can be a common problem when using a Dutch Oven. Additionally, a lower baking temperature can help to create a more tender crumb and a less dense texture, resulting in a loaf that is easier to slice and enjoy.
A Softer Crust
Baking sourdough bread in a loaf pan offers a number of benefits, including a softer outside crust, especially around the sides and base of the loaf. This is due to the unique way in which the loaf is baked in a loaf pan, which helps to promote a more gentle and controlled baking environment.
To achieve an even softer crust when baking sourdough bread in a loaf pan, you can butter the pan before adding the dough. The butter helps to create a barrier between the dough and the pan, preventing the bread from sticking and also contributing to a softer texture.
In addition to buttering the pan, you can also brush the top of the loaf with butter after it comes out of the oven. This will help to further soften the crust and give it a more tender texture. It can also add a delicious buttery flavor that complements the natural tanginess of the sourdough.
Perfect Shape for Sandwiches and Toast
Baking sourdough bread in a loaf pan offers a convenient way to enjoy the traditional taste and texture of sourdough in a shape that is perfectly suited for sandwiches and toasting. The unique shape of the loaf pan allows for a more compact and uniform loaf, making it easier to slice and enjoy.
For those who appreciate the distinctive flavor of sourdough bread, but struggle with the awkward shape of a batard or boule, a sourdough loaf made in a loaf tin is a game-changer. Not only does it provide the same tangy taste and chewy texture, but it also makes life much easier by fitting seamlessly into a toaster.
Gone are the days of trying to cram a thick slice of bread into a small toaster slot, resulting in uneven toasting and frustration. With a sourdough loaf made in a loaf pan, you can enjoy perfectly toasted bread that fits perfectly in your toaster.
Easier to Handle
If you struggle with the weight and maneuvering of a Dutch Oven when baking sourdough bread, then switching to a loaf pan may be the solution you need. With a loaf pan, you can achieve similar results without the added difficulty of lifting and moving a heavy pot.
However, if you still want to create the same steamy environment as a Dutch Oven, you can use a clever trick of placing a loaf tin of the same size on top of your dough to trap the steam in. This method has become increasingly popular among sourdough enthusiasts looking to replicate the conditions of a Dutch Oven without the added weight and bulk.
By using a loaf tin as a makeshift lid, you can create a similar steamy environment that will help your bread to rise and develop a crispy crust. The result is a loaf of sourdough bread that is just as delicious and flavorful as one baked in a Dutch Oven, but with much less hassle and physical strain.
Better for Over Fermented Dough
Shaping your sourdough bread into a sandwich loaf using a loaf pan can provide added support for your dough, both during proofing and baking.
This is especially beneficial if your dough has been over-fermented, as using a loaf pan can help to support the dough and prevent it from collapsing during baking. Unlike a banneton, where the dough is left unsupported, using a loaf pan can ensure that your dough bakes up evenly and holds its shape.
In fact, a loaf pan can be a great alternative to a banneton for proofing if you want to experiment with longer proofing times. Since the dough is baked in the tin, there’s no need to tip it out and risk the dough losing its shape or structure. This allows you to proof your dough for longer without worrying about it collapsing or becoming misshapen.
Easier to Cut
Cutting through a crusty sourdough ear or an oddly shaped boule or batard can be quite a challenge, even with the best bread knife for sourdough bread. If you’ve experienced this frustration, you’ll appreciate the ease of cutting through sourdough bread baked in a loaf pan.
Baking sourdough in a loaf pan results in a softer crust that is much easier to cut through. Additionally, the regular shape of a loaf pan sourdough makes it easier to hold and slice evenly. This makes it a great option for anyone who struggles with cutting through crusty or irregularly shaped bread.
In fact, a loaf pan sourdough is much more practical when using a slicing guide. It fits perfectly into the guide, making it much easier to achieve uniform slices of bread.
How to Shape Sourdough Bread for a Loaf Pan
If you plan to bake your sourdough bread in a loaf pan, there are four essential steps to shaping the dough:
- Pre-shape the dough into a round ball after the bulk fermentation stage. Let it rest for 15-30 minutes, either covered or uncovered.
- Shape the round ball of dough into an oval shape, just as you would for shaping a free-form “batard”. Make sure to create a good amount of tension in the dough as you roll it up to achieve a tight and even shape.
- Pinch the seam closed tightly and transfer the dough, seam-side-down, into your loaf pan.
- Cover the dough and let it proof until it has risen to your desired level. This final step is crucial to ensuring that your bread bakes up with a beautiful, even crumb and a perfect texture.
By following these four simple steps, you can achieve a perfectly shaped sourdough bread loaf that’s ready to bake in a loaf pan. Whether you’re a seasoned baker or a beginner, these tips will help you create delicious, professional-looking bread every time.
Tips for Baking Perfect Sourdough Bread in a Loaf Pan
1.How to Avoid Your Loaf Ripping on the Sides
To prevent your loaf from ripping on the sides, extend the final proof time I used to have trouble with my sandwich loaves ripping along the sides despite trying different scoring techniques. Eventually, I discovered that the issue was insufficient proofing time.
When you bake sourdough bread in a loaf pan, the pan creates a natural weak spot in the dough along the edge of the pan. If your dough undergoes significant oven spring during baking, it’s likely to tear along the pan’s side. Therefore, to avoid this, extend the final proofing time.
Assuming your dough will rise to a certain degree during the final proof and baking, let’s refer to this as “100% risen.” To prevent the bread from tearing while baking, proof the dough until it reaches about 90% of its full rise. By doing so, when you put it in the oven, it will only have around 10% left to rise, which should be insufficient to cause tearing. The bread will rise to its full extent and then stop, resulting in a perfectly risen sourdough loaf.
2. Use Parchment Paper to Line the Loaf Pan for Easy Removal
To make it easier to remove your sourdough bread from the loaf pan after baking, line the pan with parchment paper. Cut a piece of parchment paper that is slightly longer than the width of your pan and long enough to cover the bottom and sides of the pan with some overhang. Then, place the parchment paper into the pan, making sure to press it into the corners and sides.
The overhang will make it easy to lift the bread out of the pan once it’s baked and cooled. Not only does this make it easier to remove the bread, but it also prevents the bread from sticking to the pan, resulting in a cleaner-looking loaf.
And as a extra personal tip, I would also recommend you to get parchment paper sheets, instead of a roll. For me it was a complete game changer. Here is a link to the ones that I am using, I usually buy a 200 pack and it lasts for about a year. Just make sure to choose the right size before you order.
3. How to Get a Domed Top
If you prefer a sourdough bread with a nicely rounded and domed top, there are a few key steps you should follow. Firstly, it’s important to allow the dough to undergo a long final proofing stage. This will give the bread time to fully rise and develop, which is essential for creating the desired shape.
In addition to a long proof, it’s also important to skip the scoring step. Scoring the dough can help control the direction and amount of expansion during baking, but in this case, we want to encourage a more uncontrolled rise that will result in a domed top.
So, if you want to achieve a beautifully rounded and domed top on your sourdough loaf, be sure to give it a long final proof and skip the scoring step. With these simple adjustments, you’ll be able to create a loaf that not only tastes delicious but looks stunning too.
4. Bake It for a Slightly Longer Time
If you’re accustomed to baking sourdough bread in a Dutch oven or something like the Challenger Bread Pan, you may observe that bread baked in a loaf pan requires a slightly longer baking time.
For instance, my regular sourdough typically takes 20 minutes with steam (lid on for the Dutch oven) and 15 minutes without steam (lid off) to reach an internal temperature of at least 190dF.
However, with my loaf pan sourdough bread, I typically need to bake for an extra 5-10 minutes at the end to achieve the same internal temperature. This is partly due to the lower temperature at which it’s baked, but also because the pan blocks some of the heat from the dough. So, don’t be surprised if your bread requires a few extra minutes to be completely baked.
5. Wait for the Loaf to Cool Completely Before You Cut It
When making sourdough bread in a loaf pan, it’s important to let the bread cool completely before slicing into it. Unlike bread baked in a Dutch oven or free-form, bread baked in a loaf pan has less crust and can be more fragile. Slicing into it while it’s still warm can result in squished or gummy slices. So, resist the temptation to slice into your freshly baked loaf and let it cool completely on a wire rack before enjoying. This will help ensure that your slices are even and well-formed.
Sourdough Bread for a Loaf Pan Recipe
Ingredients:
- Bread Flour – 450 grams
- Water – 300 grams
- Salt – 10 grams
- Sourdough Starter – 100 grams
Steps
1. Preparing the starter
The key to successful sourdough bread baking is a healthy and active starter. To prepare your starter for making bread, it needs to be fed 4-8 hours before you plan to mix your dough. A good practice is to feed it the night before you bake.
To feed your starter, take 25 grams of it and mix it with 50 grams of bread flour and 50 grams of water. Stir the mixture well and let it rise on the counter for 4-8 hours or until it doubles in size. A healthy starter should be active and bubbly, indicating that the yeast and bacteria are actively fermenting.
Once your starter has doubled in size and is bubbly, it’s ready to use in your sourdough bread recipe. Remember to reserve a small amount of the starter (often called the “mother”) to keep as a base for future bakes. With regular feeding, your starter will become stronger and more robust over time, resulting in delicious sourdough bread every tim
2. Mixing the ingredients
Start by adding water, active sourdough starter, and salt into a large mixing bowl. Stir the mixture until the salt and starter dissolve. Next, add the flour on top of the wet ingredients. Using a mixing spoon or your hands, stir the flour until a shaggy dough forms and there are no dry bits of flour left.
Cover the mixing bowl with a clean kitchen towel and let the dough rest for 30 minutes. During this time, the flour will absorb the water, and gluten will begin to form. After 30 minutes, the dough should have a smooth and cohesive consistency.
Mixing the dough is the first and important step in making sourdough bread. It’s essential to ensure that all the ingredients are thoroughly combined to create a cohesive dough. By following these steps, you can create a smooth and consistent dough, which is essential for creating delicious sourdough bread.
3. The first rise
Perform one set of stretch and folds to the dough. Start by grabbing the north end of the dough and folding it towards the south. Repeat by folding the south end of the dough towards the north. Then fold the east end of the dough towards the west, and fold the west end of the dough towards the east. Cover the dough and let it rest for another 30 minutes. Repeat this process of stretching and folding for a total of three sets with 30 minutes of rest in between each set. After the third set, allow the dough to rise for about 3 1/2 to 6 hours. The goal is to have the dough roughly double in size.
After the initial mix, the stretch and fold process will help to develop the gluten in the dough, which is essential for creating a chewy texture and a good rise. This process also helps to evenly distribute the fermentation process, which is essential for the sourdough’s characteristic flavor. The length of the first rise can vary depending on factors such as temperature, starter activity, and desired flavor. The longer the rise, the more sour the flavor will be.
As the dough rises, keep an eye on it to make sure it doesn’t overproof. Overproofing can result in a weaker structure and a flatter loaf. One way to test if the dough is ready is to perform the “poke test.” Lightly flour your finger and poke the dough. If the indentation slowly fills in, the dough is ready for the next step. If the indentation remains, the dough needs more time to rise.
4. Pre-shaping the dough
Once the dough has risen and almost doubled in size, and it jiggles slightly when you shake the bowl, it’s time for pre-shaping. Gently shape the dough into a smooth ball and cover it. Let it rest for 30 minutes.
Pre-shaping the dough is an important step as it helps to develop the final shape of the bread. The resting period allows the dough to relax and the gluten to distribute evenly throughout the dough.
It’s important to handle the dough gently during this stage to avoid deflating it. Using a bench scraper can be helpful for shaping and lifting the dough without using too much force.
5. The final shaping
To shape the dough into its final form, remove the cover after 30 minutes of rest and shape it into an oval or log shape that’s slightly smaller than your loaf pan. Make sure to pinch the seam of the dough closed and transfer it gently into the loaf pan with the seam side facing down. Cover the dough with a kitchen towel and let it rise at room temperature for 2-4 hours.
The final rise time will depend on factors like the temperature of your kitchen and the strength of your starter. You’ll know the dough is ready for baking when it has risen to just below the top of the loaf pan and when you poke it gently with your finger, the indentation remains. If the dough springs back quickly, it’s not ready yet and needs more time to rise.
Be patient during this final rise and avoid rushing it. This stage is crucial for the texture and flavor of your bread, so it’s worth taking the time to let the dough rise fully before baking. When the dough is ready, it’s time to bake your sourdough bread in a loaf pan.
6. Prepare the oven
To get ready for baking, heat up your oven 30 minutes in advance to 425°F (218°C). As you wait for the oven to heat up, place a metal pie or cake pan on the bottom rack. This will function as a steam tray when you start baking your bread.
7. Proofing
Depending on how long you have let your dough rise, you may need to score it before baking. If you proofed your dough for about two hours, it’s time to score it across the top using a bread lame or a razor blade. This will allow the bread to expand properly in the oven. However, if you let your dough proof for 3-4 hours, you may not need to score it at all.
Scoring the dough not only helps with expansion, but it can also create a decorative pattern on the bread’s crust. You can make different patterns with the bread lame, such as a crosshatch, a simple slash, or a curved line. Be careful not to score too deeply, as this can affect the bread’s structure.
If you decide not to score your dough, make sure to use a sharp knife or razor blade to create a few shallow cuts on the surface of the bread before placing it in the oven. This will allow the steam to escape, preventing the bread from cracking during baking.
8. Baking
Baking with steam
To bake your sourdough bread with steam, position the bread pan in the middle of the center rack of your oven. Then, pour some hot water into the steam tray placed below the bread pan. This technique will add steam to your oven during the first half of the baking process, allowing your bread to rise properly.
Once you have added steam to the oven, close the oven door and allow the dough to bake for 20 minutes. This first stage of baking is critical, as the steam helps to create a crispy and golden crust while the dough rises. Be sure not to open the oven door during this period, as this can cause the steam to escape and disrupt the baking process.
After the initial 20 minutes, reduce the oven temperature to 375°F (190°C) and continue baking your sourdough bread for another 20-25 minutes. This will ensure that the bread is fully baked and has an internal temperature of at least 190°F (88°C).
Baking without steam
To bake the bread without steam, reduce the oven temperature to 350°F (180°C) after the first 20 minutes. Then, take out the steam tray carefully and let the bread continue to bake for another 20-30 minutes until the internal temperature of the bread reaches at least 190°F (88°C). This is an important step to ensure that the bread is fully cooked and safe to eat.
You can use an instant-read thermometer to check the temperature of the bread. Insert the thermometer probe into the center of the bread, making sure it doesn’t touch the pan. If the temperature is below 190°F (88°C), return the bread to the oven and check the temperature again after a few minutes. Keep checking the temperature until it reaches 190°F (88°C) or higher.
9. Let the bread cool
Once your bread is baked, remove it from the oven and take it out of the pan. Carefully transfer the bread to a wire rack to cool for at least an hour before slicing. This cooling process is crucial for the bread to set and finish baking internally. Cutting the bread too soon can result in a gummy texture, as the steam trapped inside the bread needs to escape.
As tempting as it may be, try not to cut into the bread until it has cooled completely. During the cooling process, the crust will become crispier, and the crumb will become more elastic and easier to slice. Additionally, cutting into warm bread can cause the bread to lose its shape, resulting in a misshapen loaf.
While the bread is cooling, it’s important to store it in a dry and well-ventilated area. Avoid storing the bread in a plastic bag, as this can cause the crust to become soft and lose its crispiness. Instead, place the bread in a paper bag or wrap it in a clean kitchen towel. Enjoy your freshly baked sourdough bread!
Final Thoughts
Baking sourdough bread in a loaf pan is a great option for those who prefer the shape and texture of sandwich bread. While the process is slightly different from baking a boule or batard, with some practice and experimentation, you can achieve delicious results. Don’t be afraid to try different techniques and adjust the recipe to your liking.
One thing to keep in mind is that baking in a loaf pan can sometimes result in a denser bread compared to a free-form loaf. To combat this, try increasing the hydration of your dough slightly, or using a blend of flours to create a more open crumb. Additionally, be sure to proof the dough for an adequate amount of time to ensure a good rise.
Finally, remember that baking sourdough bread is as much an art as it is a science. While there are basic guidelines to follow, there is also a lot of room for creativity and experimentation. Don’t be discouraged if your first few attempts don’t turn out as you hoped – keep trying and have fun with the process! With time and practice, you’ll be able to bake delicious and beautiful loaves of sourdough bread in a loaf pan.