Do you ever find yourself with dough that’s risen and wondering what to do next?
You can’t add more flour to dough after it rises; what you can do instead is make some adjustments before it proofs.
Understanding the science behind dough rising is the key to perfecting your baking. In this article, we’ll explore why adding flour after the rise is a no-go and share expert tips to ensure your baked goods turn out just right. Whether you’re a novice baker or a seasoned pro, these insights will elevate your baking game and leave you craving more delicious results.
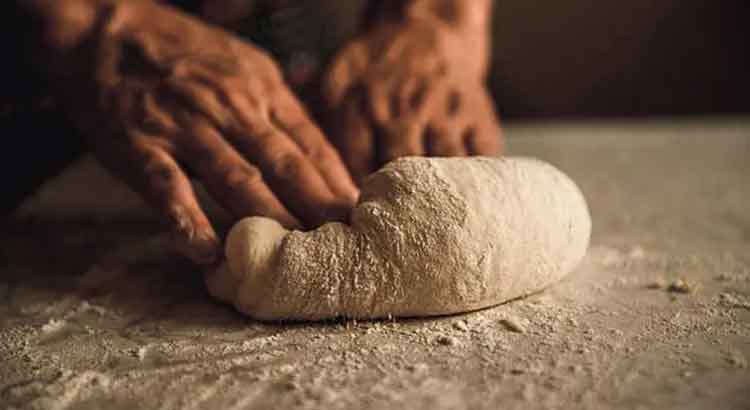
Knead the Dough
When it comes to baking, dough is the foundation of many delicious treats. But what happens when your dough has risen, and you’re thinking of adding more flour? Well, here’s the scoop: you can’t do that. Once dough has risen, it’s on its way to becoming something fantastic, and adding more flour can throw off the balance. Instead, let’s dive into some alternatives that can help you achieve the perfect dough.
Start with the Right Recipe: To avoid the need for extra flour, it’s crucial to follow your recipe carefully. Each recipe is designed with specific measurements and steps to create the ideal dough consistency. Trust in the recipe, and make sure you’ve measured your ingredients accurately.
Watch the Dough’s Texture: As you knead your dough initially, pay close attention to its texture. It should be soft, slightly tacky, but not overly sticky. If it’s too sticky, resist the urge to add more flour. Instead, lightly oil your hands and the work surface to prevent sticking.
Practice Patience: Dough needs time to rise, and rushing this process can lead to the temptation of adding more flour. Allow the dough to proof according to the recipe’s instructions. This time allows the yeast to work its magic and create the desired texture without the need for additional flour.
Adjust Hydration
Hydration is a critical factor in dough-making, and understanding it can help you avoid the urge to add more flour after the rise.
Use a Kitchen Scale: To get your dough’s hydration just right, invest in a kitchen scale. Weighing your ingredients, especially flour and water, ensures accuracy and consistency in your dough-making process.
Sprinkle, Don’t Pour: When adding water or other liquids to your dough, do it gradually. Sprinkle a bit at a time, and then mix thoroughly. This slow, measured approach allows you to control the hydration level and prevent over-hydration.
Consider the Weather: Weather conditions can affect how much liquid your dough needs. On a humid day, your flour may absorb more moisture from the air, so adjust accordingly. Conversely, on dry days, you may need a bit more liquid.
Rest the Dough
Now that you know not to add more flour to your dough after it rises, let’s explore the importance of resting your dough.
Embrace the Autolyse Method: Autolyse is a fancy term for a simple technique. After mixing your flour and water, give your dough a rest of about 20-30 minutes. This allows the flour to hydrate fully and develop gluten, making your dough easier to handle later on.
Relaxation for the Dough: Resting dough is like a mini-vacation for it. During this time, the dough relaxes, and it becomes more extensible, which means it’s easier to stretch and shape. Plus, it can improve the flavor and texture of your final product.
The Fold and Rest Technique: If you’re working with a high-hydration dough or one that’s a bit sticky, consider using the fold and rest technique. After each fold, let the dough rest for a few minutes before continuing. This method strengthens the dough without the need for extra flour.
Use Flour for Shaping
When it’s time to shape your dough, you can use a little flour to prevent sticking and make the process smoother.
Light Dusting: To prevent your dough from sticking to your hands or the work surface, lightly dust it with flour. Be conservative with the flour, though, as using too much can dry out the dough.
Keep It Handy: Have a small bowl of flour nearby while shaping your dough. If you find it getting too sticky as you work, dip your hands in the flour and continue shaping. This way, you can add flour sparingly as needed.
Try Alternative Flours: Instead of all-purpose flour, consider using rice flour or cornmeal for shaping. These flours have a lower protein content, which means they are less likely to toughen the dough.
Consider Higher Protein Flour
When it comes to dough, the type of flour you use can make a significant difference in its texture and performance. If you’ve been grappling with dough that’s too sticky or not holding its shape, it might be time to consider using higher protein flour.
What Is Higher Protein Flour?: Flour with a higher protein content, like bread flour, contains more gluten-forming proteins. This extra gluten provides structure and strength to your dough, making it less likely to require extra flour during the process.
The Bread Flour Advantage: For bread and pizza dough, bread flour is an excellent choice. Its higher protein content helps create a sturdy, elastic dough that can handle rising and shaping without becoming overly sticky.
All-Purpose Flour Adaptation: If your recipe calls for all-purpose flour, you can still make adjustments. Try mixing in a small portion of bread flour to boost the protein content, usually a quarter to a third of the total flour amount.
Practice Technique
Even with the right ingredients, technique plays a crucial role in dough-making. Here are some techniques to practice for dough success.
The Windowpane Test: To check if your dough is adequately kneaded, perform the windowpane test. Take a small piece of dough and stretch it between your fingers. If it forms a thin, translucent membrane without tearing, your dough is ready.
Fold and Turn: During the bulk fermentation phase, practice folding and turning your dough at regular intervals. This technique helps distribute yeast evenly and strengthen the dough’s structure.
Consistent Shaping: When shaping your dough, aim for consistency. Make sure each piece is roughly the same size and shape. This ensures even baking and a uniform final product.
Start Over
Sometimes, despite your best efforts, you may find that your dough has become unmanageable or overly sticky after it has risen. In such cases, it’s perfectly okay to start over. Here’s how to do it effectively:
Assess the Situation: If your dough has become too sticky or has other issues, take a moment to evaluate what went wrong. Did you use the wrong type of flour? Did you over-hydrate the dough? Identifying the issue will help you avoid making the same mistake next time.
Begin Anew: Once you’ve identified the problem, discard the troublesome dough and start fresh. This means going back to the initial mixing stage. Follow your recipe closely, paying attention to measurements and techniques.
Learn from Mistakes: Don’t view starting over as a failure. It’s an opportunity to learn and improve your baking skills. Each time you encounter a challenge, you gain valuable experience that will make you a better baker in the long run.
Final Thoughts
In the world of baking, working with dough can be both a science and an art. When faced with the question of whether you can add more flour to dough after it rises, the answer is a resounding “no.” Doing so can disrupt the delicate balance of ingredients and lead to less-than-desirable results. Instead, there are several techniques and approaches you can take to ensure your dough turns out just right.
First and foremost, starting with the right recipe and following it meticulously is essential. Recipes are crafted with specific measurements and steps to achieve the perfect dough consistency. Trusting the process and ensuring precise measurements will set you on the path to success.
Understanding the importance of hydration is also crucial. Gradually adding liquids, weighing ingredients with a kitchen scale, and considering environmental factors like humidity can help you maintain the right hydration level without resorting to extra flour. Additionally, experimenting with higher protein flour, such as bread flour, can provide your dough with the strength and structure it needs to avoid sticky situations.
Lastly, don’t forget that practice makes perfect. Embrace techniques like the windowpane test, fold and turn, and consistent shaping to refine your dough-making skills. And if things go awry, don’t be afraid to start over and learn from your mistakes. With dedication and a commitment to honing your craft, you’ll master the art of dough-making and create delectable baked goods every time. Happy baking!
FAQ
Q1: Can I add more flour to dough that’s already risen?
A1: No, adding more flour to dough after it has risen is not recommended. Once the dough has undergone fermentation and rising, it has already developed its structure and flavor. Adding more flour at this stage can disrupt the balance of ingredients, leading to a less-than-desirable final product. It’s best to avoid this practice and focus on alternative approaches to achieve the desired dough consistency.
Q2: What should I do if my dough is too sticky after it rises?
A2: If your dough is too sticky after it has risen, resist the urge to add more flour. Instead, consider the following steps:
- Rest the Dough: Allow the dough to rest for a short period, usually 20-30 minutes, which can help relax the gluten and make the dough more manageable.
- Use Flour for Shaping: When shaping the dough, lightly dust it with flour to prevent sticking. Be cautious not to use excessive flour, as it can dry out the dough.
- Adjust Hydration: If you consistently encounter sticky dough, consider adjusting the hydration levels in your recipe. Gradually add water or flour to achieve the desired consistency.
Q3: How can I prevent my dough from becoming too sticky in the first place?
A3: Preventing sticky dough begins with proper techniques and ingredient management:
- Follow the Recipe: Start by following your recipe closely, ensuring precise measurements and adhering to the recommended techniques.
- Use the Right Flour: Selecting the right type of flour is crucial. Higher protein flours, like bread flour, can provide the structure needed to avoid excessive stickiness.
- Gradual Liquid Addition: When mixing your dough, add liquids gradually and mix thoroughly. This allows you to control the hydration level and avoid over-hydration.
- Environmental Factors: Consider environmental factors like humidity, as they can impact the amount of liquid your dough requires.
Q4: Is there a way to salvage dough that has become too sticky?
A4: If your dough has become excessively sticky, it’s best to start over with a fresh batch of dough. While it may be tempting to add more flour to salvage it, this can lead to inconsistent results. Learning from the experience and adjusting your techniques for the next batch is a better approach to achieving the perfect dough.
Q5: Are there specific techniques I can practice to improve my dough-making skills?
A5: Yes, there are several techniques that can help you become a better dough-maker:
- The Windowpane Test: To check if your dough is adequately kneaded, perform the windowpane test. Stretch a small piece of dough between your fingers; if it forms a thin, translucent membrane without tearing, it’s ready.
- Fold and Turn: During the bulk fermentation phase, practice folding and turning your dough at regular intervals. This technique strengthens the dough’s structure and improves gluten development.
- Consistent Shaping: When shaping your dough, aim for uniformity. Ensure that each piece is roughly the same size and shape to achieve even baking results.
Remember, becoming proficient in dough-making takes practice. Don’t be discouraged by initial challenges; instead, view them as opportunities to refine your skills and create delectable baked goods.