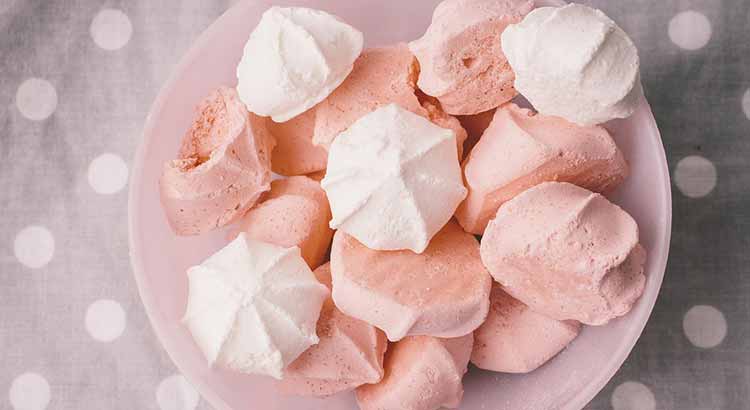
Do your delicate meringues often come out a bit too sticky or droopy? Ever wish there was a quick and easy way to make them perfectly crisp and airy? Say hello to the ultimate guide on drying out meringue – your baking dreams are about to get a whole lot sweeter!
The quickest and simplest way to dry out meringue is by giving it a low and slow bake. Set your oven to a gentle temperature and let your meringue kisses or pies spend some quality time inside. This gradually removes moisture, leaving you with that delightful crunch on the outside and a soft, marshmallowy center.
Curious to unlock the secrets of creating bakery-worthy meringue treats? Delve into these effortless techniques and soon you’ll be delighting in picture-perfect pavlovas, charming chiffon pies, and so much more. Master the art of transforming meringue into ethereal confections that’ll have your taste buds dancing with joy. Get ready to become a meringue magician in your own kitchen – let’s whisk up some magic together!
Extended Baking Time
When it comes to achieving the perfect meringue with that delightful crispness, one of the simplest tricks to keep in mind is extending the baking time. Gently increase the baking duration to let your meringue slowly bid farewell to excess moisture. By giving it more time in the oven, you’re allowing the moisture to evaporate gently, resulting in a delectably crisp exterior that contrasts beautifully with the tender inside.
But remember, patience is key. Avoid the temptation to rush the process, as baking your meringue at a slightly lower temperature for a longer period ensures that it dries out uniformly. This method is a bit like letting a delicate flower bloom at its own pace – the rewards are truly worth it.
Lower Baking Temperature
Embrace the magic of a lower baking temperature when on your mission to achieve meringue excellence. Set your oven to a lower temperature than usual, and let the gentle heat work its charm. This approach helps your meringue gradually release moisture without shocking its delicate structure.
A lower temperature prevents your meringue from browning too quickly on the outside, giving it ample time to dry out while maintaining its pale, ethereal appearance. This method also minimizes the risk of your meringue collapsing, ensuring it remains beautifully puffed and ready to melt in your mouth.
Double Baking
Let’s dive into a clever technique that might just become your go-to meringue magic trick. After the initial bake, allow your meringue to cool completely, and then give it a double dose of oven love. This involves a second round of baking at a low temperature to ensure every last bit of moisture bids adieu.
The key here is the controlled approach. By cooling the meringue first, you prevent the risk of it becoming overly browned or unevenly dried out during the second bake. The result? A meringue that’s practically whispering, “Break me!” with its tantalizing texture and flavor.
Use an Oven with Door Ajar
Here’s a nifty trick that can work wonders for your meringue-drying mission. During the baking process, prop open your oven door slightly. This might seem counterintuitive, but it’s an effective way to let excess moisture escape while maintaining a controlled environment.
Leaving the oven door ajar encourages a gradual drying process without abrupt temperature changes. This method is like allowing your meringue to get used to the idea of being crisp and airy. Just remember to monitor the process to prevent your meringue from becoming overly browned – a little peeking won’t hurt.
Dehydrator
Say hello to a modern meringue-saving hero: the dehydrator. If you have one in your kitchen arsenal, it can be a game-changer when it comes to achieving that sought-after meringue crunch. Place your freshly baked meringue inside the dehydrator, set it to a low temperature, and let the magic unfold.
This method is like giving your meringue its own cozy retreat to lose all that lingering moisture. The controlled environment of the dehydrator ensures even drying, while also minimizing the risk of over-browning. It’s a hands-off approach that delivers hands-down impressive results.
Cool Dry Place
You don’t always need fancy equipment to achieve meringue perfection – sometimes, all you need is a little time and the right environment. Once your meringue is done baking, let it cool completely before transferring it to a cool, dry place. This could be your pantry, a cupboard, or any spot in your kitchen that’s free from humidity.
The idea here is to allow your meringue to air out gradually. The natural air circulation in a cool, dry spot helps the moisture escape without compromising the delicate structure. Think of it as giving your meringue a peaceful siesta after its baking adventure – it wakes up refreshed and ready to impress.
Fan Assistance
Here’s a technique that enlists the help of your oven’s fan to achieve meringue perfection. If your oven is equipped with a convection or fan setting, you’re in for a treat. When baking meringue, using the fan setting can be a game-changer.
The fan setting ensures even distribution of heat, which means your meringue dries out uniformly. This method is like inviting a gentle breeze to whisk away the excess moisture. The result? Meringues that are crisp on the outside and delightfully soft on the inside, ready to be savored with every bite.
Final Thoughts
And there you have it, fellow baking enthusiasts! We’ve embarked on a journey through the wonderful world of meringue drying techniques. From extended baking times to the magic of using an oven with the door ajar, we’ve covered a range of approaches that can take your meringue creations to the next level.
Remember, achieving the perfect meringue is a blend of science and patience. It’s about finding the method that works best for your kitchen setup and baking style. Whether you opt for double baking, the dehydrator route, or harnessing the power of your oven’s fan, each technique adds its own touch of magic to your creations.
As you venture into the realm of meringue mastery, don’t be afraid to experiment. Test different techniques, make notes, and observe the delightful transformations that unfold in your oven. Embrace the journey of learning and refining your skills – after all, baking is as much about the process as it is about the end result.
So, armed with these quick and simple meringue-drying techniques, it’s time to embark on your own baking adventures. Whether you’re crafting delicate pavlovas or elegant meringue-topped pies, each creation is a canvas for your culinary creativity. Here’s to many more batches of meringue delights that bring joy to your kitchen and smiles to the faces of those who savor your delectable treats. Happy baking!
FAQ
Q: Can I use these techniques for all types of meringue-based treats? Absolutely! Whether you’re making meringue kisses, pavlovas, or topping off pies, these drying techniques can work their magic across the board. Just adjust the baking times and temperatures according to the size and thickness of your meringue creation.
Q: How do I know when my meringue is perfectly dried out? Great question! The ultimate sign of a perfectly dried meringue is a crisp exterior that’s slightly golden in color. However, the inside should remain soft and marshmallow-like. When you touch the meringue, it should feel dry and not sticky to the touch. If it’s still a bit tacky, consider giving it a little more time in the oven or chosen drying method.
Q: Can I speed up the process of drying out meringue? While patience is key when it comes to drying out meringue, you can make a few adjustments to expedite the process. Using a lower baking temperature and giving it a bit more time in the oven can help achieve that perfect balance between crispness and tenderness.
Q: What’s the best way to store dried meringue creations? Once your meringue treats are beautifully dried and ready to be savored, store them in an airtight container. This helps maintain their texture and flavor. However, be cautious about storing them in a humid environment, as moisture can quickly undo all your drying efforts.
Q: Can I revive meringue that’s become too soft or sticky? Absolutely! If your meringue treats have softened due to humidity, you can gently re-crisp them. Preheat your oven to a low temperature, place the meringues on a baking sheet, and let them spend a short time in the oven to regain their crunch. Keep a close eye on them to avoid over-browning.
Q: What other factors can affect the drying process? Humidity levels play a significant role in how well your meringue dries out. Baking on a dry day is preferable, as high humidity can slow down the drying process. Also, make sure your baking tools and utensils are clean and grease-free, as any traces of oil can affect the meringue’s ability to dry properly.
Q: Can I combine these techniques for optimal results? Absolutely! Feel free to experiment with combining these techniques for the best outcome. For instance, you might choose to start with extended baking time and then transfer your meringue to a dehydrator for the final touch. The possibilities are endless, so have fun exploring different combinations!
Q: What if my meringue still doesn’t turn out right? Don’t be disheartened if your meringue doesn’t achieve the desired results on your first try. Baking is a wonderful blend of science and art, and sometimes it takes a bit of practice to find the perfect technique for your kitchen and equipment. Keep experimenting, take notes, and before you know it, you’ll be a meringue-drying maestro.
With these FAQs in your baking toolkit, you’re well-equipped to dive into the world of meringue mastery. Remember, there’s no one-size-fits-all answer – it’s about adapting these techniques to suit your unique creations. Happy baking!